
How to Create Solarization Effect with AI — Magic Eraser
Create the Sabattier solarization darkroom effect on any photo using AI tone inversion. Step-by-step guide covering selective midtone reversal, Mackie line boost, and color channel solarization for surreal photographic art.
SEO & Growth
Reviewed by Magic Eraser Editorial ·
Table of Contents
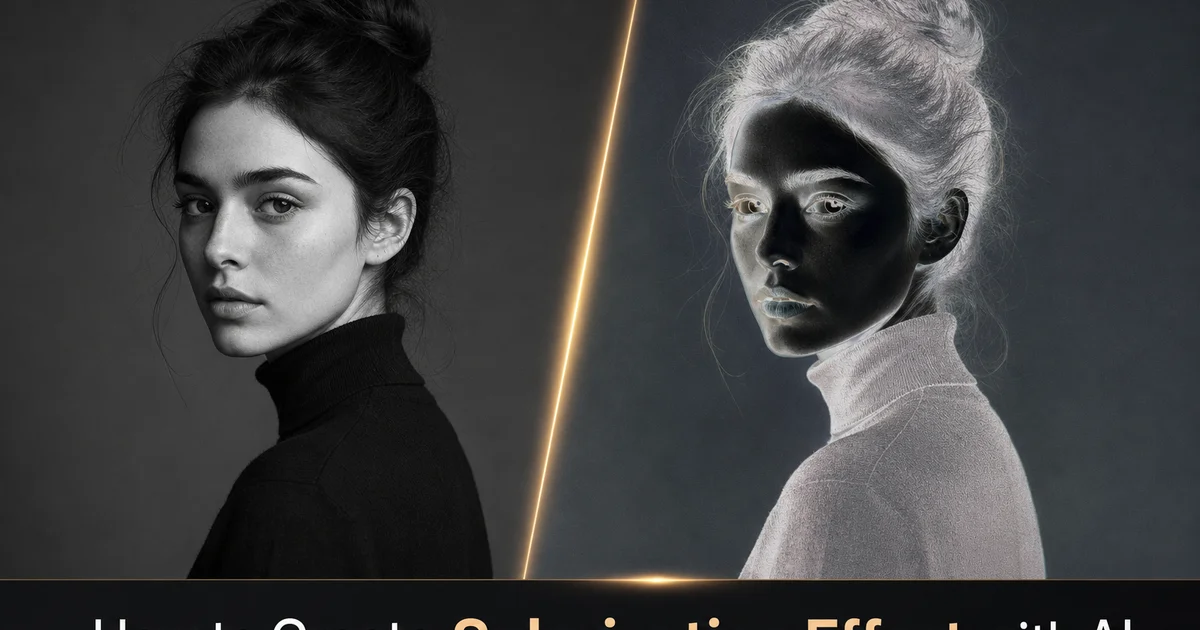
Solarization — technically known as the Sabattier effect — is one of the most visually distinctive techniques in the history of photography, discovered by accident in the 1860s when Armand Sabattier briefly exposed a partially developed print to light during processing. The result was a haunting partial reversal of tones: shadows remained dark and highlights stayed bright. The midtones inverted, creating an otherworldly image where light and dark seemed to merge along thin luminous boundary lines. Man Ray popularized the technique in his surrealist work of the 1920s and 1930s, turning darkroom accidents into deliberate artistic statements that challenged viewers' expectations of photographic reality. The effect has remained a staple of fine art photography for over a century because it transforms ordinary subjects into something visually uncanny.
Achieving solarization in a traditional darkroom requires precise timing and extensive practice. The photographer must re-expose the print to a brief flash of light at exactly the right moment during development. Too early and the image is simply fogged, too late and the effect is barely visible. The exposure duration, light intensity, and development stage all interact in ways that are difficult to reproduce consistently. That means even experienced darkroom printers often produce unusable results before getting one successful solarized print. This unpredictability has kept the technique in the realm of dedicated fine art practitioners rather than becoming a mainstream photographic tool.
AI-powered solarization eliminates the guesswork while keeping the aesthetic character of the original darkroom process. AI Filter analyzes the tonal distribution of your image and applies selective tone inversion that mimics the photochemical response of silver halide paper to re-exposure. It reverses midtones while keeping extreme shadows and highlights, and generates the characteristic Mackie lines at tonal boundaries. The result is controllable and repeatable: you can adjust which tones are inverted, how aggressively they reverse, and whether the effect applies uniformly or to individual color channels. This guide walks through how to create both classic monochrome and modern color solarization effects using AI Filter and AI Enhance.
- AI tone inversion selectively reverses midtones while preserving deep shadows and bright highlights, replicating the Sabattier darkroom process digitally.
- Adjustable tonal thresholds let you control exactly which luminosity values are inverted, from subtle dreamlike effects to dramatic full-range reversals.
- Mackie line enhancement with AI Enhance sharpens the characteristic luminous boundaries between inverted and non-inverted tonal zones.
- Color channel solarization applies independent tone inversions to red, green, and blue channels for psychedelic color shifts beyond what darkroom processing can achieve.
- Repeatable and non-destructive processing means you can experiment freely without wasting materials or relying on precise darkroom timing.
The science behind solarization and why AI replicates it accurately
The Sabattier effect occurs because of a photochemical phenomenon called partial reversal in silver halide emulsions. During normal development, exposed silver halide crystals are reduced to metallic silver. The dark areas of a print correspond to heavily exposed crystals that have been fully developed. When the partially developed print is re-exposed to light, the previously unexposed crystals in the shadow areas absorb the new light and begin developing. Meanwhile, the already-developed highlight areas have exhausted their silver halide and cannot respond to the extra exposure. The result is that shadow areas darken further while highlights remain stable, but the critical midtone region — where crystals are partially developed — experiences a reversal as the new exposure competes with and overtakes the original development. This competition creates the tone inversion that defines solarization.
The Mackie lines that appear at tonal boundaries are caused by chemical byproducts of development. As heavily exposed areas develop, they release bromide ions into the surrounding developer solution. These bromide ions inhibit development in adjacent less-exposed areas, creating a thin underdeveloped border along every tonal edge. When the print is re-exposed, these inhibited borders respond differently from the areas on either side, producing the thin bright or dark lines that give solarized images their distinctive graphic quality. The width and intensity of Mackie lines depend on developer concentration, agitation pattern, and re-exposure timing — variables that are nearly impossible to control precisely in a darkroom.
AI solarization models this photochemistry computationally. The algorithm analyzes each pixel's luminosity value and applies a tone curve that mimics the partial reversal. Shadows below a certain threshold are preserved, highlights above another threshold are preserved, and everything in between is remapped according to an inverted curve. The Mackie lines are generated by detecting tonal edges and applying localized contrast boost at those boundaries. Because the AI can control every variable independently — threshold positions, inversion curve shape, Mackie line width and intensity — it produces results that are more controllable than darkroom solarization while remaining faithful to the visual character of the original photochemical process.
- The Sabattier effect results from re-exposing partially developed silver halide emulsions. Midtones invert because partially developed crystals respond to the new light differently than fully developed or unexposed crystals.
- Mackie lines form from bromide ion inhibition at tonal boundaries — the AI replicates this by applying localized contrast enhancement along detected tonal edges.
- AI tone curves independently control shadow threshold, highlight threshold, and midtone inversion intensity for more precise results than darkroom timing allows.
- Computational solarization is fully non-destructive and repeatable, eliminating the material waste and unpredictability of chemical darkroom processing.
Choosing subjects that produce the most striking solarization effects
Not every photograph benefits equally from solarization. Selecting the right source image is the most important creative decision in the process. High-contrast images with a full range of tones from pure black to pure white produce the most dramatic results because there is maximum tonal range for the inversion to act upon. Portraits lit with hard directional light — for example, a single studio strobe at ninety degrees creating deep shadows on one side of the face and bright highlights on the other — generate the classic solarized portrait look that Man Ray made famous. The shadow side of the face remains dark and the highlight side stays bright, while the transitional midtones across the nose and cheekbones invert to create an otherworldly luminosity.
Architectural subjects with strong geometric shadows also respond well to solarization. Buildings photographed in harsh midday sun have deep cast shadows and bright sunlit surfaces with abrupt tonal transitions at every edge, exactly the conditions that produce prominent Mackie lines. Columns, arches, staircases, and window frames become graphic abstractions when the midtones between their light and dark surfaces reverse. Industrial subjects — machinery, bridges, pipes, structural steel — produce similarly striking results because their metallic surfaces create complex highlight and shadow patterns with many tonal transitions.
Subjects to avoid for solarization include overcast landscapes with narrow tonal range, flat-lit interior photos, and images dominated by a single midtone value. These images lack the tonal contrast needed for the inversion to create visible drama. The result looks more like a slightly off color correction than a deliberate artistic effect. High-key images (mostly bright tones) and low-key images (mostly dark tones) also produce weak solarization because most of their tonal range falls outside the midtone inversion zone. The ideal source image has roughly equal representation of shadows, midtones, and highlights distributed across the frame in a visually interesting pattern.
- High-contrast portraits with hard directional lighting produce the classic Man Ray solarization look — deep shadows preserved, highlights stable, midtones inverted across facial planes.
- Architectural and industrial subjects with geometric shadows create prominent Mackie lines at every structural edge, turning buildings and machinery into graphic abstractions.
- Avoid flat-lit images with narrow tonal range — overcast landscapes, even interior lighting, and single-midtone compositions lack the contrast for visible solarization drama.
- The ideal source image distributes shadows, midtones, and highlights roughly equally across the frame so the tone inversion has maximum visual impact.
Color solarization techniques for contemporary digital art
While traditional darkroom solarization was almost exclusively a black-and-white process — color photographic papers have multiple emulsion layers that respond unpredictably to re-exposure — digital solarization opens entirely new creative territory by applying tone inversion to individual color channels independently. When you solarize only the red channel, warm tones like skin, brick, and sunset colors invert to cyan and blue-green while cool-toned elements remain unchanged. Solarizing the blue channel reverses sky tones to warm yellow-orange while leaving red and green elements intact. Applying different inversion intensities to each channel creates color combinations that are physically impossible in a darkroom, producing images with a psychedelic, synthetically beautiful quality.
The creative possibilities multiply when you combine channel-specific solarization with selective masking. AI Filter can apply the effect to specific tonal regions within each channel, for example by inverting midtone reds while keeping shadow reds and highlight reds. A portrait treated this way might show the subject's skin transitioning smoothly from natural warm tones in the shadows through an inverted blue-green zone in the midtones and back to warm highlights, creating an iridescent quality that recalls holographic or oil-slick color behavior. Fashion photographers and album cover designers have adopted this technique for its ability to create arresting, memorable images that stand out in saturated social media feeds.
For photographers who prefer a more restrained modern look, partial desaturation after color solarization produces sophisticated results. Apply full-channel solarization to create the maximum color shift, then selectively desaturate the channels you want to neutralize while keeping one or two shifted channels vivid. A portrait with solarized blues and greens but desaturated reds retains the surreal sky and shadow tones while keeping skin tones close to natural. This creates an effect that reads as artistic and intentional rather than over-processed. This selective approach gives you the visual interest of solarization without the full psychedelic intensity, making it suitable for editorial work and expert portfolios.
- Channel-independent solarization inverts red, green, and blue tones separately — creating color combinations impossible in traditional darkroom processing.
- Selective masking within channels allows midtone-only inversion per color, producing iridescent effects where skin tones transition through unnatural hues across their tonal range.
- Fashion and music industries use color solarization to create arresting visuals that stand out in saturated social media environments.
- Partial desaturation after solarization creates a restrained contemporary look — keeping one or two shifted channels vivid while neutralizing others for editorial-appropriate results.
Enhancing Mackie lines and tonal boundaries for maximum impact
Mackie lines are the visual signature of solarization: the thin luminous boundaries that appear where inverted and non-inverted tones meet. In a traditional darkroom, these lines are a natural byproduct of chemical diffusion during development. Their appearance depends on factors the printer can only partially control. In AI-powered solarization, Mackie lines can be enhanced, suppressed, or precisely tuned to achieve the exact graphic quality you want. AI Enhance provides the primary tool for this refinement by applying edge-aware sharpening that detects tonal boundaries and increases local contrast specifically at those transitions.
The width of the Mackie line effect determines whether the solarized image reads as subtle or graphic. Thin Mackie lines — one to two pixels wide — create a delicate luminous tracing around every tonal boundary that is visible upon close inspection but does not dominate the image at normal viewing distance. This is useful for portraits and naturalistic subjects where you want the solarization to add ethereal quality without overwhelming the subject's distinctive features. Wide Mackie lines — five to ten pixels — create a bold graphic outline effect that abstracts the image greatly, reducing distinct subjects to contour drawings filled with inverted tones. This approach works for album covers, poster art, and large-format prints where graphic impact matters more than subject fidelity.
To maximize Mackie line visibility, increase the contrast between the inverted and non-inverted tonal zones on either side of the boundary. AI Enhance can boost midtone contrast after solarization. It darkens the dark side of each boundary and brightens the light side, making the Mackie line stand out more prominently. For images where you want Mackie lines to be the primary visual element, apply the solarization effect at moderate intensity. Set it not so extreme that the tonal inversion eliminates the boundaries between adjacent zones, and not so subtle that the boundaries are barely distinguishable from normal tonal gradients. The sweet spot is usually between forty and seventy percent inversion intensity, which creates enough tonal reversal to generate visible Mackie lines while keeping enough original tonal structure for the lines to trace.
- AI Enhance applies edge-aware sharpening that detects tonal boundaries and boosts contrast specifically at Mackie line positions for maximum visibility.
- Thin Mackie lines of one to two pixels suit portraits and naturalistic subjects — visible up close but not dominating at normal viewing distance.
- Wide Mackie lines of five to ten pixels create bold graphic outlines ideal for album covers, poster art, and large-format print work.
- Moderate solarization intensity between forty and seventy percent produces the most visible Mackie lines — too strong eliminates tonal boundaries, too weak makes them indistinguishable.
How to do it
- 1
Select a photo with strong tonal contrast for solarization
The solarization effect works best on images with a wide range of tones from deep shadows to bright highlights. Portraits with dramatic side lighting, architectural shots with strong light-and-dark geometry, and still life images with glossy reflective surfaces all produce striking results. Flat, evenly lit photos with narrow tonal range will look muddy rather than surreal when solarized because the tone-reversal has little dynamic range to work with.
- 2
Apply the AI solarization filter to invert midtones selectively
Upload your photo to AI Filter and choose the solarization or Sabattier effect preset. The AI analyzes the tonal distribution and applies selective tone inversion, reversing midtone values while keeping the deepest shadows and brightest highlights. Unlike a simple negative inversion that flips every tone, this selective reversal creates the distinctive look where light and dark areas meet along surreal boundary lines called Mackie lines, mimicking the result of briefly re-exposing a print during darkroom development.
- 3
Adjust the intensity and tonal threshold of the effect
Use the intensity slider to control how aggressively midtones are inverted. A low setting produces a subtle dreamlike quality where only the lightest midtones flip. A high setting creates a dramatic, almost alien reversal across a wide tonal band. Adjust the threshold to control which tones are affected. A lower threshold inverts darker tones while a higher threshold restricts the inversion to brighter values. Experiment with both controls together to find the balance that matches your creative vision.
- 4
Enhance contrast and edge definition with AI Enhance
After applying solarization, run the image through AI Enhance to sharpen the distinctive Mackie lines and boost the contrast between inverted and non-inverted tonal zones. The Sabattier effect in a traditional darkroom produces thin bright outlines where adjacent tones reverse direction. AI Enhance can emphasize these boundaries for a more pronounced graphic quality. This step also recovers detail in shadow areas that may have become too dark during the tone inversion process.
- 5
Fine-tune color channels for monochrome or color solarization
Classic Sabattier prints are black-and-white, but color solarization produces even more striking results by inverting different tonal ranges in each color channel on its own. AI Filter lets you apply solarization to the red, green, and blue channels at different intensities, creating psychedelic color shifts where warm skin tones become cool blue-greens and blue skies turn burnt orange. For a traditional look, convert to monochrome first and then solarize. For a modern art effect, solarize the color image and then selectively desaturate channels you want to keep neutral.
Sources
- The Sabattier Effect: History and Technique in Analog Photography — Encyclopaedia Britannica
- Man Ray and the Age of Light — Museum of Modern Art
- Digital Simulation of Photographic Effects Using Neural Style Transfer — arXiv