
Art Reproduction & Print Sales: Upscale, Expand & Prepare Artwork for Print
Selling prints is the most accessible recurring-revenue stream for visual artists — but the gap between a painting on the wall and a print-ready digital file is wider than most artists expect. Phone and DSLR captures of physical artwork introduce color shifts, glare, uneven lighting, and resolution limits that degrade reproduction quality at print sizes above 8x10 inches. AI Enhance recovers detail and upscales artwork captures to large-format print resolution, while AI Expand extends the canvas for aspect ratios that differ from the original — letting artists sell a single painting as a 24x36 poster, a 16x20 matted print, and a 1:1 square canvas wrap without cropping or distorting the composition.
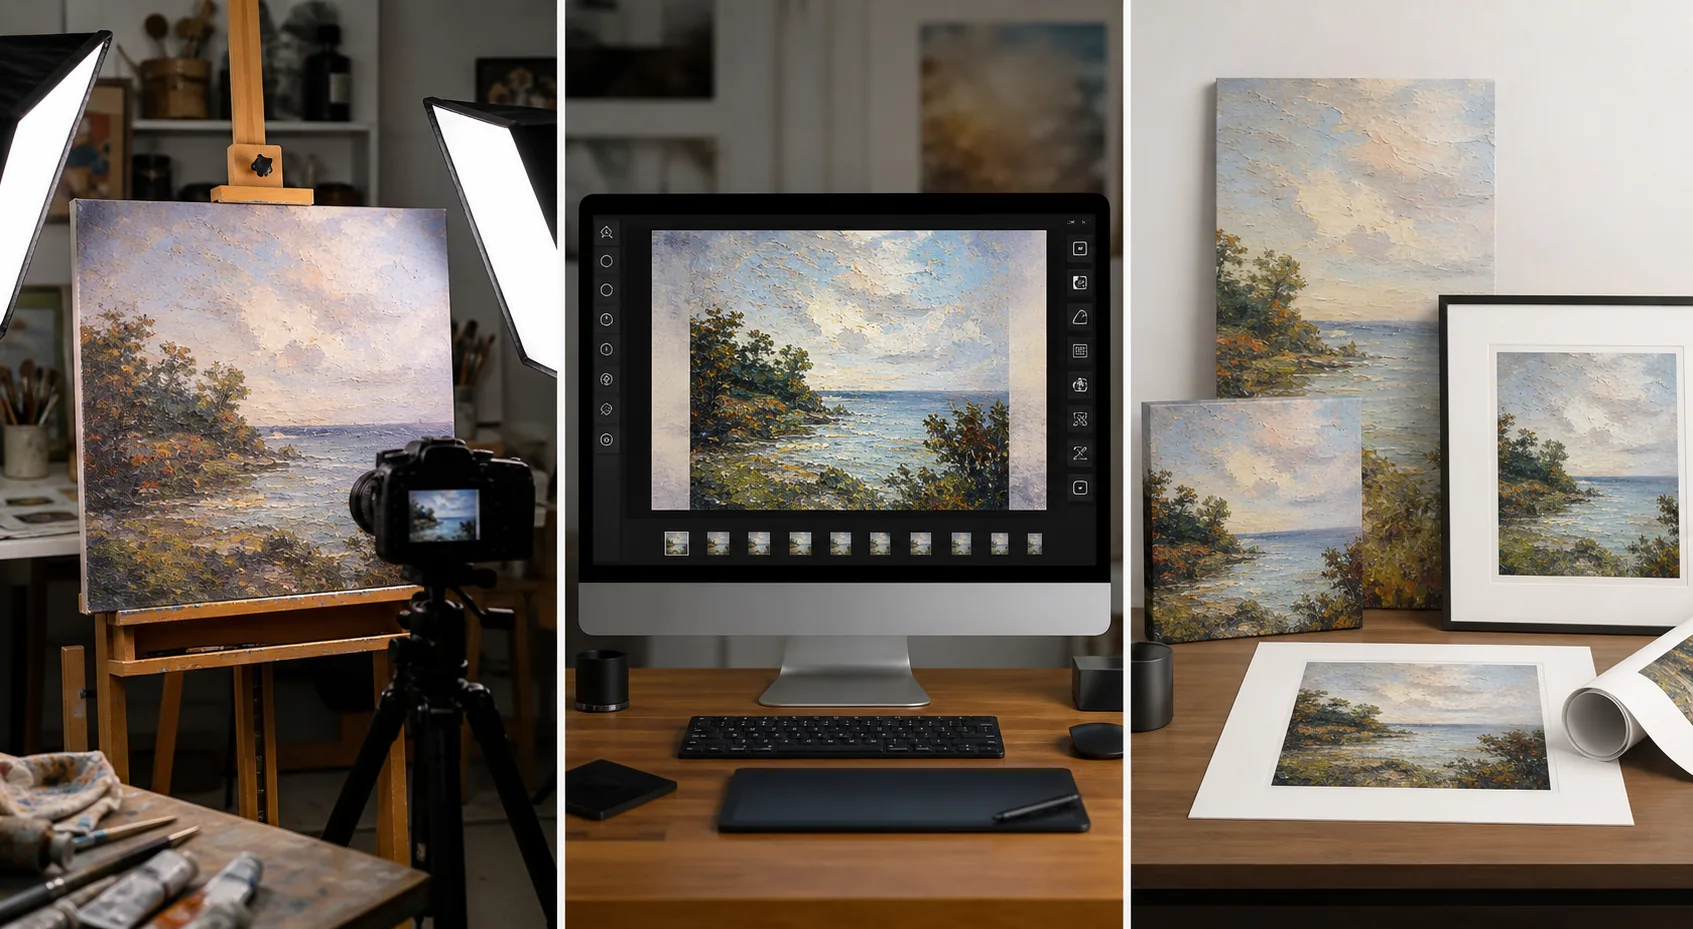
Phone and camera captures of physical artwork lack print-resolution detail
Most artists photograph their work with a phone camera or a consumer DSLR under imperfect lighting conditions. The resulting file — typically 12-48 megapixels — is sufficient for social media and online galleries but falls short for large-format prints. A 24x36 inch print at 300 DPI requires a 7200x10800 pixel file; a 12-megapixel phone capture delivers roughly 4000x3000 pixels. Upscaling with traditional interpolation produces soft, mushy prints that lose the texture and brushwork that make the original artwork compelling. AI Enhance upscales while preserving fine detail — individual brush strokes, canvas texture, pencil marks, and paper grain remain sharp at print scale.
Different print formats require different aspect ratios from a single original
A painting created at 18x24 inches needs to be sold as prints in standard frame sizes: 8x10, 11x14, 16x20, 18x24, and 24x36 — each with a different aspect ratio. Traditional approaches either crop the composition (losing edges the artist considers integral) or add generic borders (which look cheap). AI Expand intelligently extends the artwork's edges — continuing background gradients, patterns, textures, and negative space — to fill the target aspect ratio without cutting into the composition. This means one original can populate an entire print-size catalog.
Color accuracy across capture, screen, and print is difficult to maintain
The color journey from physical artwork to digital capture to screen preview to printed reproduction introduces shift at every stage. Camera white-balance errors produce warm or cool casts. Screen calibration varies between the artist's editing display and the customer's viewing device. Print profiles differ between printers, papers, and ink sets. AI Enhance normalizes the white balance and exposure of the capture to produce a clean digital master that more faithfully represents the original artwork, giving the print lab a better source file to work from. The artist still needs to soft-proof against the printer's ICC profile, but starting from a cleaner digital master reduces the calibration gap.
How Magic Eraser fits the art reproduction workflow
Capture the original artwork under controlled conditions
Photograph the artwork using two matched diffused light sources at 45-degree angles to minimize glare and surface reflections. Use a tripod to keep the camera parallel to the artwork surface — any angle introduces keystone distortion that warps straight edges. If possible, photograph in RAW format for maximum editing latitude. Remove the artwork from glass frames before photographing to eliminate reflections. For textured work (oil, acrylic, impasto, mixed media), consider raking light at a shallow angle for a separate texture-capture pass.
Enhance and upscale the digital capture with AI Enhance
Run the artwork capture through AI Enhance to recover fine detail, correct white-balance shifts from lighting conditions, and upscale to the resolution needed for your largest print size. For a 24x36 print at 300 DPI, you need 7200x10800 pixels; AI Enhance can upscale a 4000x3000 phone capture to this resolution while maintaining brush stroke detail, canvas texture, and medium-specific qualities. Process the image at the maximum resolution — you can always downsample for smaller prints, but upscaling after the fact always loses quality.
Expand the canvas for additional aspect ratios with AI Expand
Take the enhanced master file and use AI Expand to generate variants for each target print size. Extend an 18x24 original to fill 8x10, 16x20, 11x14, and 1:1 square formats by expanding the edges of the composition. AI Expand continues the artwork's visual language — extending background colors, gradients, textures, and patterns — rather than adding a blank border. Review each expanded variant to ensure the extensions are faithful to the original's style and make manual corrections if any extended area deviates from the artwork's visual language.
Prepare print-ready files and upload to print-on-demand platforms
Export each size variant as a high-resolution TIFF or PNG in the color space required by your print partner (typically sRGB for online print-on-demand, Adobe RGB or CMYK for professional print labs). Upload to your print-on-demand platform (Printful, Fine Art America, Society6, Redbubble) or deliver to your local print lab. Maintain the enhanced master file as the single source of truth — regenerate size variants from the master if you ever need to adjust the crop or expansion for a new product format like canvas wraps, metal prints, or greeting cards.
Tools
Frequently Asked Questions
How large can I print from a phone-camera capture after AI upscaling?
+
A modern phone camera (12-48 megapixels) captured under good conditions can be AI-enhanced and upscaled to produce prints up to 24x36 inches at 300 DPI. For larger formats — 30x40, 40x60, gallery-wrap sizes — a higher-resolution DSLR or mirrorless capture (45-100+ megapixels) provides a better starting point. The key factor is the quality of the original capture: sharp focus, even lighting, and minimal glare matter more than raw pixel count because AI Enhance recovers detail from well-captured images far better than from soft or glare-affected ones.
Does AI Expand work on all types of artwork or only certain styles?
+
AI Expand works best on artwork with definable edge patterns — abstract backgrounds, gradients, atmospheric landscapes, textured fields, and geometric patterns extend naturally. Artwork with hard compositional edges or figures cut off at the border requires more careful review because the AI must infer what continues beyond the original frame. For highly detailed figurative work, consider expanding only the less-complex edges (typically the background side) and accepting a slight crop on the detailed edges when adapting to a new aspect ratio.
Will the AI enhancement change the character of my artwork?
+
AI Enhance is designed to recover and preserve detail, not to reinterpret the artwork. Brush strokes, canvas texture, pencil marks, ink bleeds, and paper grain are maintained and sharpened rather than smoothed over. However, any digital enhancement involves interpolation, so artists should compare the enhanced file against the original at 100% zoom before approving for print production. If the enhancement introduces artifacts in a specific area, you can mask that area and blend manually. The goal is a print that viewers cannot distinguish from a high-resolution drum scan of the original.
Can I use this workflow for mixed-media and three-dimensional artwork?
+
Mixed-media work (collage, assemblage, textile art) benefits from the same capture-enhance-expand workflow, with the caveat that three-dimensional elements cast shadows that change with lighting angle. For heavily textured or dimensional pieces, capture under flat diffused lighting for the color-accurate master and consider a separate raking-light capture for texture documentation. AI Enhance processes both captures effectively. For artwork with extreme depth (shadow boxes, sculptural relief), consider focus stacking multiple captures before enhancement to ensure the full depth is sharp.
Turn one original artwork into a full print-size catalog
AI Enhance upscales artwork captures to large-format print resolution while preserving brush strokes and texture. AI Expand extends the canvas for every standard frame size without cropping the composition. Free tier on web, iOS, and Android.
Try Magic Eraser freeRelated use cases
See how professionals use these tools in real-world workflows.
Product listings need clear images before shoppers can judge the item. Magic Eraser helps sellers remove messy backgrounds, table edges, labels, props, glare, and other distractions so each product photo is easier to review before publishing.
Photobombers ruining your travel pics? Messy backgrounds killing your selfie game? Stop wasting hours in Photoshop. Magic Eraser removes distractions, cleans up cluttered shots, and expands your photos to fit any platform format — all in one tap.
Remove a distracting background and replace it with a clean solid color for a passport, visa, or ID photo. Because requirements vary by document and country, confirm the current official color, crop, size, and submission rules before you apply.
Related comparisons
See how Magic Eraser compares to similar tools.
Cleanup.pictures is a free web tool with one generic eraser brush. Magic Eraser gives you 100+ purpose-built removal tools — one for emoji, glasses, watermarks, sky, power lines, and dozens more — plus background removal, AI enhance, and mobile apps, in 16 languages. See how breadth changes the result.
remove.bg is the market leader for background removal, offering a powerful API and integrations with Photoshop and Figma. Magic Eraser goes further with eight AI-powered editing tools — from object removal and generative fill to AI enhance and design — all in one editor.
Two powerful AI photo editors with different strengths. Magic Eraser offers a broader set of generative AI tools for creative editing, while Photoroom excels at e-commerce product photography and batch processing. See which fits your workflow.
We tested and compared the top AI photo editing tools so you don't have to. From object removal to background replacement, see which editor delivers the best results for your workflow.
Related guides
Explore more guides and editorial content related to this workflow.
Step-by-step guide to removing watermarks from your own photos using AI. Learn when it is appropriate, the best techniques, and how Magic Eraser handles it.
Fix blurry, low-resolution, and out-of-focus photos using AI enhancement. Learn how AI upscaling works and when it delivers the best results.
Learn how AI outpainting extends your photos beyond their original borders. Fix tight crops, change aspect ratios, and create wider compositions in seconds.