
Fitness Trainer Transformation Photos: Consistent Before-Afters That Convert Clients
Transformation photos are the single most persuasive marketing asset a personal trainer or fitness coach has — prospective clients make enrollment decisions based on visual proof that the training program delivers real results for real people. The challenge is that before photos are typically taken with a smartphone in a gym locker room or home bathroom with poor lighting, cluttered backgrounds, and no attention to composition, while after photos are taken weeks or months later in a different location with different lighting. The inconsistency between before and after conditions makes it harder for viewers to evaluate the actual physical transformation. AI Enhance and Magic Eraser standardize lighting, backgrounds, and clarity so the before-and-after comparison communicates the real results without visual noise.
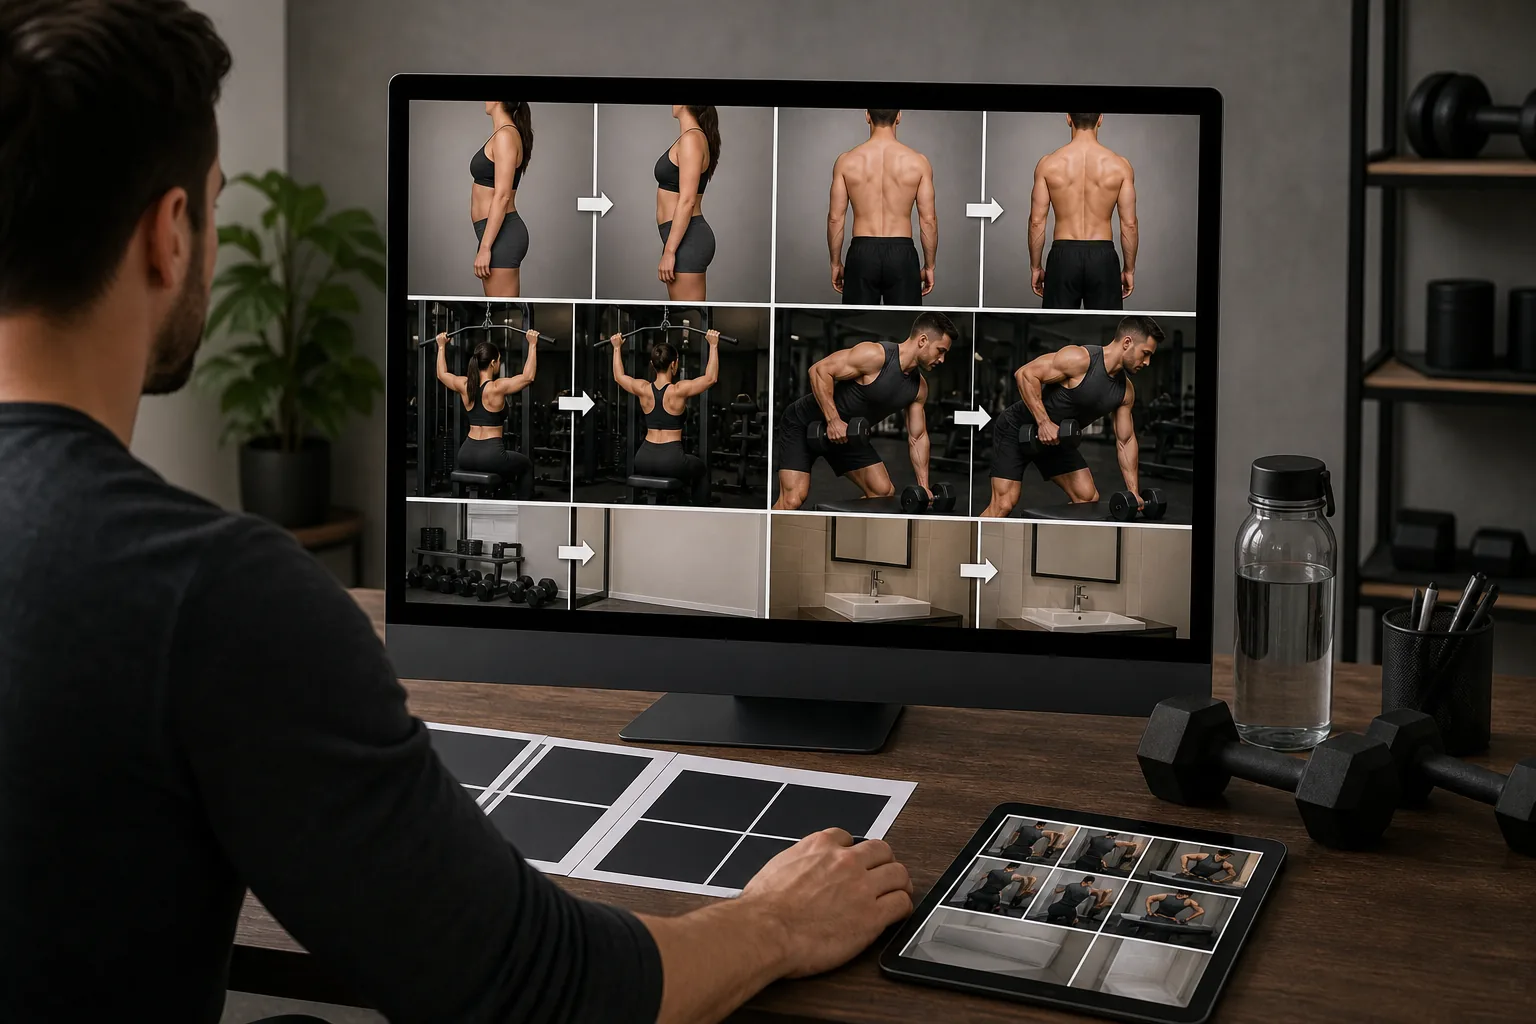
Before and after photos taken in different conditions undermine the comparison
The before photo is typically captured on day one in whatever space is available — a gym locker room with harsh overhead fluorescents, a bathroom mirror selfie with mixed lighting, or a bedroom with window light from one side creating deep shadows. The after photo is taken 8-16 weeks later in a potentially different location with different lighting. When the before is dimly lit with a yellow cast and the after is brightly lit with natural daylight, viewers can't tell whether the visible difference is physical transformation or just better photography. This inconsistency is the most common reason transformation posts underperform on social media.
Gym and home backgrounds include distracting clutter and branding
Transformation photos shot in gyms include other members' belongings, equipment that draws the eye away from the subject, competing gym branding, mirrors reflecting uncontrolled background elements, and signage. Home bathroom and bedroom photos include toiletries, towels, unmade beds, and personal items. These backgrounds don't just look unprofessional — they actively distract the viewer from the physical transformation that is the photo's entire purpose. Clean backgrounds keep the viewer's attention on the subject's body composition change.
Smartphone cameras flatten muscle definition in low-light gym environments
Gym lighting is typically direct overhead fluorescent or LED that creates flat, unflattering illumination with minimal shadow contrast — the opposite of what you'd want for showing muscle definition, body composition changes, and physical progress. Smartphone cameras compound this by applying noise reduction that smooths out the subtle shadow-and-highlight contrast that makes muscle definition visible. The result is transformation photos where 12 weeks of progress in muscle tone, body recomposition, and definition improvement is barely visible in the photo, even though it's clearly visible in person.
How Magic Eraser fits the fitness transformation photo workflow
Establish a repeatable capture protocol from day one
Set up a consistent capture protocol that you use for every client's before photo and every progress check-in: same spot in the gym or studio, same distance from camera, same poses (front relaxed, front flexed, side, back), same time of day if possible. Use a tripod or phone mount for consistent framing. Even with this protocol, the lighting and background conditions will vary between sessions — that's what the editing workflow corrects. The protocol gives you the best starting material; the editing normalizes the conditions.
Run AI Enhance to normalize lighting and reveal muscle definition
Open both the before and after photos in AI Enhance. The AI corrects the underexposure from gym lighting, neutralizes the color cast from fluorescent or LED overhead lights, and sharpens the detail that smartphone noise reduction smoothed out. Critically, enhanced lighting reveals the shadow-and-highlight contrast that makes muscle definition, body recomposition, and physical progress visible in the photo. Apply the same enhancement approach to both before and after photos so the lighting conditions match — the comparison should show only the physical transformation, not a lighting transformation.
Use Magic Eraser to clean backgrounds and remove distractions
Remove the background elements that distract from the transformation: gym equipment, other members' belongings, competing branding, bathroom toiletries, and any personal items the client doesn't want visible in a public-facing photo. For consistency, clean both the before and after to the same background standard. The client's body and the physical context (standing on the gym floor, positioned against a neutral wall) stay intact; the visual noise around them gets removed.
Create the side-by-side comparison and export for social media
Place the cleaned before and after photos side by side at identical dimensions and alignment so the viewer's eye can move directly between the two and evaluate the transformation. Export at platform-appropriate dimensions: 1080x1350px for Instagram feed (the portrait ratio that maximizes screen real estate for transformation comparisons), 1080x1080px for square grid posts, 1080x1920px for Stories and Reels, and 1200x630px for Facebook share cards. Include the transformation timeline (e.g., '12 weeks') in the image or caption so viewers can assess the rate of progress.
Frequently Asked Questions
Is it ethical to enhance transformation photos?
+
Enhancing lighting and removing background clutter is ethical and standard practice — it makes the photo a clearer representation of the actual physical change, not a different representation. What is unethical is digitally altering the client's body (slimming, muscle-enhancing filters, skin smoothing that erases stretch marks or natural texture). The principle is simple: editing should remove technical and environmental barriers to seeing the real transformation clearly, not create the appearance of a transformation that didn't happen. Clients and followers both benefit from honest, clear transformation documentation.
How do I get clients to take useful before photos when they're not motivated?
+
Day-one clients are typically at their lowest confidence about their appearance, which means they rush through before photos, avoid standard poses, and don't engage with the process. Reframe the before photo as the first step of the program — not documentation of a problem, but the baseline from which progress will be measured. Use the established capture protocol (same spot, same poses, same framing) so it feels systematic rather than judgmental. Let clients know the photos will be enhanced for lighting and background so the final comparison looks professional, which reduces anxiety about the raw capture conditions.
How often should I take progress photos during a training program?
+
Every 4 weeks is the standard cadence for visible-change documentation. Weekly photos rarely show enough change to be meaningful and can discourage clients when the week-to-week difference is minimal. Four-week intervals capture enough physical change to be visible in photos, especially after AI enhancement that reveals muscle definition the raw smartphone capture might miss. For a 12-week program, that gives you a before, a 4-week check-in, an 8-week check-in, and a final after — a four-photo progression that tells a compelling story of consistent progress.
Do I need client consent to post transformation photos on social media?
+
Absolutely. Written consent is required before posting any client transformation photos on social media, your website, or any marketing materials. The consent should specify which platforms the photos will appear on, whether the client's name or identifying information will be included, and the client's right to request removal. Many trainers include a photo-release clause in the training contract with an opt-in checkbox. Clients who consent are often your most enthusiastic advocates — they're proud of the transformation and want to share it — but the consent must be explicit and documented.
Show the real transformation, not the lighting difference
AI Enhance normalizes gym lighting to reveal actual muscle definition and body composition changes, while Magic Eraser removes background distractions — so your before-and-after comparison shows the training results, not the photography conditions. Free tier on web, iOS, and Android.
Try Magic Eraser freeRelated use cases
See how professionals use these tools in real-world workflows.
Listing photos cluttered with personal items, parked cars, or construction equipment can turn buyers away. Magic Eraser uses AI to clean up your property photos instantly — no Photoshop skills required.
Product listings need clear images before shoppers can judge the item. Magic Eraser helps sellers remove messy backgrounds, table edges, labels, props, glare, and other distractions so each product photo is easier to review before publishing.
Photobombers ruining your travel pics? Messy backgrounds killing your selfie game? Stop wasting hours in Photoshop. Magic Eraser removes distractions, cleans up cluttered shots, and expands your photos to fit any platform format — all in one tap.
Related comparisons
See how Magic Eraser compares to similar tools.
TouchRetouch is a popular paid mobile app for removing objects and blemishes. Magic Eraser offers free AI-powered editing on any device with no install required. See how they compare across features, pricing, and ease of use.
Cleanup.pictures is a free web tool with one generic eraser brush. Magic Eraser gives you 100+ purpose-built removal tools — one for emoji, glasses, watermarks, sky, power lines, and dozens more — plus background removal, AI enhance, and mobile apps, in 16 languages. See how breadth changes the result.
remove.bg is the market leader for background removal, offering a powerful API and integrations with Photoshop and Figma. Magic Eraser goes further with eight AI-powered editing tools — from object removal and generative fill to AI enhance and design — all in one editor.
Two powerful AI photo editors with different strengths. Magic Eraser offers a broader set of generative AI tools for creative editing, while Photoroom excels at e-commerce product photography and batch processing. See which fits your workflow.
Related guides
Explore more guides and editorial content related to this workflow.
Learn how to use Magic Eraser to remove objects, people, text, and distractions from photos with cleaner AI editing results.
Learn how to remove people from photos using AI in seconds. Step-by-step guide for travel photos, real estate shots, and product images.
Step-by-step guide to removing watermarks from your own photos using AI. Learn when it is appropriate, the best techniques, and how Magic Eraser handles it.