
Vintage Car Restoration Documentation: Progress Photos, Detail Captures & Sale-Ready Shots
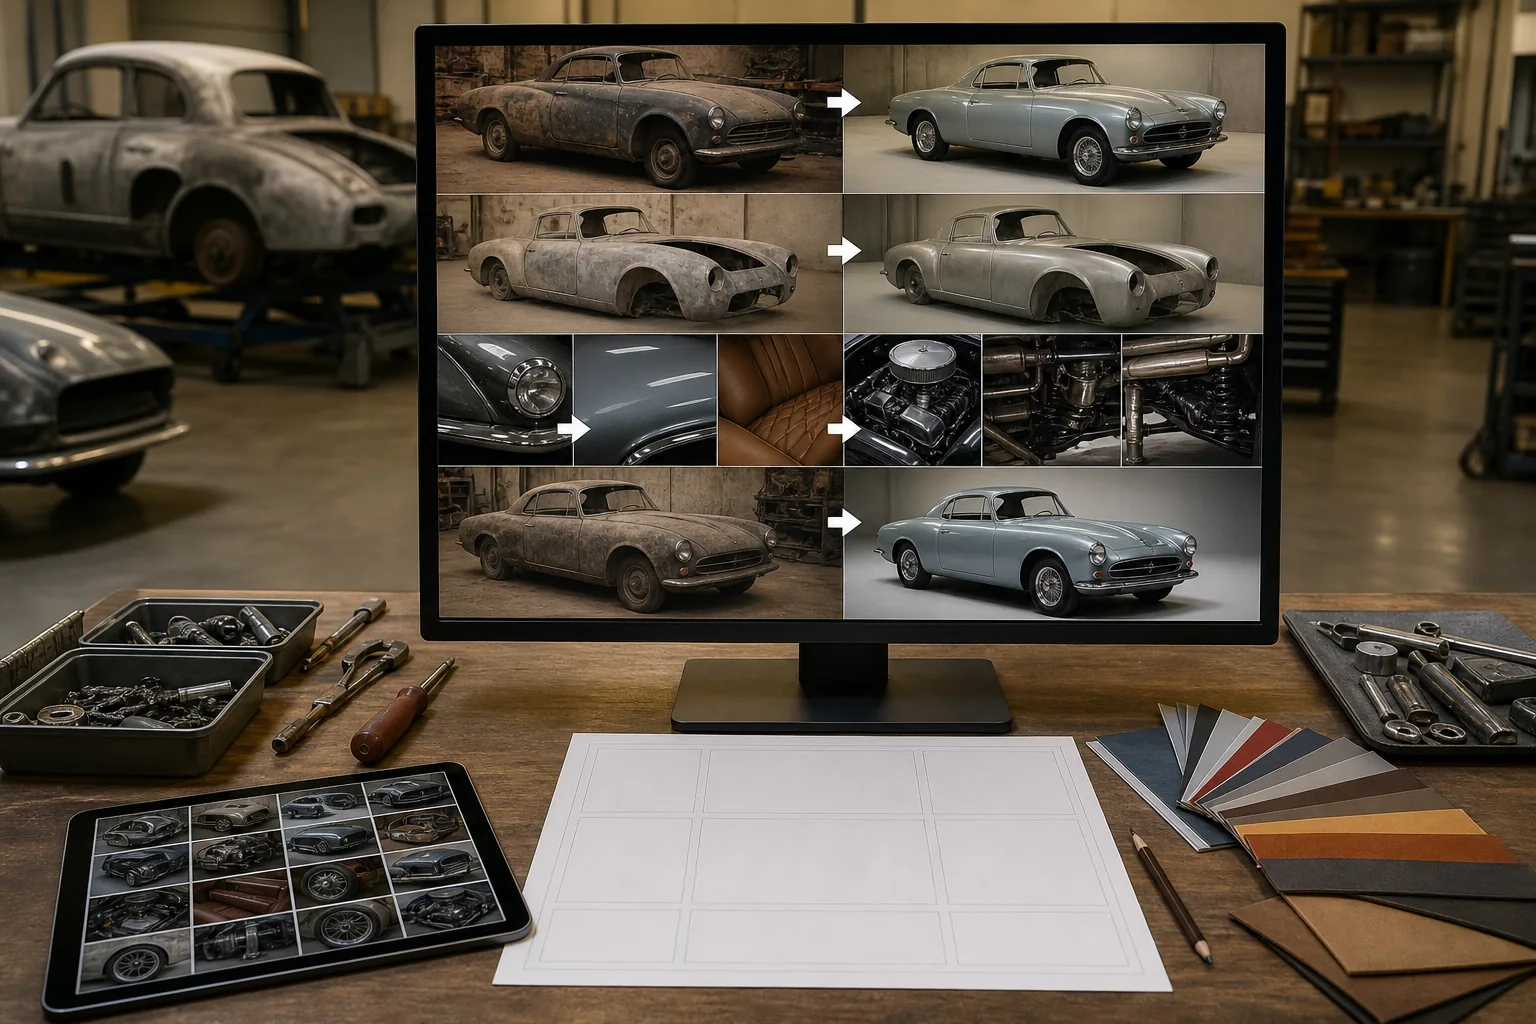
Documenting a classic car restoration from disassembly through completion serves three critical purposes: proving the scope and quality of work to the owner or future buyer, building the build-thread content that attracts new restoration commissions, and satisfying the photographic-evidence requirements for concours judging and marque-club certifications. The challenge is that restoration shops are optimized for metalwork and paint, not photography — the lighting is industrial, the backgrounds are cluttered with parts, tools, and other projects, and the person capturing the photos is usually the restorer between work steps rather than a photographer. AI Enhance and Magic Eraser transform shop-floor documentation captures into presentation-quality photos that serve all three purposes.
Shop-floor lighting makes paint color, chrome finish, and detail work unreadable in photos
Restoration shops use high-bay fluorescent or LED fixtures that provide functional visibility for metalwork but create harsh, flat lighting with strong color casts for photography. Under these lights, a freshly sprayed Guardsman Blue reads as a muddy teal, chrome bumpers show greenish reflections instead of the pure silver they exhibit in daylight, and the leather-stitching detail on an interior re-trim is invisible in shadow. The lighting misrepresents the quality of work that may have taken hundreds of hours to execute, which matters enormously when the documentation serves as the basis for a sale at $50,000-$500,000+ or a concours-judging evaluation.
Other projects, tools, and shop clutter in every background
A working restoration shop has 3-8 projects in various stages of completion, parts cars, shelving units of cataloged components, tool chests, paint booths, and fabrication equipment sharing the same floor space. Every in-progress photo of the restoration target includes visual competition from surrounding projects and shop infrastructure. For build-thread posts on Bring a Trailer, Hemmings, or marque-specific forums, the background clutter is distracting. For sale-listing photos, it's actively detrimental — buyers associate cluttered backgrounds with disorganized operations.
Before-condition documentation is often an afterthought captured poorly
When a project car arrives at the shop, the priority is assessment and disassembly planning, not photography. Before-condition photos are often hasty smartphone captures in the parking lot or on the shop floor before work begins — underexposed, poorly composed, and insufficient in coverage. Months later, when the restoration is complete and the before-and-after documentation needs to tell the story of the transformation's scope, the before photos are the weak link. They exist, but they're not good enough to clearly show the rust, the deteriorated trim, the interior damage, and the mechanical neglect that justify the restoration investment.
How Magic Eraser fits the vintage car restoration documentation workflow
Establish a documentation protocol at project intake
Before any disassembly begins, photograph the project car systematically: full exterior from each quarter angle (front three-quarter left, front three-quarter right, rear three-quarter left, rear three-quarter right), each side profile, front and rear straight-on, and detail shots of every area of damage, deterioration, or wear that the restoration will address. Shoot the interior from the driver's side, passenger side, and rear-seat perspective. Capture the engine bay, trunk, and undercarriage. This protocol takes 20-30 minutes and produces the 40-80 before-condition photos that anchor the entire project documentation.
Capture key restoration milestones as work progresses
Document major milestones: bare-metal body after media blasting, bodywork and panel fitment, primer stage, paint application, chrome and trim re-installation, interior assembly, engine bay detailing, and mechanical completion. At each milestone, photograph the same angles as the before-condition set so the progression is directly comparable. These in-progress captures will inevitably include shop clutter, imperfect lighting, and the working environment's visual noise — that's expected and will be addressed in post-production.
Run AI Enhance to correct shop lighting and reveal true finish quality
Open each documentation photo in AI Enhance to address the shop-lighting deficiencies: correct the fluorescent color cast so paint color renders accurately, restore the specular highlights on chrome and polished surfaces, lift shadow detail in engine-bay and undercarriage photos, sharpen the fine detail of stitching, panel gap alignment, and hardware fitment, and reduce noise from high-ISO smartphone captures in dim shop areas. For paint-quality documentation specifically, accurate color rendering is critical — the photo needs to show the actual paint color as it will appear in natural daylight, not the shop-lighting version.
Use Magic Eraser to clean backgrounds for sale listings and build threads
For the photos that will appear in sale listings (Bring a Trailer, Hemmings, Collecting Cars, private sale packages) and public build threads, remove background shop clutter that distracts from the vehicle: adjacent project cars, tool chests, parts shelving, shop signage, and floor-level debris. Preserve the vehicle and its immediate surface (the shop floor or display surface) while cleaning the visual periphery. For concours-documentation photos, this cleanup presents the vehicle as the sole subject, which mirrors how it will be displayed on the judging field.
Compile the complete before-during-after documentation package
Organize the processed photos into the complete documentation package: before-condition series, milestone progression series, completion series, and detail close-ups of key restoration work (panel fit, paint quality, interior materials, engine-bay presentation, undercarriage detail). For sale purposes, this package proves the restoration scope and quality to potential buyers. For concours applications, it provides the photographic evidence of restoration fidelity that judges evaluate. For marketing purposes (shop website, social media, build-thread forums), it tells the transformation story that attracts future commission clients.
Frequently Asked Questions
How important is photo documentation for a vintage car's resale value?
+
Comprehensive restoration documentation directly impacts sale price, often by 10-25% of the vehicle's value. Buyers of restored classic cars are paying for the quality of the restoration as much as the car itself, and photographic documentation is the primary evidence of that quality. A '67 Mustang with 200 professionally presented photos showing the complete restoration process from bare metal to completion will command a materially higher price than the same car with 20 hasty smartphone photos and a verbal description of the work performed. Platforms like Bring a Trailer, where bidders evaluate primarily through photos, make this price differential explicit and measurable.
Should I document parts and components during disassembly?
+
Yes, and this is one of the most commonly skipped documentation steps that restorers later regret. Photograph every component as it's removed: hardware with its location labeled, trim pieces with their orientation and mounting context, wiring harnesses with their routing visible, and mechanical components with their assembly relationships clear. This documentation serves as the reassembly reference (far more reliable than memory months later), the provenance record showing original-versus-replacement components, and the evidence of factory-correct fitment for marque-club certification or concours judging. AI Enhance is particularly valuable here for making small hardware and detail-fitment photos legible.
What's the best way to photograph paint quality in a shop environment?
+
The ideal approach is to photograph paint quality in indirect natural daylight — roll the car outside on an overcast day or into open shade. When that's not possible (weather, space constraints, the car isn't mobile yet), the best shop alternative is to photograph under the paint-booth lighting which is typically color-corrected to 5000-6500K. If neither option is available and you're shooting under standard shop fluorescents, capture the photos anyway and rely on AI Enhance to correct the color cast. Include a known color reference in at least one shot (a gray card or even a white paper towel) so the color correction has a neutral reference point.
Document every restoration with the quality the work deserves
AI Enhance corrects shop lighting to show true paint color and finish quality, while Magic Eraser removes shop clutter for sale-listing and build-thread photos that command attention and higher prices. Free tier on web, iOS, and Android.
Try Magic Eraser freeRelated use cases
See how professionals use these tools in real-world workflows.
Listing photos cluttered with personal items, parked cars, or construction equipment can turn buyers away. Magic Eraser uses AI to clean up your property photos instantly — no Photoshop skills required.
Product listings need clear images before shoppers can judge the item. Magic Eraser helps sellers remove messy backgrounds, table edges, labels, props, glare, and other distractions so each product photo is easier to review before publishing.
Photobombers ruining your travel pics? Messy backgrounds killing your selfie game? Stop wasting hours in Photoshop. Magic Eraser removes distractions, cleans up cluttered shots, and expands your photos to fit any platform format — all in one tap.
Related comparisons
See how Magic Eraser compares to similar tools.
TouchRetouch is a popular paid mobile app for removing objects and blemishes. Magic Eraser offers free AI-powered editing on any device with no install required. See how they compare across features, pricing, and ease of use.
Cleanup.pictures is a free web tool with one generic eraser brush. Magic Eraser gives you 100+ purpose-built removal tools — one for emoji, glasses, watermarks, sky, power lines, and dozens more — plus background removal, AI enhance, and mobile apps, in 16 languages. See how breadth changes the result.
remove.bg is the market leader for background removal, offering a powerful API and integrations with Photoshop and Figma. Magic Eraser goes further with eight AI-powered editing tools — from object removal and generative fill to AI enhance and design — all in one editor.
Two powerful AI photo editors with different strengths. Magic Eraser offers a broader set of generative AI tools for creative editing, while Photoroom excels at e-commerce product photography and batch processing. See which fits your workflow.
Related guides
Explore more guides and editorial content related to this workflow.
Learn how to use Magic Eraser to remove objects, people, text, and distractions from photos with cleaner AI editing results.
Learn how to remove people from photos using AI in seconds. Step-by-step guide for travel photos, real estate shots, and product images.
Step-by-step guide to removing watermarks from your own photos using AI. Learn when it is appropriate, the best techniques, and how Magic Eraser handles it.