
Museum & Archive Photo Digitization: Restore, Enhance, and Share Historical Collections
Cultural institutions worldwide are racing to digitize fragile photograph collections before physical deterioration makes them unrecoverable — but raw scans of century-old prints arrive with fading, foxing, tears, stains, scratches, and color shifts that make them unsuitable for public-facing digital collections, educational materials, or exhibition displays. The traditional restoration workflow requires a trained conservator spending 30-90 minutes per image in Photoshop, which makes large-scale digitization projects cost-prohibitive. AI Enhance and Magic Eraser reduce per-image restoration time to 2-5 minutes, making it practical to process collections of thousands of photographs within realistic institutional budgets and timelines.
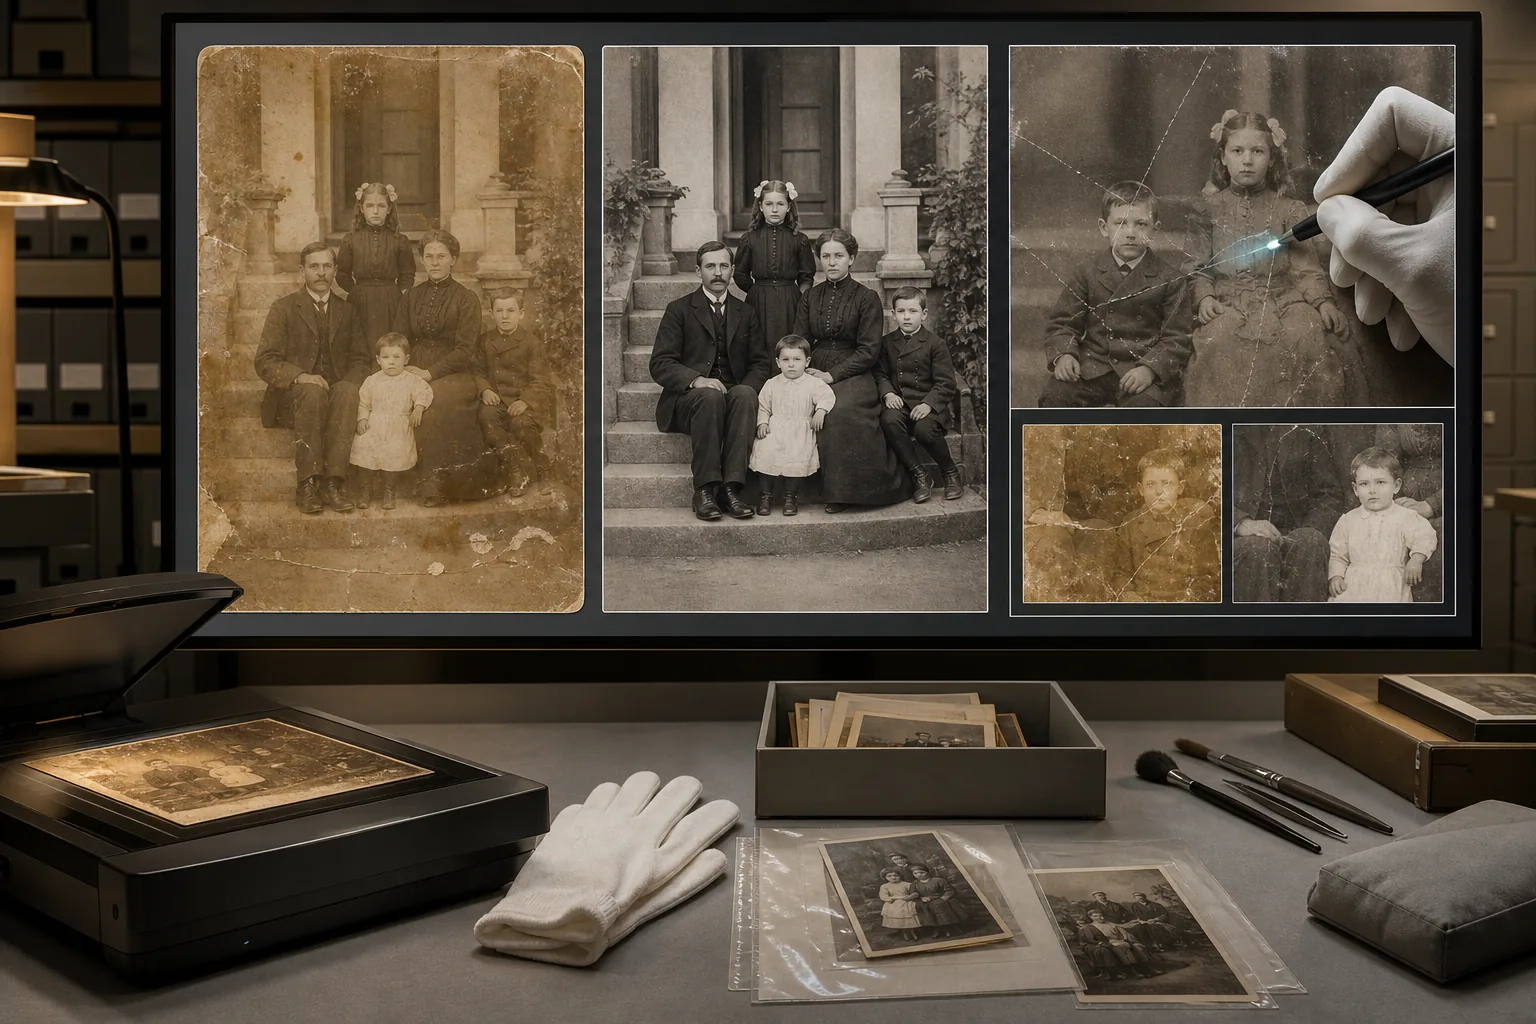
Physical deterioration artifacts overwhelm the historical content
Scanned photographs from the 19th and early 20th centuries commonly exhibit foxing spots from fungal growth, silver mirroring from chemical degradation of the emulsion layer, yellowing from acid migration in the paper substrate, water stains from improper storage, and physical tears or creases from handling. These deterioration artifacts can cover 10-40% of the image surface, making the underlying historical content difficult or impossible to interpret. For institutions publishing scans to online collections (DPLA, Internet Archive, institutional repositories), unrestored scans fail to communicate the historical content they were digitized to preserve.
Manual restoration at conservator rates is cost-prohibitive for large collections
Professional digital restoration by a trained conservator runs $30-80 per image for straightforward damage and $100-300+ for heavily deteriorated photographs. A mid-size institution digitizing 5,000-20,000 photographs faces a restoration budget of $150,000-$1,600,000 at those rates — a budget that simply doesn't exist for most museums, historical societies, university archives, and public libraries. The result is that most digitized collections get published as raw scans with damage artifacts intact, or the institution selects only the 50-200 most important images for manual restoration and leaves the rest unprocessed.
Color accuracy and historical fidelity are non-negotiable for scholarly use
Unlike commercial photo editing where aesthetic preference drives color decisions, archival restoration must balance two competing demands: making the image legible and presentable while preserving the historical character and authenticity that scholars and researchers depend on. Over-restoration — making a Civil War-era albumen print look like a modern digital photo — destroys the historical signal that the medium itself carries. The restoration workflow needs to correct deterioration artifacts while preserving the photographic era's characteristic tonal range, contrast curve, and color palette.
How Magic Eraser fits the archive digitization workflow
Scan at archival resolution and retain the unmodified master file
Scan each photograph at 600 DPI minimum (1200 DPI for small-format originals like cartes de visite and cabinet cards) using a calibrated flatbed scanner with a color reference target in each scan. Save the raw scan as an uncompressed TIFF — this is the archival master that gets preserved exactly as scanned, before any restoration. All subsequent restoration work happens on derivative copies, never the master file. This preserves the evidentiary record of the photograph's physical condition at the time of digitization.
Run AI Enhance to correct fading, contrast loss, and color degradation
Open the derivative copy in AI Enhance to address the most common deterioration effects: compensate for emulsion fading that has reduced tonal range, restore contrast that has flattened over decades, correct the yellow-brown color shift from acid migration, and sharpen detail that has softened from emulsion degradation. The AI enhancement recovers detail and tonal information that is physically present in the scan but visually suppressed by deterioration — it's revealing what's there, not inventing what isn't.
Use Magic Eraser to remove physical damage artifacts
After tonal restoration, use Magic Eraser to address localized physical damage — foxing spots, water stain edges, scratch lines, tear marks, tape residue shadows, and any handling damage visible in the scan. Brush over each damage artifact and let the AI reconstruct the underlying image content from surrounding context. For photographs with significant content loss (large tears, missing corners, heavy staining), document which areas were AI-reconstructed in the image metadata so future researchers can distinguish original content from restoration.
Export access derivatives at appropriate resolutions for each use context
From the restored derivative, export multiple resolution tiers for different institutional needs: full-resolution TIFF for the digital preservation repository, 2000px-long-edge JPEG for the online collection browser, 800px thumbnails for search results and collection grids, and 3000px+ files for exhibition prints and publication licensing. Embed descriptive metadata (Dublin Core or equivalent) in each export so the photograph's provenance, date, subject, and restoration status travel with the file.
Document the restoration in collection management records
Record the restoration actions performed on each photograph in the collection management system (PastPerfect, ArchivesSpace, CollectiveAccess, or equivalent): which deterioration artifacts were present, which were corrected, which areas involved AI reconstruction of lost content, and links to both the unmodified archival master and the restored derivative. This documentation supports scholarly transparency and allows future researchers to assess the reliability of any specific area of the restored image.
Frequently Asked Questions
Does AI restoration compromise the historical authenticity of archival photographs?
+
Not when implemented correctly. The key practice is maintaining the unmodified archival master scan as the preserved record and treating all restoration as derivative work — exactly the same principle that governs physical conservation, where the conservator's interventions are documented and reversible. AI enhancement that corrects fading and removes damage artifacts reveals the photograph's original content more clearly; it doesn't alter the historical record. The institutional responsibility is documenting what was done and preserving the unmodified original.
Can this workflow handle daguerreotypes, tintypes, and other non-paper photographic formats?
+
Yes, though each historical format has specific characteristics that affect the restoration approach. Daguerreotypes exhibit silver mirroring and are scanned with specialized lighting to capture the image from the correct angle. Tintypes have a darker tonal base and different deterioration patterns than paper prints. Albumen prints yellow characteristically along specific chemical pathways. AI Enhance handles the tonal correction for each format, and Magic Eraser addresses physical damage artifacts regardless of the photographic medium. The important step is calibrating the AI enhancement to the format's original tonal range rather than normalizing everything to modern photographic standards.
What volume of photographs can a small institution realistically process?
+
A single staff member using the AI-assisted workflow can process 40-80 photographs per day at moderate restoration depth (tonal correction plus spot damage removal), compared to 4-8 photographs per day with fully manual Photoshop restoration. For a 5,000-photograph collection, that translates to roughly 65-125 working days of AI-assisted processing versus 625-1,250 days of manual processing. Most small institutions allocate this as a multi-month project for one staff member or a semester-long project for trained student workers or volunteers.
How should we handle photographs where significant content is missing or destroyed?
+
For photographs with large areas of content loss (torn-away sections, heavy water damage, chemical destruction of the emulsion), be transparent about the boundary between original content and AI reconstruction. The recommended practice is to process two derivatives: one with the damage artifacts removed and content reconstructed (for public display and general access), and one with damage areas clearly masked or annotated (for scholarly reference). Document the extent of reconstruction in the catalog record. This dual-derivative approach gives the public an accessible image while giving researchers the provenance transparency they need.
Make your archive's photographs accessible to the public
AI Enhance and Magic Eraser reduce per-image restoration time from 30-90 minutes to 2-5 minutes, making it practical to process collections of thousands of historical photographs within realistic institutional budgets. Free tier on web, iOS, and Android.
Try Magic Eraser freeRelated use cases
See how professionals use these tools in real-world workflows.
Listing photos cluttered with personal items, parked cars, or construction equipment can turn buyers away. Magic Eraser uses AI to clean up your property photos instantly — no Photoshop skills required.
Product listings need clear images before shoppers can judge the item. Magic Eraser helps sellers remove messy backgrounds, table edges, labels, props, glare, and other distractions so each product photo is easier to review before publishing.
Photobombers ruining your travel pics? Messy backgrounds killing your selfie game? Stop wasting hours in Photoshop. Magic Eraser removes distractions, cleans up cluttered shots, and expands your photos to fit any platform format — all in one tap.
Related comparisons
See how Magic Eraser compares to similar tools.
TouchRetouch is a popular paid mobile app for removing objects and blemishes. Magic Eraser offers free AI-powered editing on any device with no install required. See how they compare across features, pricing, and ease of use.
Cleanup.pictures is a free web tool with one generic eraser brush. Magic Eraser gives you 100+ purpose-built removal tools — one for emoji, glasses, watermarks, sky, power lines, and dozens more — plus background removal, AI enhance, and mobile apps, in 16 languages. See how breadth changes the result.
remove.bg is the market leader for background removal, offering a powerful API and integrations with Photoshop and Figma. Magic Eraser goes further with eight AI-powered editing tools — from object removal and generative fill to AI enhance and design — all in one editor.
Two powerful AI photo editors with different strengths. Magic Eraser offers a broader set of generative AI tools for creative editing, while Photoroom excels at e-commerce product photography and batch processing. See which fits your workflow.
Related guides
Explore more guides and editorial content related to this workflow.
Learn how to use Magic Eraser to remove objects, people, text, and distractions from photos with cleaner AI editing results.
Learn how to remove people from photos using AI in seconds. Step-by-step guide for travel photos, real estate shots, and product images.
Step-by-step guide to removing watermarks from your own photos using AI. Learn when it is appropriate, the best techniques, and how Magic Eraser handles it.