
How to Create Product Mockups with AI: A Step-by-Step Guide
Learn how to create realistic product mockups using AI Fill and background replacement. Place your products in lifestyle scenes, generate marketing visuals, and build a full mockup library without a photo studio.
SEO & Growth
Reviewed by Magic Eraser Editorial ·
Table of Contents
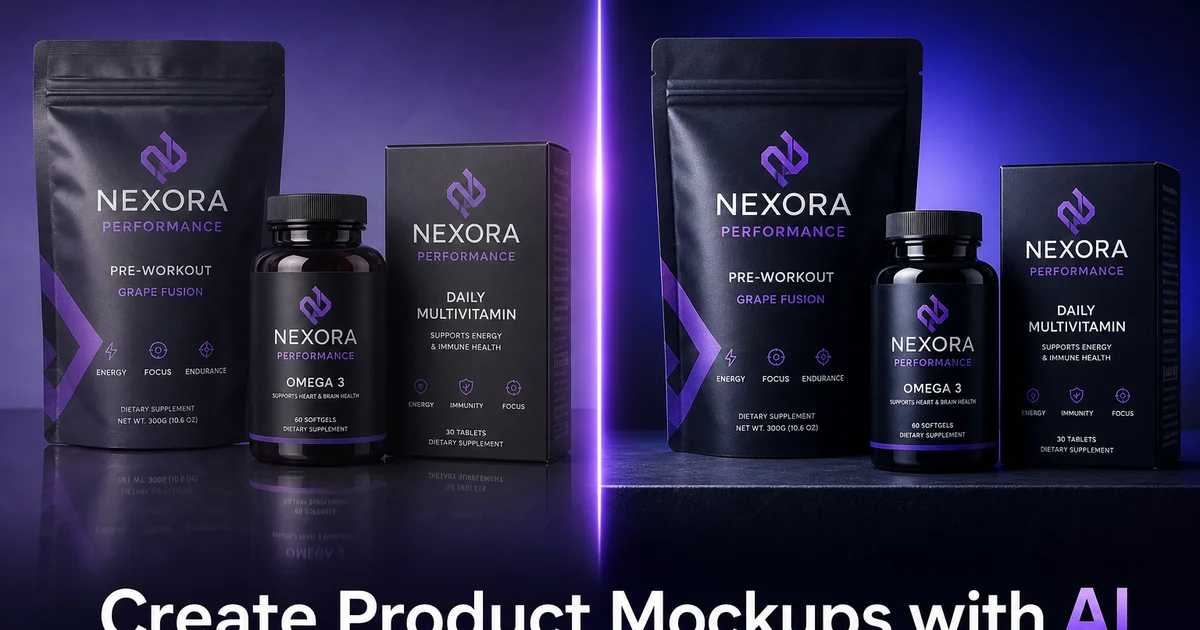
Product mockups show your product in context. On a desk, in a kitchen, held by a hand, sitting on a shelf next to matching items. They help customers visualize ownership and usage. This is why product pages often perform better when they combine lifestyle mockups with plain white-background photos instead of relying on white-background photos alone. Baymard Institute research shows that customers expect to see products in context alongside standard product-only shots. The absence of lifestyle imagery is a measurable conversion detractor.
In the past, creating product mockups required either a physical photo shoot with props, surfaces. Lighting setups, or a graphic designer skilled in Photoshop compositing who could manually place product cutouts into stock photography scenes. Both approaches are expensive, slow, and hard to scale. A single photo shoot produces a fixed set of scenes, and any new context. A different room, a seasonal theme, a social media trend — means another shoot or another round of designer hours.
AI tools collapse this workflow into minutes. You take one good photo of your product, remove the background. Then use AI Fill to generate an unlimited variety of lifestyle scenes. Need your water bottle on a hiking trail? On a gym bench? On a conference table? Each scene takes a single text prompt and thirty seconds of generation. This guide covers the complete process from initial product photo to finished mockup library.
- AI Fill generates realistic lifestyle scenes from text descriptions, placing your product in contextual environments.
- A single product photo can produce dozens of unique mockups for different sales channels and seasonal campaigns.
- Background Eraser isolates complex product shapes — curves, transparency, fine edges — in seconds.
- AI Expand extends tight crops into banner and hero compositions with space for text overlays.
- No photo studio, props, or Photoshop compositing skills required.
Why mockups outperform white-background product photos
White-background product photos serve an important function. They show the product clearly, without distraction, in a standardized format that marketplaces like Amazon require. But they do not help the customer imagine the product in their life. A candle on a white background is a product. A candle on a wooden side table next to an open book in a cozy living room is an experience. The difference in emotional response translates directly into purchase intent.
Shopify's research on product photography always finds that stores with a mix of white-background and lifestyle imagery can convert better than stores relying on only one image type. The white-background shots provide clarity and comparison capability. The lifestyle mockups provide aspiration and context. Customers need both, and AI tools make it practical for even solo sellers to produce both at scale.
Mockups also perform better on social media and in advertising. A lifestyle scene stops the scroll because it looks like content, not a product listing. Ad teams often see stronger click-through rates on ads with contextual imagery compared to plain product-on-white images. The mockup gives the viewer a reason to pause. The scene is interesting — and then the product within that scene gets their attention.
Shooting the base product photo
Your base product photo determines the quality ceiling for every mockup you create. The AI can generate beautiful scenes, but if the product itself is blurry, poorly lit, or shot at a bad angle, no amount of background magic will save the result. Fortunately, you do not need expensive equipment. A smartphone camera from the last three to four years, a sheet of white poster board, and a window with indirect light can produce excellent results.
Place the product on the poster board with the window to one side so the light wraps around the product with soft shadows. Avoid direct sunlight, which creates harsh highlights and deep shadows that are difficult to correct. Shoot at the height and angle that best represents the product. Eye level for bottles and packages, slightly above for flat items, and at the angle a customer would naturally view the item. Take multiple shots and select the sharpest one.
For products with reflective surfaces — glass, metal, glossy packaging — position a second piece of white poster board on the opposite side of the window to bounce light back and reduce harsh reflections. Products with transparent elements, like glass bottles or clear packaging, need backlight as well as sidelight to show the transparency naturally. Spend five extra minutes on lighting setup — it pays off in every mockup you generate from this base image.
- Use a white poster board and indirect window light for clean, even product lighting.
- Shoot at the angle customers would naturally view the product — eye level for bottles, slightly above for flat items.
- Bounce light with a second poster board to reduce harsh reflections on glass and metal surfaces.
- Take multiple shots and select the sharpest one as your base for all mockup generation.
Generating lifestyle scenes with AI Fill
With your product cleanly isolated on a transparent background, AI Fill becomes your scene generator. The tool accepts a text description of the setting you want and creates a photorealistic scene that integrates with your product. The quality of the result depends heavily on the specificity of your prompt. Generic prompts like 'kitchen background' produce generic results. Specific prompts like 'marble kitchen counter with morning sunlight from the left, blurred open shelving in the background, warm neutral tones' produce scenes that look like they came from a styled photo shoot.
Start by identifying the three to five contexts that matter most for your product. A skincare product might need a bathroom vanity scene, a bedroom nightstand scene, and a spa-like setting. A coffee mug might need a home office desk, a kitchen counter, and an outdoor patio table. Each context tells a different story about when and where the customer would use the product, expanding the product's appeal to different buyer personas and use occasions.
Generate two to three variations for each context to give yourself options. AI Fill produces slightly different results each time, even with the same prompt. Running the same prompt three times gives you variety in lighting angle, background detail, and overall mood. Select the best version and make minor adjustments. You might use Magic Eraser to remove a generated element that competes for attention with the product, or use AI Expand to extend the scene for a wider composition.
Extending mockups for banners and hero images
Many marketing formats require wide compositions with the product on one side and open space for text on the other. Website hero sections, email banners, social media cover images, and marketplace A+ content all benefit from this layout. But most product photos are shot in square or portrait orientation, leaving no room for text placement without obscuring the product.
AI Expand solves this by extending the canvas in any direction and generating contextually appropriate content to fill the new space. Start with your mockup scene — say, a product on a kitchen counter — and expand the canvas to the left. The AI extends the counter surface, continues the background wall and lighting, and produces a natural-looking composition that is twice as wide as the original. The left side of the image now has open space where your headline, price, or call-to-action can sit without competing with the product.
This technique is mainly valuable for seasonal campaigns. Take your core product mockup, expand the canvas. You have banner-ready artwork for every promotion without a new photo shoot. The same product in the same scene can be extended and cropped differently for each format. Wide for email headers, tall for Pinterest, square for Instagram — all from a single base mockup.
- AI Expand extends tight product photos into wide banner compositions for hero sections and email headers.
- Expanded areas generate contextually appropriate content — surfaces, walls, lighting — that matches the original scene.
- Position your product on one side with open space for headlines, pricing, or call-to-action text on the other.
- A single mockup can be expanded and cropped to fit every format — wide, tall, square — without reshooting.
Building a reusable mockup library
The real efficiency of AI mockups compounds over time as you build a library. Each new product you launch needs the same set of scenes: the hero lifestyle shot, the social media variations, the marketplace listings, and the seasonal campaign versions. Once you have established your brand's scene templates — the specific prompts that produce scenes matching your brand aesthetic — creating mockups for new products becomes a fifteen-minute task rather than a multi-day project.
Organize your mockup library by product, scene type, and format. A folder structure like /Product/SceneType/Format makes it easy to find the right asset when building a listing page, scheduling social media, or assembling an email campaign. Include your base product cutout files in the library so any team member can generate new mockups if a new marketing context arises.
Refresh your mockup library seasonally. The same product that sits on a sunlit patio table in your summer campaign should sit on a cozy fireside table in winter. Seasonal updates keep your marketing visuals fresh and relevant without requiring new product photography. You already have the product cutout — you only need new scene prompts. This seasonal refresh takes hours instead of the days or weeks that physical reshoots require.
How to do it
- 1
Photograph your product on a plain background
Take a clean photo of your product against a white or neutral background with even lighting. You do not need an expert studio — a sheet of white poster board near a window works well. The goal is a sharp, well-lit product image with no unwanted elements. This base photo is what the AI tools will use as the foundation for your mockups.
- 2
Remove the background with Background Eraser
Use Background Eraser to isolate the product from its plain backdrop. The AI traces around the product edges. It handles complex shapes like bottle curves, fabric drapes, or packaging with transparent windows and produces a clean cutout. This isolated product image is your reusable asset for creating multiple mockup scenes.
- 3
Generate lifestyle scenes with AI Fill
Use AI Fill to place your product into contextual settings. Describe the scene you want — a coffee table in a sunlit living room, a desk in a modern office, a kitchen counter with morning light — and the AI generates a realistic background that integrates naturally with your product. Create three to five different scenes to show the product in varied use contexts.
- 4
Extend compositions with AI Expand
If your product photo is tightly cropped, use AI Expand to extend the canvas and generate extra scene context around the product. This is mainly useful for banner images, social media headers, and hero sections where you need the product positioned to one side with space for text overlay on the other.
- 5
Export sized versions for each sales channel
Save each mockup in the dimensions required for your sales channels: square for Instagram and marketplace listings, 16:9 for website hero sections, 2:3 vertical for Pinterest. Check the specific dimensions required by Amazon, Shopify, or your chosen e-commerce platform. Consistent sizing ensures your mockups look polished wherever they appear.
Sources
- The Impact of Product Photography on E-Commerce Conversion — Shopify
- E-Commerce Product Imagery Best Practices — Baymard Institute
- Visual Commerce and Consumer Decision Making — BigCommerce