
How to Remove Watermarks from Your Own Photos
Learn how to remove watermarks from photos you own or have rights to. Step-by-step guide using AI object removal, with guidance on when watermark removal is right and how to handle common scenarios.

Technical Writer
Reviewed by Magic Eraser Editorial ·
Table of Contents
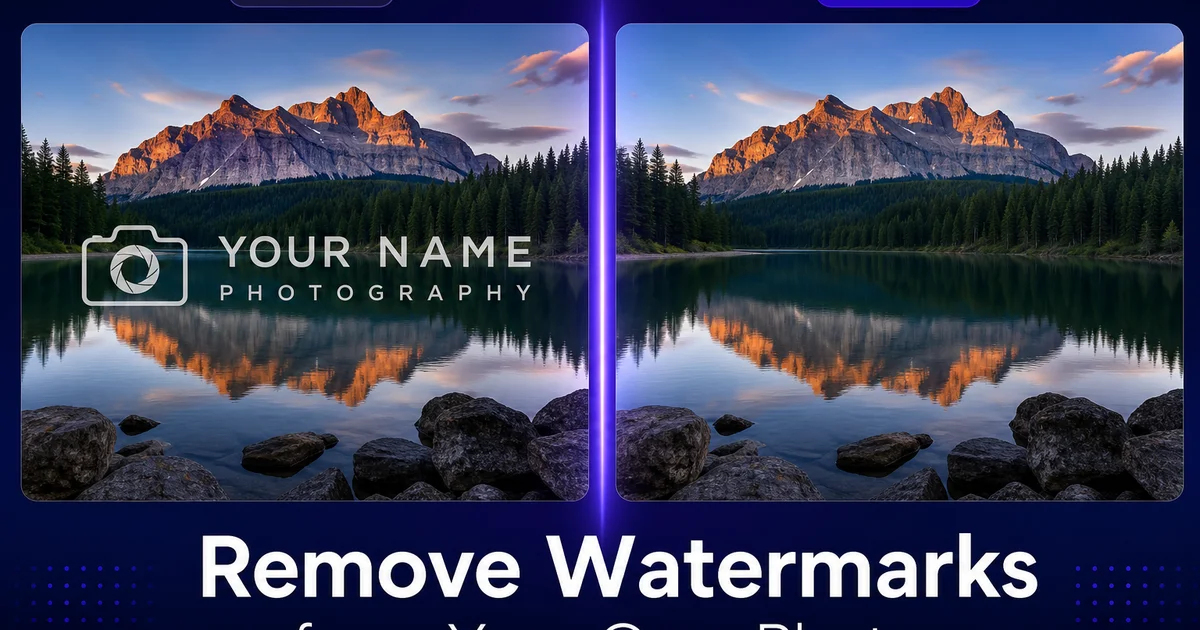
If you have ever added a watermark to your own photos for online posting and then needed the clean version for a print order, a client delivery, or a portfolio update, you know the frustration of hunting through old hard drives for the original unwatermarked file. Or perhaps you purchased the full license for a stock photo but the vendor's download system gave you the watermarked preview instead of the clean file. Maybe you are a photographer who inherited an archive where the only surviving copies of certain images have your studio's old watermark baked in.
In all these cases, you own the photo or have the legal right to use it. The watermark is just an artifact that needs to be removed. AI-powered object removal makes this straightforward. Magic Eraser can reconstruct the image content beneath a watermark by analyzing the surrounding pixels and predicting what should be there, producing a clean result that looks like the watermark was never applied.
This guide covers the legitimate scenarios for watermark removal, the step-by-step process, and tips for handling tricky watermarks that cross complex textures or high-detail areas.
- AI object removal reconstructs the image beneath watermarks by analyzing surrounding context.
- Works on text watermarks, logo overlays, tiled patterns, and semi-transparent stamps.
- Best results when the watermark covers a relatively small percentage of the total image area.
- Multiple passes handle stubborn traces or watermarks crossing complex textures.
- Only remove watermarks from photos you own, have licensed, or have explicit permission to modify.
When watermark removal is appropriate
Watermark removal gets a bad reputation because it is often associated with stealing photographers' work. But there are many legitimate scenarios where removing a watermark from a photo is perfectly right and legal. The most common is removing your own watermark. Photographers and businesses regularly watermark images before posting to social media or sending proofs to clients, then need the clean version later for printing, licensing, or portfolio use. If the original unwatermarked file has been lost, corrupted, or is on a drive you no longer have access to, removing the watermark from the only surviving copy is the practical solution.
Purchased stock photos are another common scenario. Stock photo agencies sometimes have download issues where the watermarked preview is delivered instead of the licensed clean file. If you have the license confirmation and the vendor's support team is slow to respond, removing the watermark yourself gets the project moving. Similarly, photographers who change studios, rebrand, or update their watermark design may need to remove the old watermark from archived images before applying the new one.
The key legal principle is straightforward: you must own the copyright or have a license or explicit written permission from the copyright holder. Removing a watermark from someone else's photo to avoid paying for a license is copyright infringement under the DMCA and equivalent laws in most countries. It is also a violation of this tool's terms of use. This guide is exclusively for photos you have the legal right to modify.
- Removing your own watermark from images where the original clean file is lost or inaccessible.
- Cleaning up purchased stock photos when the download delivered the watermarked preview instead of the licensed file.
- Updating archived photos with an old studio watermark before applying a new brand design.
- Never remove watermarks from photos you do not own or have explicit permission to modify.
How AI watermark removal works
Watermarks work by overlaying text, logos, or patterns on top of the original image content. In traditional photo editing, removing them required painstakingly cloning and painting over each part of the watermark using content from surrounding areas, a process that could take 30-60 minutes for a single image and often left visible seams where the cloned texture did not quite match.
AI object removal at its core changes this process. When you brush over a watermark in Magic Eraser, the neural network analyzes the pixels surrounding the marked area, identifies the patterns, textures, and color gradients that should exist beneath the watermark, and generates replacement content that seamlessly blends with the rest of the image. For a watermark over a sky gradient, it continues the gradient. For a watermark over a textured surface like fabric or grass, it generates matching texture. For a watermark crossing a face or product, it reconstructs the underlying features based on the visible context.
The quality of the result depends on several factors: the opacity and size of the watermark relative to the image, the complexity of the content beneath it, and whether the watermark crosses critical detail areas. Semi-transparent watermarks over simple backgrounds produce nearly perfect results. Dense tiled watermarks over complex subjects require more passes and may need localized touch-ups.
Handling different watermark types
Text watermarks — a studio name, copyright symbol, or date stamp — are the most common and generally the easiest to remove. They occupy a defined area with clear boundaries, and the AI can clearly distinguish watermark pixels from image pixels. Brush over the text, and the AI fills in the underlying content. One pass often handles text watermarks cleanly unless the text crosses a high-contrast edge in the image.
Logo watermarks are slightly more complex because they include shapes, gradients, and sometimes semi-transparent elements. The approach is the same — brush over the entire logo — but you may need a slightly larger brush stroke to ensure you capture any semi-transparent halo or drop shadow around the logo. If the logo uses white or light colors over a bright area of the image, the AI may need a second pass to fully eliminate faint traces.
Tiled or repeating pattern watermarks are the most challenging. These cover a large percentage of the image with a repeating text or pattern, often at reduced opacity. The strategy here is to work in sections. Brush over one area of the pattern, let the AI process it, review the result, then move to the next section. The AI handles each section on its own. Working in smaller areas produces cleaner results than trying to cover the entire tiled pattern in one stroke.
Diagonal watermarks that cross critical subject areas — a watermark line running across a face, for example — require the most care. Brush over the diagonal line in segments where it crosses different textures, and inspect each segment at full zoom. The AI reconstructs facial features, fabric texture, and background separately as the watermark crosses each region.
- Text watermarks are the easiest — one brush stroke and one pass typically suffice.
- Logo watermarks may need a wider brush stroke to capture semi-transparent halos and drop shadows.
- Tiled patterns should be processed in sections rather than all at once for the cleanest results.
- Diagonal watermarks crossing faces or critical subjects benefit from segmented, careful processing.
Tips for the best results
Start with the highest-resolution version of the photo available. The more pixel data surrounding the watermark, the better the AI can predict what belongs beneath it. A 4000-pixel-wide original gives the AI far more context than a 1200-pixel web export. If you have both, always work from the larger file.
Use a brush size that covers the watermark with a small margin. Painting too tightly along the watermark edges may leave traces. Painting too far outside wastes the AI's processing on content that does not need to change. A margin of 5-10 pixels beyond the watermark boundary is often ideal.
Process the image in passes by priority. First, handle the watermark areas over simple backgrounds — skies, solid surfaces, blurred areas. These will come out clean on the first pass. Then address watermark areas over textures and patterns, which may need a second pass. Save the most complex areas — faces, fine text, product details — for last, when you can give them focused attention and review each at 100% zoom.
If a faint ghost of the watermark remains after two passes, try brushing just the trace itself with a small brush rather than re-processing the entire watermark area. Targeting only the residual artifact preserves the good reconstruction from the first pass while cleaning up the stubborn trace.
- Always use the highest-resolution version of the photo for the best AI reconstruction.
- Size your brush to cover the watermark plus a 5-10 pixel margin on each side.
- Process simple background areas first, textured areas second, and critical detail areas last.
- Target residual traces with a small brush rather than reprocessing the entire area.
Archiving and workflow best practices
Once you have removed the watermark, save the clean version as a separate file. Do not overwrite the watermarked version. Keeping both files protects you if you need to prove ownership or show that you held a watermarked copy. Name the files clearly: 'product-shot-watermarked-original.jpg' and 'product-shot-clean.jpg' in the same folder.
Going forward, adopt a file management practice that prevents the lost-original problem. When you watermark a photo for web posting, save the original unwatermarked file in a clearly labeled master folder, a cloud backup, or both. Many photographers use Lightroom's virtual copy feature to create watermarked exports without modifying the original catalog file. If you use a batch watermarking tool, configure it to output to a separate directory rather than overwriting originals.
For photographers who watermark client proofs, consider embedding metadata in the original files that links them to the watermarked versions. Simple file naming conventions — the same base name with '-proof' and '-final' suffixes — make it easy to find the clean file when a client orders prints or licenses the image.
- Save the clean version as a separate file — never overwrite the watermarked original.
- Always keep unwatermarked originals in a clearly labeled master folder with cloud backup.
- Use naming conventions that link watermarked proofs to their clean original files.
- Configure watermarking tools to output to a separate directory rather than overwriting source files.
How to do it
- 1
Confirm you own the rights to the photo
Before removing any watermark, verify that you are the copyright holder, the licensed owner, or have written permission from the creator. This guide applies exclusively to watermarks on photos you own. Removing watermarks from other people's work without permission is copyright infringement.
- 2
Open the photo in Magic Eraser
Upload the watermarked photo to Magic Eraser. Use the highest-quality supported image file available to you, because more pixels give the AI better context for reconstructing the area beneath the watermark.
- 3
Brush over the watermark area
Use the brush tool to paint over the watermark text, logo, or pattern. Cover the entire watermark including any semi-transparent edges. For large watermarks that span major portions of the image, work in sections. Brush over one area, let the AI process it, then move to the next.
- 4
Review and refine the result
Zoom into the area where the watermark was removed and check for any residual artifacts or inconsistencies. If traces of the watermark remain, brush over those specific spots for a second pass. Pay special attention to areas where the watermark crossed complex textures or strong edges.
- 5
Save the clean version at full resolution
Export the watermark-free image at full resolution. Save it alongside your original as the clean master file for printing, publishing, or sharing.
Sources
- Copyright and Fair Use: What You Need to Know — U.S. Copyright Office
- Best Practices for Photographers: Watermarking and Image Protection — Professional Photographers of America