Remove a shadow from a photo
Clean up harsh shadows under products, dark shadows across portraits, and uneven light across outdoor scenes. Brush over the shadow and Magic Eraser AI Fill rebuilds the area with matching surface and color.
Last updated
Open AI Fill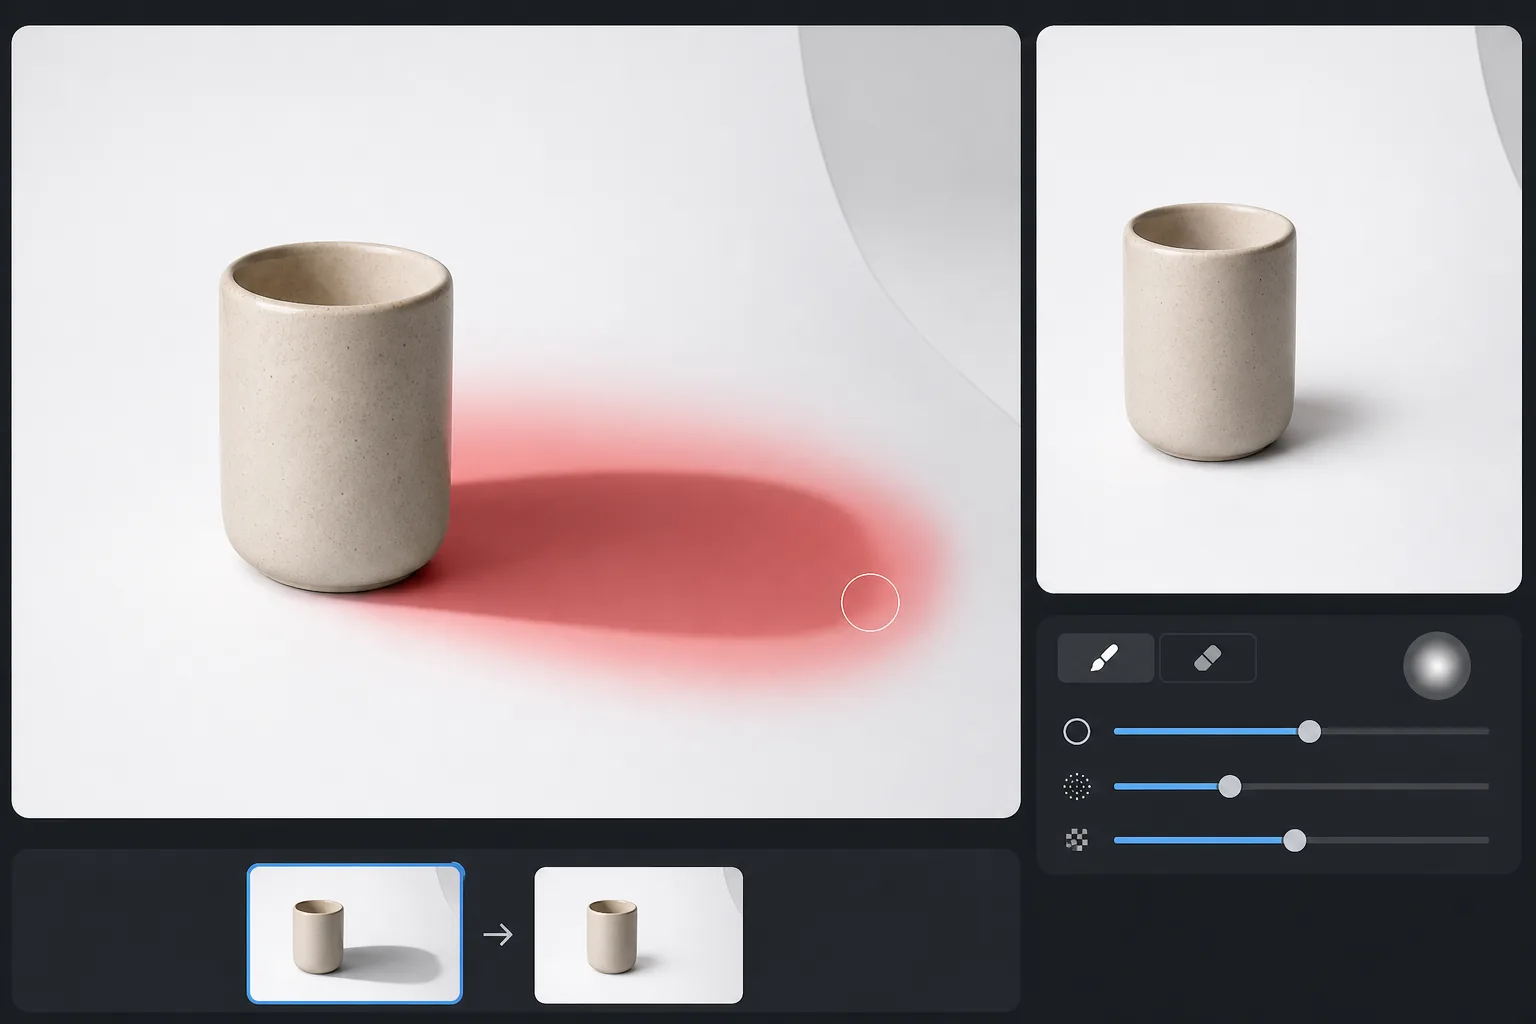
How to remove a shadow from a photo
To remove a shadow from a photo, upload the image to Magic Eraser AI Fill, brush over the shadowed area including its soft outer edge, and tap Fill — the AI rebuilds the surface underneath at full brightness in a few seconds. It works on product shots, portraits, and outdoor photos, and is most accurate when a cleanly lit version of the same surface is visible elsewhere in the frame. It's available with limited free edits in any browser, with sign-in required. Shadows are one of the trickiest things to edit out of a photo because they are not objects sitting on top of a surface — they are the surface, just darker. A shadow falling across a hardwood floor still shows the grain; a shadow on a face still shows skin, pores, and the curve of a cheekbone. So removing one is not a matter of erasing pixels and filling the gap. The brightness has to be lifted in just the shadowed zone, the underlying texture and color preserved, and the soft transition where the shadow fades into ambient light blended seamlessly — do any of that wrong and you get a flat gray smudge or an obvious halo. Real situations where this matters: the photographer's own silhouette thrown across a flat-lay, harsh midday light splitting a face into bright and dark halves, a fence or window frame striping a portrait, product shots where the light stand casts a hard edge, and shadows dropped across a scanned document or whiteboard. Magic Eraser handles these with AI inpainting: you brush the shadow, and the model studies the lit parts of the same surface elsewhere in the frame to predict how that area should look at full brightness. It is an honest reconstruction — a plausible rebuild of what the light would have revealed, not recovered hidden pixels — so results are strongest when a clean lit reference exists nearby.
Remove a shadow in three steps
- 1
Upload your photo
Open Magic Eraser AI Fill, drop in the photo. JPEG, PNG, and WebP are all supported; works on portrait, landscape, and product shots.
- 2
Brush over the shadow
Paint over the shadowed area. Include the full shadow including its soft edges — these gradient zones are where shadows blend back into ambient light and the AI needs them to match brightness correctly.
- 3
Run AI Fill
Tap Fill. The AI matches the surrounding lit surface and rebuilds the shadowed area in seconds. For very large shadows or complex surfaces, run a second pass on any remaining darker patches.
Best for
- Product photography with harsh shadows under the subject
- Portraits with strong under-eye shadows or one-sided directional light
- Real-estate interior shots with shadows from window blinds or furniture
- Outdoor photos taken at midday with hard shadows across faces
- Flat-lay shots where the photographer's shadow falls into the frame
- Striped shadows from window blinds, fences, or railings falling across a subject's face or body
- Scanned documents, receipts, and whiteboard photos darkened by the phone or hand casting a shadow over the page
- Hard-edged shadows from a light stand, softbox, or reflector creeping into the corner of a studio or e-commerce shot
When to keep shadows
Work from a clean reference. AI Fill rebuilds the shadowed area by studying lit parts of the same surface, so the more of that surface is visible and evenly lit elsewhere in the frame, the more accurate the rebuild. If the whole background sits in shadow, there is nothing to copy from and results soften. Brush the full shadow including its faint outer edge — stopping short of that gradient leaves a telltale dark ring. For large or graduated shadows, run two passes: clear the dark core first, then catch any residual gray on a second pass with a smaller brush. On textured surfaces (wood, fabric, gravel) the texture usually survives; on smooth gradients like a studio sweep, watch for a slight tone seam and re-brush across it. Set realistic expectations: soft cast shadows on backgrounds disappear cleanly, while a hard-edged shadow crossing complex detail — patterned tile, a face turned away from the light — is a best-guess reconstruction and benefits from a quick zoom-in check. And consider keeping a soft contact shadow under products; a faint base shadow reads as grounded, where a fully shadowless cutout often looks pasted in.
Frequently asked questions
- Does it work on soft, gradient shadows?
- Yes. Brush across the full shadow including its softest edge. The AI reads the brightness gradient and rebuilds the underlying surface to match the lit side.
- What about my own shadow falling into a flat-lay?
- That's one of the most common cases. Brush over your shadow, run Fill, and the AI rebuilds the background as if you weren't there.
- Can it remove shadows from a face?
- Partial face shadows work well. For shadows covering an eye or mouth, the AI's reconstruction is a best guess at what's underneath — usually convincing for personal photos, less so when accuracy matters.
- Will it change the rest of the photo's lighting?
- No. AI Fill only affects the area you brush. The rest of the image stays untouched.
- Why does my shadow look gray or smudged after removal instead of clean?
- That usually means there was no clean lit version of the same surface for the AI to reference, or the shadow's faint outer edge was left unbrushed. Extend your brush past the visible edge into the gradient, and make sure some of the lit surface is in frame. On smooth backgrounds, a second pass across the seam evens out any leftover tone.
- Can it remove a shadow that falls across two different surfaces at once?
- It can, but accuracy varies. Where a shadow crosses, say, a wall and then the floor, each surface needs its own lit reference nearby. Results are best when you brush and review one surface at a time, since the AI rebuilds each zone from the material around it rather than treating the shadow as a single object.
- Should I remove the shadow or just lighten it?
- Depends on the goal. For distracting cast shadows — your own silhouette, a blind stripe, a light-stand edge — full removal is cleanest. For product and portrait work, lightening rather than erasing often looks more natural: brush only the harsh core and leave a soft contact or directional shadow so the subject still feels grounded and three-dimensional.
- Is removing a shadow from a photo free, and do I need to sign up?
- Yes, it's free and there's sign-in required. Open Magic Eraser AI Fill in any browser, upload your photo, brush the shadow, and export the result at no cost. The same tool runs on iOS and Android, so you can clean up shadows directly from your camera roll on a phone.
- Can it remove a shadow for product photos on a white background?
- Yes — this is one of the cleanest cases. On a plain white or seamless studio backdrop the AI has a large, evenly lit reference to copy from, so a hard shadow cast beside or under the product lifts out smoothly. For catalog and marketplace listings that require a pure white background, brush the cast shadow on the sweep but consider leaving a faint contact shadow directly under the product so it still looks grounded rather than floating.
- Can it remove the shadow a person or object casts on a wall or floor?
- Yes. A cast shadow thrown onto a wall, floor, or pavement is exactly what AI Fill is built for, because the lit wall or floor around it gives the model a clear surface to rebuild from. Brush the whole silhouette including its soft edge. Where the shadow bends from one surface onto another — wall to floor — review each surface separately, since the AI reconstructs each from the material around it.
- Does it work on shadows in old or scanned photos?
- Often, yes. Shadows cast by your hand or phone across a scanned document, receipt, or printed photo lift well because the surrounding page is uniform and gives a clear brightness reference. Heavy, full-frame darkening from poor original lighting is harder — there's no cleanly lit area to copy from — so results are strongest when the shadow covers only part of an otherwise well-lit page.