
Dental Smile Enhancement
Create professional before-and-after dental marketing images that showcase your practice's work. This template applies natural-looking tooth whitening, removes clinical background clutter, standardizes patient portrait backgrounds, and balances the harsh overhead lighting common in operatory photos.
Try this template freeProfessional template preview
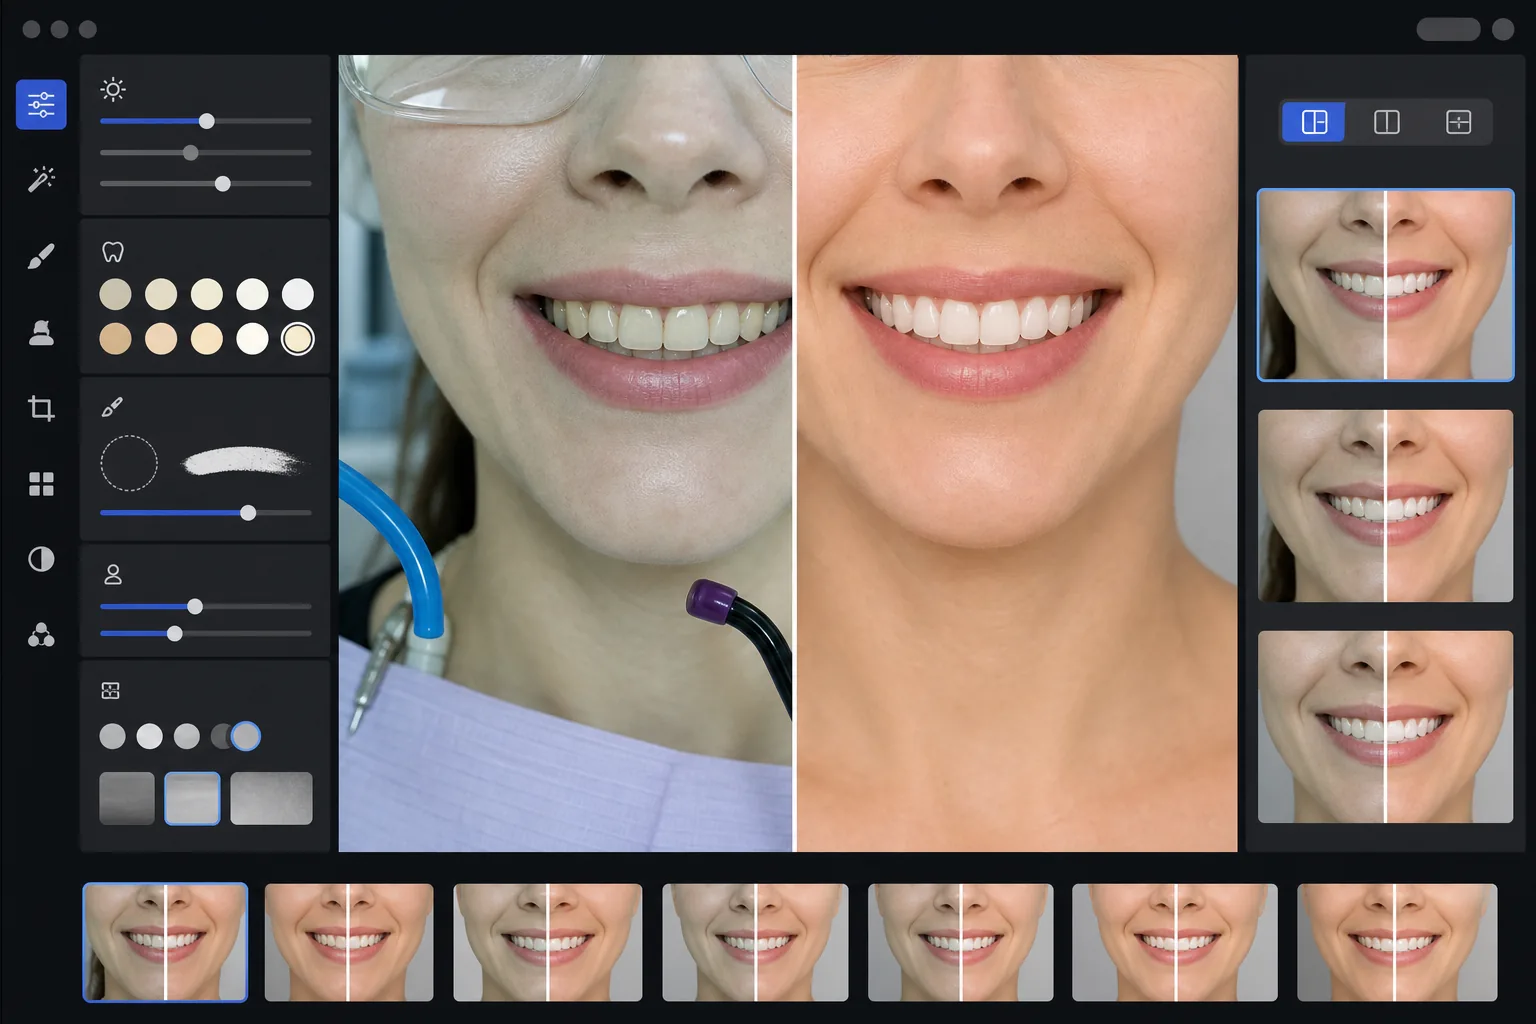
What this template does
Transforms clinical dental photos into polished marketing images for practice websites, social media, and patient education materials. AI Enhance corrects the unflattering green-white cast of dental operatory lighting and applies subtle tooth whitening that looks natural — brightening teeth by 2-3 shades without making them look artificial. Magic Eraser removes clinical background elements like suction hoses, curing lights, articulating paper marks on lips, and protective eyewear. Patient portrait backgrounds are standardized to a clean, consistent backdrop across your entire case gallery.
Template settings
| Tooth whitening | Natural +2 to +3 shade lift (preserves translucency and enamel texture) |
| Lighting correction | Dental operatory daylight balance (removes green-white clinical cast) |
| Background | Consistent neutral gray or white backdrop with soft vignette |
| Skin tone | Perioral warmth correction (reduces paleness from dental lighting) |
| Lip color | Natural saturation recovery (counteracts washed-out clinical lighting) |
How to use this template
Upload clinical photos
Upload smile close-ups, portrait-style before-and-after photos, or intraoral images taken in your operatory. The template works with photos from dental-specific cameras, DSLRs with ring flashes, and smartphone photos taken under operatory lights.
Correct clinical lighting
AI Enhance neutralizes the green-white color cast from overhead dental unit lights, warms the skin tones around the mouth, and recovers natural lip color. Tooth color is brightened subtly to show the result at its best while remaining realistic and honest.
Clean up backgrounds and distractions
Magic Eraser removes visible hoses, curing light tips, bib clips, articulating paper stains on lips, and clinical equipment in the background. The background is replaced with a consistent neutral backdrop that matches across all your before-and-after pairs.
Export for marketing use
Download individual enhanced images or side-by-side before-and-after composites. The output is sized for website galleries, Instagram posts, Google Business Profile, and printed patient brochures with resolution suitable for 8x10 inch prints.
Pro tips for best results
- ✓For before-and-after pairs, photograph both the pre-treatment and post-treatment images from the same angle, distance, and lighting position. The template can correct exposure differences between the two, but matching the original camera angle produces the most convincing comparison.
- ✓The tooth whitening is intentionally conservative — it brightens by 2-3 vita shades rather than making teeth paper-white. This looks more natural and credible to prospective patients. If your actual clinical result is dramatic, the honest photo with light enhancement is more persuasive than an over-processed image.
- ✓Use a cheek retractor for intraoral smile shots to get the most complete view of dental work. The template handles the slightly clinical look of retractor-assisted photos by warming skin tones and cropping to focus on the smile zone.
- ✓Process your entire case gallery in one batch to ensure consistent background color, brightness, and warmth across all before-and-after pairs. Mismatched lighting between cases on your website undermines the professional impression.
Common questions
Is this considered misleading dental advertising?
+
The whitening enhancement is limited to 2-3 vita shades and preserves the natural translucency and surface texture of enamel. This is well within what professional photography lighting and white balance naturally affect. The template does not alter tooth shape, alignment, or gum contour — it only corrects the unflattering color effects of clinical lighting that make results look worse in photos than they do in person.
Can this create side-by-side before-and-after composites?
+
Yes. The template can output individual enhanced images or generate a side-by-side composite with a center divider, consistent background, and before/after labels. Both images in the pair receive the same background treatment so the comparison is visually clean and professional.
Does this work with intraoral camera photos?
+
Yes. Intraoral camera images typically have very harsh, direct lighting that bleaches out surface texture. The template recovers enamel detail, corrects the extreme white cast, and adjusts contrast to show tooth anatomy naturally. The result is more detailed and natural-looking than the raw intraoral capture.
Showcase your dental work with professional marketing photos
Upload clinical photos and get naturally enhanced, consistently styled before-and-after images ready for your website, social media, and patient brochures.
Try it freeRelated templates
More professional templates for your workflow.
Professional LinkedIn headshot template. Clean background, natural skin enhancement, and the polished look that gets 14x more profile views.
Create compliant passport and visa photos at home. White background, correct head size ratio, 2×2 inch US standard, and 600 DPI output that meets State Department requirements.
Professional headshot template for actors and models. Meet casting director standards with 8×10 print-ready output, natural retouching, and clean backgrounds for agency submissions.