Remove vignette from a photo
Lens vignette is the gradual darkening that creeps in from the four corners toward the center — a quirk of optics, wide apertures, stacked filters, or a heavy in-app preset. Magic Eraser lifts that falloff and reconstructs the brightness the corners should have had, so exposure reads evenly from edge to edge instead of fading into shadow.
Last updated
Open Magic Eraser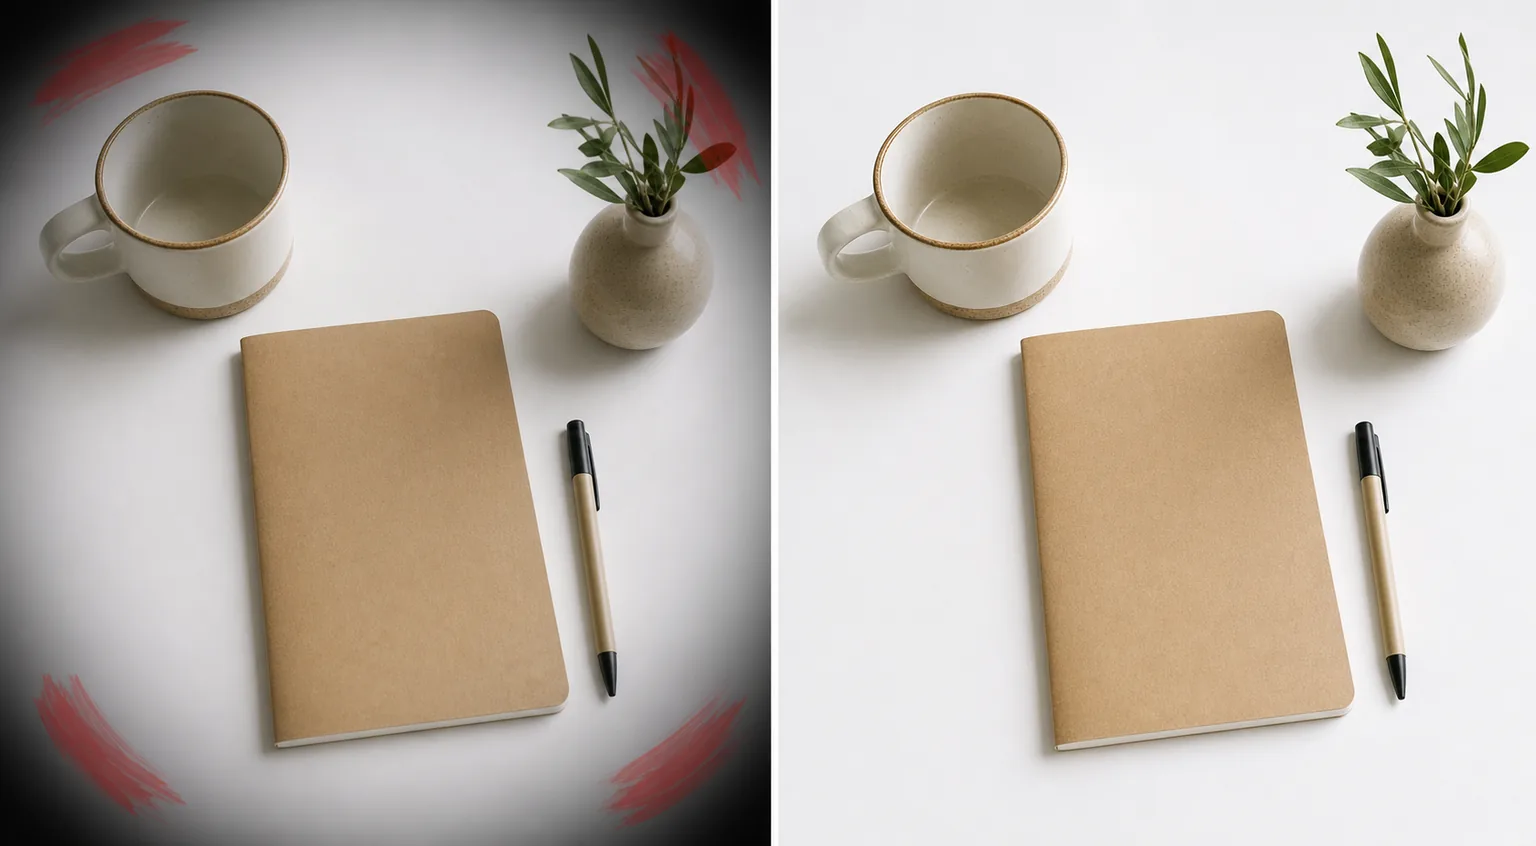
What a vignette actually is
A vignette is symmetric corner darkening — the image is bright in the middle and falls off smoothly toward all four corners. It comes from the optics: a wide-open aperture, a lens hood or stacked filter clipping the light path, a cheap wide-angle, or a filter that bakes the look in on purpose. That makes it different from the things people often confuse it with. A shadow is cast by an object and lands wherever the object blocks the light, so it has an edge and a shape. Glare is a bright hotspot or veil from a light source hitting the lens. A vignette is neither — it is a soft, roughly even gradient tied to the frame corners, not to anything in the scene. Sometimes it flatters a portrait; often it just looks like the photo is dimming at the edges, fights with a product shot on a white background, or clashes once you crop or stitch frames together. Magic Eraser treats it as an exposure problem: it maps the falloff and rebuilds the corner brightness so the frame is lit evenly, instead of merely cropping the dark edges away and losing your composition.
Remove a vignette in three steps
- 1
Upload the photo
Open Magic Eraser on the web, iOS, or Android and upload the shot with darkened corners. It works on portraits, product photos, landscapes, and scanned or filtered images.
- 2
Brush the dark corners
Paint over the darkened edges and corners where the falloff is strongest. You can cover all four corners or just the worst one — focus the brush on the dim band, not the correctly-exposed center, so the AI knows which region to relight.
- 3
Erase and review
Tap Erase and the AI lifts the falloff and reconstructs the corner brightness to match the center. Check the transition where corner meets center for an even blend, ease off if a corner looks blown out, and export the corrected photo.
Best for
- Evening out corner darkening from wide-aperture or wide-angle lenses
- Lifting a heavy vignette baked in by a filter or in-app preset
- Cleaning product shots so a white background stays white edge to edge
- Fixing falloff from a lens hood or stacked filters clipping the frame
- Brightening corners before stitching a panorama or photo grid
- Recovering even exposure on scanned prints and old photos
- Prepping flat-lay and document photos that need uniform lighting
- Removing a vignette that fights with a later crop or reframe
What to expect from vignette removal
Vignette removal works best when the darkening is a brightness problem and not a detail problem. If the corners are dim but still hold real texture — sky, a wall, an even backdrop — the AI lifts the exposure and the recovered area looks true, because it is restoring brightness to detail that is genuinely there. Where corners are crushed close to pure black, there is little real information left, so the tool estimates what belongs there; large dark patches over busy subjects are the hardest and can come back softer or slightly invented rather than perfectly accurate. A smooth, even gradient over a plain region reconstructs cleanly; an abrupt or uneven darkening, or one tangled up with a real shadow or glare in the same corner, takes a more careful brush so the AI does not relight the wrong thing. Keep the brush on the dim falloff and off the correctly-exposed center, or you risk over-brightening areas that were already fine. Treat the result as a plausible, evenly-lit reconstruction of the corners rather than a guaranteed pixel-exact recovery of lost shadow detail.
Frequently asked questions
- How is a vignette different from a shadow?
- A shadow is cast by an object and has an edge and a shape tied to whatever blocked the light. A vignette is symmetric corner darkening from the lens or a filter — a smooth gradient pinned to the frame corners, not to anything in the scene. Vignette removal relights those corners; for object shadows, use the shadow tool instead.
- Can it recover detail in nearly black corners?
- Partly. If the dark corner still holds faint texture, the AI lifts it and the detail looks real. Where corners are crushed to near-black, little information survives, so the tool estimates what belongs there. Expect honest brightness recovery on dim-but-detailed corners and a plausible reconstruction on fully crushed ones.
- Will the corners match the rest of the photo?
- That is the goal — the AI rebuilds corner brightness to match the center so exposure reads evenly across the frame. Check the corner-to-center transition after erasing; if a corner reads too bright, dial the edit back and brush a little less of the falloff.
- Is vignette removal free?
- Yes. Magic Eraser's free tier handles vignette and corner-darkening fixes on web, iOS, and Android. Upload the photo, brush the dark corners, and export the evenly-lit result at no cost.