How to remove reflections from a photo
Window reflections obscuring a storefront display, glass glare ruining a museum photo, mirror reflections revealing the photographer — unwanted reflections distract from your subject and make images look amateur. Magic Eraser's AI intelligently removes reflections while preserving the scene behind them.
Last updated
Remove reflections now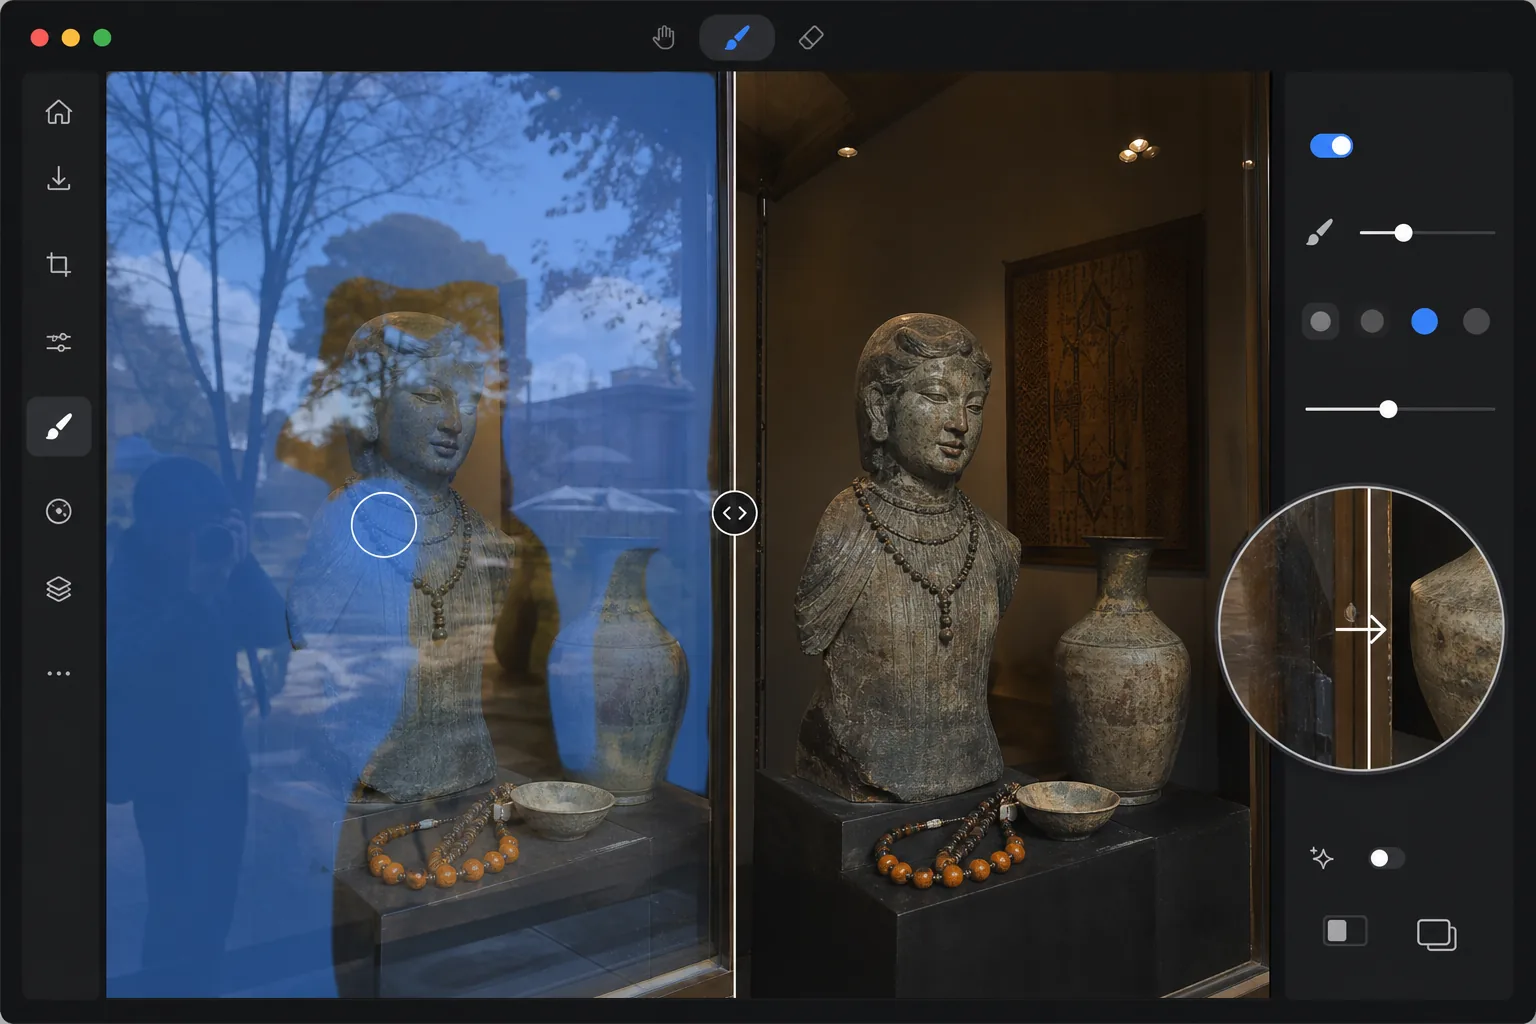
How to remove reflections from a photo
To remove a reflection from a photo, open Magic Eraser on the web, iOS, or Android, upload the image, brush generously over the whole reflection — the glare on the glass, the ghosted scene, or the photographer in a mirror — and tap Erase. The AI separates the reflected layer from the scene behind it and reconstructs the clean image underneath. It includes limited free edits after sign-in. It works best when the reflection is distinct from what's behind the glass; on a very strong reflection that's nearly as bright as the real subject, a second pass cleans up what the first leaves behind. Reflections are complex because they layer a semi-transparent ghost image over the actual subject. Unlike simple blemishes, a reflection contains coherent visual information — a reversed scene, a light source, or the photographer themselves — blended with the real content behind the glass. Manual removal in Photoshop requires painstakingly separating the reflected layer from the transmitted layer, frequency separation to isolate the reflection pattern, and careful reconstruction of the obscured detail underneath. Even skilled retouchers spend 10-20 minutes per image. A polarizing filter helps at capture time but cannot be applied after the fact. Magic Eraser's AI recognizes reflection patterns, separates the layers computationally, and reconstructs the clean scene in seconds.
Remove reflections in three steps
- 1
Upload the photo
Open Magic Eraser on web, iOS, or Android. Upload the photo with unwanted reflections — a shot through a window, a display case photo, or a mirror selfie where you want to remove yourself. JPEG, PNG, HEIC, and WebP formats are all supported up to 50 MP.
- 2
Brush over the reflection
Paint over the entire reflected area including its soft edges. For window reflections, brush the ghosted image that overlays the scene behind the glass. For spot reflections from flash or overhead lights, cover the bright highlight and the surrounding halo. Be generous with the selection to capture the full extent of the reflection.
- 3
Tap Erase and review
The AI separates the reflection from the underlying scene and reconstructs the clean image. Check that the area behind the former reflection looks natural with consistent color and detail. If any faint reflection remains, do a second pass over the residual area. Export at full resolution for print or web use.
Best for
- Storefront and window photography where interior displays are obscured by outdoor reflections
- Museum and gallery photography where glass cases create distracting reflections over exhibits
- Real estate photography where window reflections show the photographer or equipment
- Product photography on reflective surfaces where unwanted mirror images appear
- Car photography where windshield or body panel reflections distract from the vehicle
Tips for best results
Cover the entire reflection generously — partial selection leaves ghost edges that look worse than the original reflection. Strong single-source reflections (flash bounce, overhead light spot) are the easiest to remove because the AI has clear surrounding reference. Diffuse reflections across an entire window work well when the scene behind the glass has enough contrast for the AI to distinguish reflection from subject. For very strong reflections where the ghost image is nearly as bright as the real scene, two passes often produce better results than one: the first pass reduces the reflection and the second cleans up residual artifacts. Shooting at an angle to the glass rather than straight on reduces reflection intensity at capture time and makes AI removal even more effective.
Frequently asked questions
- Can it remove reflections from glass windows?
- Yes. Window reflections are one of the most common use cases. The AI identifies the reflected layer — typically an outdoor scene ghosted over an indoor subject — and removes it while preserving the interior detail behind the glass. Results are best when the reflection and subject have different content.
- What about reflections on shiny surfaces like car paint?
- Magic Eraser handles reflections on glossy surfaces including car paint, polished floors, and lacquered furniture. The AI distinguishes the surface's own color and finish from the reflected environment and restores the clean surface appearance without losing the natural sheen.
- Is removing reflections free?
- Yes. Magic Eraser's free tier includes the brush tool for reflection removal with daily usage limits. Upload your photo, brush the reflection, and export the clean result. Premium removes daily limits and enables high-resolution batch processing.
- How do I remove a reflection from a photo on Android or iPhone?
- Open Magic Eraser in any mobile browser or the iOS or Android app, load the photo from your camera roll, and pinch to zoom in on the glare. Brush over the whole reflection with your finger and tap Erase. The AI reconstructs the scene behind it right on your phone and saves the clean image back to your camera roll. It works the same as the desktop version, with no app install required if you use the browser — handy for fixing a window or glass-case shot straight after you take it.
- When does reflection removal not work well?
- The AI needs something to rebuild from, so results depend on how much of the real scene survives under the reflection. A faint glare over a clear subject comes out clean; but where the reflection is as bright as — or brighter than — what's behind it, the detail underneath was never really captured, so the AI fills a plausible reconstruction that may not match reality. Mirror-flat surfaces that show almost nothing but the reflection are the hardest. For the best result, brush the whole reflection (partial selection leaves ghost edges) and, at capture time, shooting at an angle to the glass reduces the glare to begin with.