How to remove blemishes from a photo
Temporary blemishes like pimples, spots, and minor marks don't represent how someone normally looks. AI blemish removal cleans these up instantly while preserving the natural skin texture that makes portraits look authentic.
Last updated
Remove blemishes now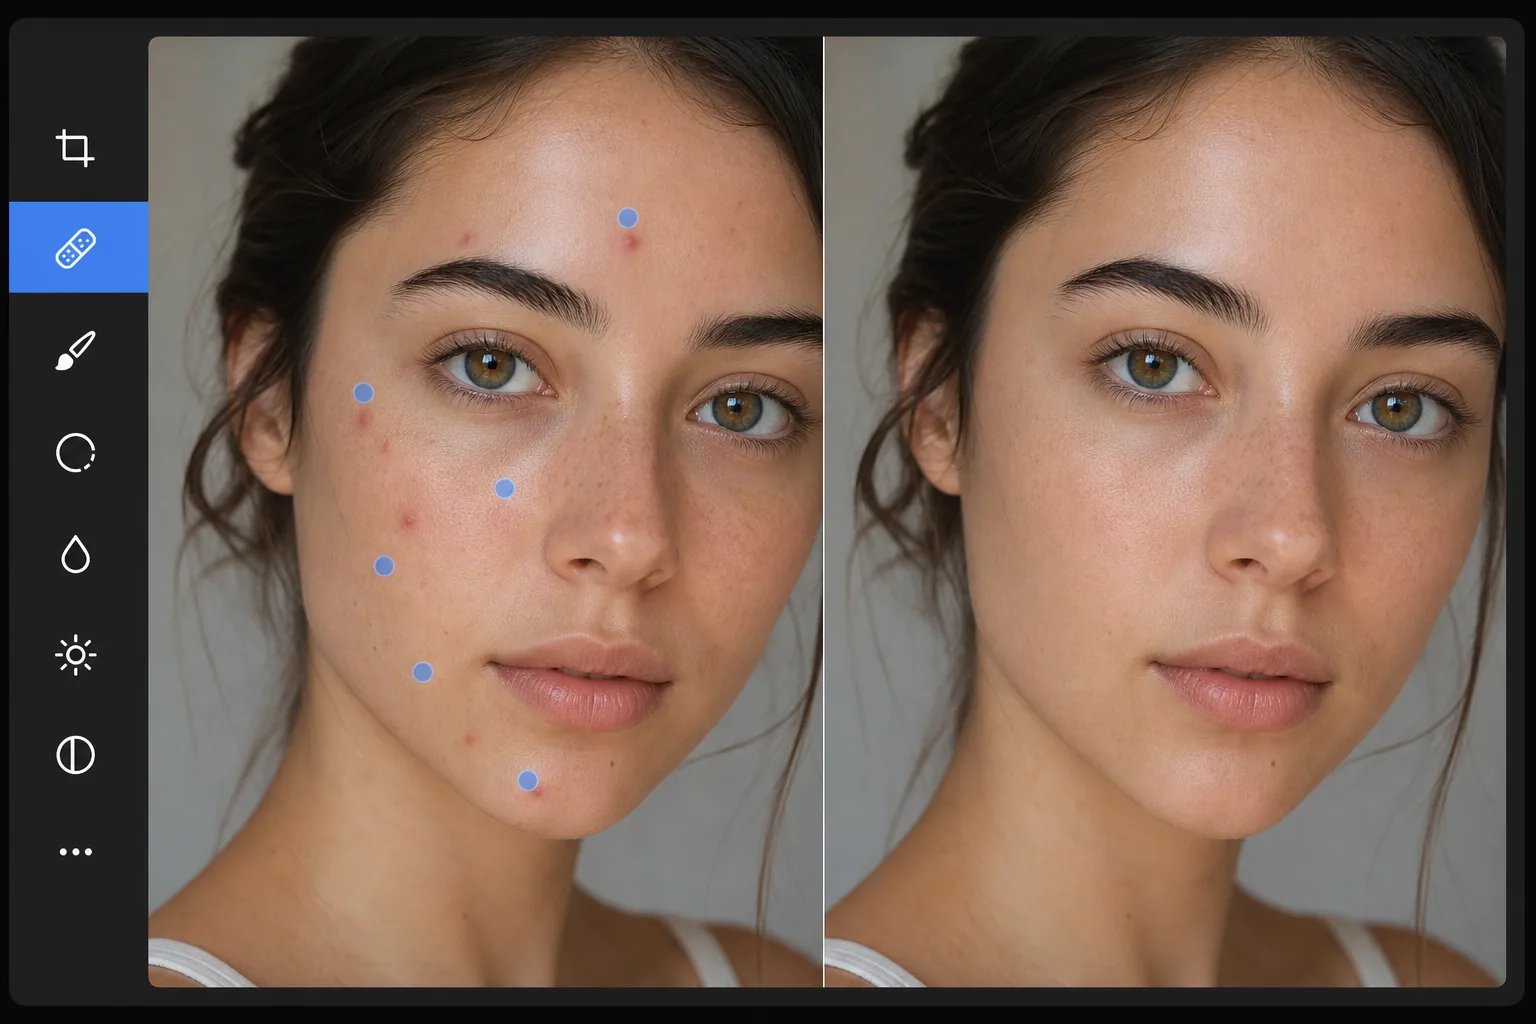
How to remove blemishes from a photo
To remove blemishes from a photo, open Magic Eraser on the web, iOS, or Android, upload the portrait, dab each spot with a small brush, and tap Erase. The AI replaces each pimple, mark, or scratch with skin sampled from right around it, so the pore texture and tone still match and the result looks like a clear-skin day rather than airbrushed. It includes limited free edits after sign-in. Target spots one at a time for the most natural finish, and leave permanent features like freckles and beauty marks unless you actually want them gone. The goal of blemish removal is to show the person as they normally look — without temporary imperfections that happened to be present on the day of the photo. Pimples, cold sores, scratches, bruises, and similar temporary marks distract from the subject and don't represent their typical appearance. The key is removing these temporary marks while preserving permanent features and natural skin texture. Over-retouching — smoothing all skin texture, removing all variation — creates the uncanny 'magazine airbrushing' effect that makes subjects look artificial. Magic Eraser's AI targets individual blemishes precisely, replacing each with the surrounding skin's natural texture pattern.
Remove blemishes in three steps
- 1
Upload the portrait
Open Magic Eraser on web, iOS, or Android. Upload the portrait or photo with blemishes to remove. JPEG, PNG, HEIC, and WebP supported. Higher resolution gives the AI more skin texture reference for natural-looking replacement.
- 2
Tap each blemish with the brush
Use a small brush size and tap or dab each blemish individually. For pimples and spots, a single tap centered on the mark is usually sufficient. For larger blemishes (a scratch or bruise), brush the full area. Work systematically across the face — forehead, cheeks, chin, nose — to catch all temporary marks.
- 3
Tap Erase and review
The AI replaces each blemish with clean skin that matches the surrounding area's texture, color, and lighting. The result looks like the person on a clear-skin day — natural, not retouched. Check at full zoom for any remaining spots and do a second pass if needed. Export at full resolution.
Best for
- Portrait and headshot photography where the subject has temporary blemishes that don't represent their normal appearance
- School and yearbook photos where students may have acne that they'd prefer not to appear in their permanent photo
- Wedding photography where stress-related breakouts or minor marks appear on the bride, groom, or wedding party
- Professional headshots for corporate websites, LinkedIn, and business profiles
- Social media photos where a temporary blemish detracts from an otherwise great shot
Tips for best results
Use the smallest brush size that covers each blemish. A brush that's too large removes surrounding skin detail unnecessarily, while one that's just right removes only the blemish and replaces it with the immediately surrounding texture. For clusters of blemishes (acne on a cheek), address each spot individually rather than painting over the entire area — individual targeting produces more natural results because the AI replaces each spot with the clean skin immediately around it. For blemishes near facial features (a pimple near the eye or at the lip line), be precise to avoid affecting the feature itself. Leave beauty marks and freckles unless the subject specifically requests their removal — these permanent features are part of the person's identity.
Frequently asked questions
- Will it look natural?
- Yes. The AI replaces each blemish with texture sampled from the surrounding skin, matching pore pattern, color, and lighting. The result looks like clear skin, not airbrushed or smoothed skin.
- Can it handle acne across a large area?
- Yes. Tap each spot individually and the AI cleans them up one by one. For dense acne, work in sections and review between passes. The AI maintains natural skin variation even when removing many spots.
- Does it remove freckles?
- Only if you brush over them. The AI removes whatever you target. To keep freckles while removing blemishes, simply avoid brushing the freckles — target only the temporary marks.
- Is blemish removal free?
- Yes. Magic Eraser's free tier includes the brush tool for blemish removal with daily usage limits. Premium removes limits for professional retouching workflows.
- How do I remove blemishes or acne from a photo on Android or iPhone?
- Open Magic Eraser in any mobile browser or the iOS or Android app, load the portrait from your camera roll, and pinch to zoom in on the face. Use a small brush and dab each pimple or spot individually with your finger, then tap Erase. The AI cleans each one on your phone using the skin right around it and saves the result back to your camera roll. It works the same as the desktop version, with no app install required if you use the browser.