
दाग और खामियाँ हटाना
स्थायी विशेषताओं को बरकरार रखते हुए दाग, धब्बे, और अस्थायी खामियों को लक्षित रूप से हटाना सीखें।
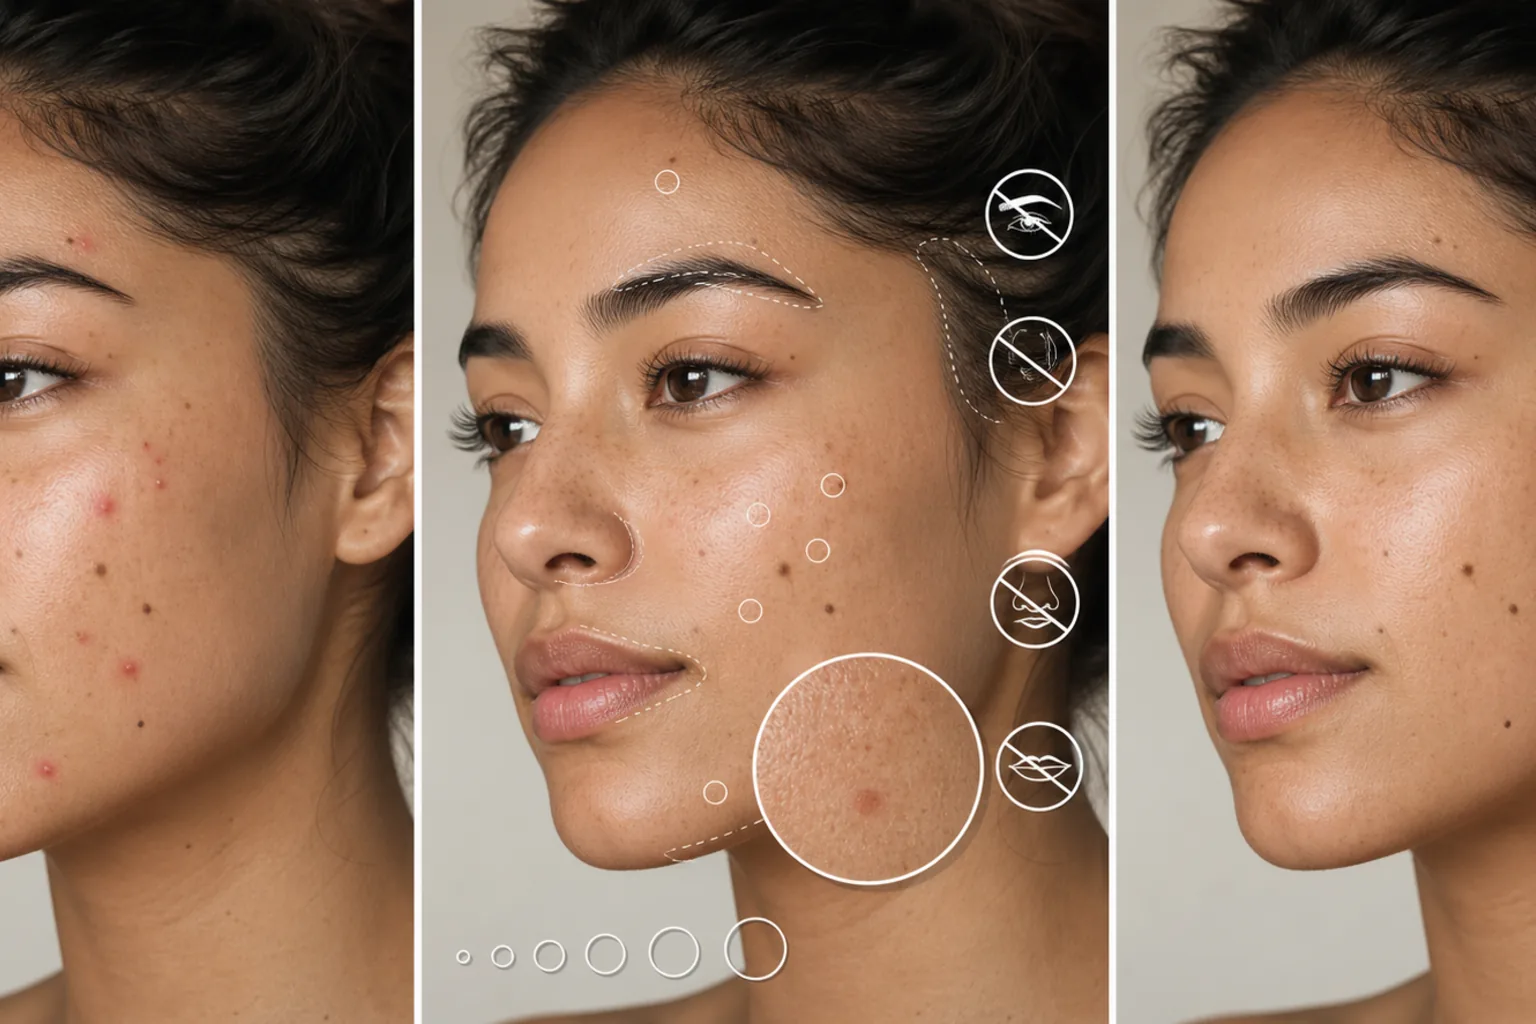
Lesson context before the long read
Review the result preview above, then scan the learning objectives below before reading the full lesson. Updated 2026-05-17.
Example visual uses an existing public asset: /content-images/portrait-blemish-removal-academy.webp.
Learning Objectives
- 1अस्थायी दागों और स्थायी विशेषताओं के बीच अंतर करें जिन्हें बनाए रखा जाना चाहिए
- 2स्वचालित बनावट मिलान के साथ दाग हटाने के लिए AI ऑब्जेक्ट रिमूवल का उपयोग करें
- 3किनारों, हेयरलाइन, और कंटूर के पास वाले जैसे चुनौतीपूर्ण दाग परिदृश्यों को संभालें
दागों बनाम त्वचा विशेषताओं की पहचान
दाग हटाना मुँहासे, छोटे खरोंच, कीड़े के काटने, और बिखरे बालों जैसी अस्थायी खामियों को साफ़ करने के बारे में है, जबकि व्यक्ति की स्थायी विशेषताओं को अछूता छोड़ देना है। एक आम गलती है तिल, झाइयाँ, या प्राकृतिक त्वचा विविधताओं को हटाना जो किसी व्यक्ति की पहचान का हिस्सा हैं। एडिटिंग शुरू करने से पहले, एक पल लें यह तय करने के लिए कि कौन से निशान अस्थायी विकर्षण हैं और कौन से व्यक्ति के चरित्र को परिभाषित करते हैं। यही अंतर पेशेवर रीटचिंग को अत्यधिक प्रोसेसिंग से अलग करता है।
अत्यधिक एडिटिंग के बिना लक्षित निष्कासन
Magic Eraser में AI-संचालित इरेज़र टूल दाग हटाने के लिए आदर्श है क्योंकि यह हटाए गए क्षेत्र को भरने के लिए स्वचालित रूप से आसपास की त्वचा की बनावट और टोन का नमूना लेता है। बस दाग पर ब्रश करें और एल्गोरिदम आसन्न त्वचा से रंग, प्रकाश दिशा, और रोमछिद्र बनावट का मिलान करता है। सर्वोत्तम परिणामों के लिए, दाग से थोड़ा बड़ा ब्रश आकार उपयोग करें। बड़े आकार के चयन भौंहों, नथुनों, या होंठ के किनारों जैसी पास की विशेषताओं से अवांछित बनावट खींच सकते हैं।
प्रामाणिक त्वचा चरित्र को बनाए रखना
चुनौतीपूर्ण क्षेत्रों में अतिरिक्त सावधानी की आवश्यकता होती है। हेयरलाइन के पास के दागों को त्वचा में बालों की लटों को क्लोन करने से बचने के लिए सटीक चयन की आवश्यकता होती है। जॉलाइन या नाक के पुल के साथ की खामियाँ टोनल सीमाओं पर बैठती हैं जहाँ प्रकाश और छाया मिलते हैं, इसलिए स्वचालित फ़िल को ग्रेडिएंट को सही ढंग से मिलाने के लिए दूसरे पास की आवश्यकता हो सकती है। ग्रुप पोर्ट्रेट या इवेंट फ़ोटो पर काम करते समय जहाँ गति मायने रखती है, एक साथ कई चेहरों पर स्पष्ट दागों का पता लगाने और हटाने के लिए बैच प्रोसेसिंग का उपयोग करें, फिर सटीकता के लिए एक त्वरित मैनुअल समीक्षा करें।
Key Takeaways
- ✓हमेशा तिल और झाइयों जैसी स्थायी विशेषताओं को बनाए रखें जो व्यक्ति को परिभाषित करती हैं
- ✓सबसे साफ़ स्वचालित फ़िल के लिए अपने ब्रश को दाग से थोड़ा ही बड़ा रखें
- ✓इवेंट और ग्रुप फ़ोटो के लिए बैच दाग पहचान का उपयोग करें, फिर परिणामों की मैन्युअल रूप से समीक्षा करें