
Comment supprimer le flou de mouvement des photos — Magic Eraser
Apprenez a corriger le flou de mouvement cause par le bouge de l'appareil ou le mouvement du sujet grace aux techniques AI de netteté et de debuilage. Guide pas a pas avec conseils de prevention pour des photos plus nettes.
SEO & Growth
Vérifié par Magic Eraser Editorial ·
Sommaire
- Comment le bouge de l'appareil et le mouvement du sujet creent differents motifs de flou
- Le debuilage AI : comment la technologie recupere les details perdus
- Gerer les artefacts de debuilage pour des resultats d'aspect naturel
- Quand supprimer les elements flous plutot que de les debuiler
- Techniques d'appareil photo pour prevenir le flou de mouvement avant qu'il ne se produise
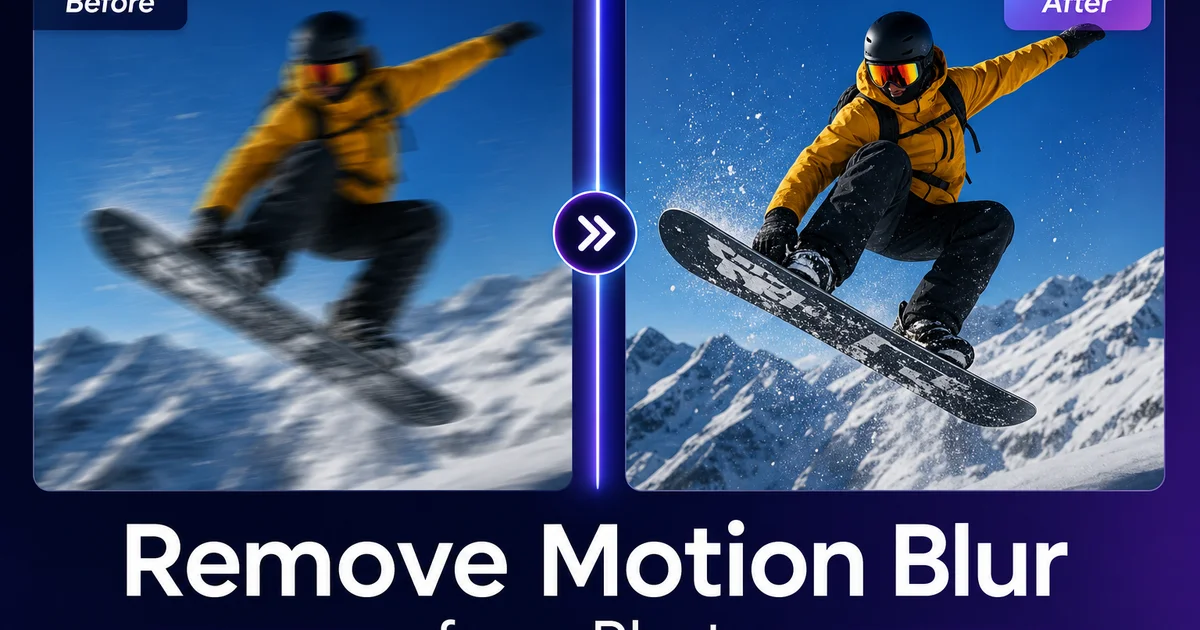
Le flou de mouvement est l'une des raisons les plus courantes pour lesquelles une photo echoue. Vous avez capture un moment unique — les premiers pas d'un enfant, un oiseau qui prend son envol, un coup de pied decisif — et quand vous examinez l'image, le sujet n'est qu'une trainee de couleur plutôt qu'une figure nette et definie. L'explication technique est simple : l'obturateur de l'appareil est reste ouvert assez longtemps pour que l'appareil ou le sujet se deplace d'une distance visible sur le capteur pendant l'exposition. L'explication emotionnelle est que vous avez perdu un moment que vous ne pouvez pas recreer, et chaque photographe a connu cette frustration specifique.
Il existe deux types distincts de flou de mouvement, et comprendre la difference est important pour la correction. Le bouge de l'appareil se produit lorsque les mains du photographe bougent pendant l'exposition. Cela produit un flou directionnel uniforme sur toute l'image, et chaque element, du premier plan a l'arriere-plan, est egalement affecte. Le flou de mouvement du sujet se produit lorsque le sujet bouge plus vite que la vitesse d'obturation ne peut le figer. Le sujet en mouvement est flou tandis que les elements statiques du cadre restent nets. De nombreuses photos problematiques contiennent les deux types a la fois, principalement dans la photographie d'action et en faible luminosite, ou le photographe et le sujet sont tous deux en mouvement.
Le debuilage AI a fait des progres remarquables dans la recuperation des details des images floues de mouvement. Les algorithmes de deconvolution traditionnels exigeaient que vous estimiez manuellement le noyau de flou — la direction et l'amplitude du flou — et appliquiez un inverse mathematique qui amplifiait souvent le bruit et introduisait des artefacts de sonnerie. Le debuilage AI moderne analyse automatiquement le motif de flou, le separe des details de l'image, et reconstruit les bords et les textures nets en utilisant une comprehension apprise de l'apparence des objets du monde reel lorsqu'ils sont nets. Ce guide explique comment utiliser AI Enhance, AI Filter et Magic Eraser ensemble pour recuperer le resultat le plus net possible a partir de photos floues de mouvement, ainsi que les techniques d'appareil photo pour prevenir le probleme en premier lieu.
- AI Enhance analyse automatiquement la direction et l'amplitude du flou de mouvement, appliquant une deconvolution inverse mathematique pour recuperer les details perdus sans estimation manuelle du noyau de flou.
- Le bouge de l'appareil et le flou de mouvement du sujet necessitent des approches de correction differentes — identifier le type de flou que vous avez est la premiere etape essentielle.
- AI Filter lisse les artefacts de debuilage comme les halos de sonnerie et le bruit d'ombre amplifie tout en preservant la netteté recuperee.
- Magic Eraser peut supprimer entierement les elements d'arriere-plan fortement flous lorsque leur debuilage produirait un resultat imparfait.
- La prevention par une selection appropriee de la vitesse d'obturation elimine la plupart des flous de mouvement — une photo nette et bruitee est plus facile a corriger qu'une photo propre mais floue.
Comment le bouge de l'appareil et le mouvement du sujet creent differents motifs de flou
Le bouge de l'appareil et le flou de mouvement du sujet ont un aspect different sous un examen attentif. Reconnaitre le type auquel vous avez affaire determine la strategie de correction la plus efficace. Le bouge de l'appareil produit un flou de direction constante sur tout le cadre. Si votre main a legèrement bouge vers la droite pendant une exposition d'une demi-seconde, chaque element de l'image — le sujet, l'arriere-plan, le premier plan — montre la meme trainee vers la droite. La direction du flou peut ne pas etre parfaitement horizontale ou verticale — elle suit le chemin reel trace par votre main, qui est souvent un leger arc ou une diagonale. Dans les cas graves, vous pouvez voir la position de debut et de fin des points lumineux comme des trainees allongees.
Le flou de mouvement du sujet est localise sur l'objet en mouvement. Une photo d'un joueur de football en plein tir pourrait montrer le pied et la jambe inferieure comme un arc flou de mouvement tandis que la tee du joueur, le but derriere lui et l'herbe sous ses pieds sont parfaitement nets. Cette selectivite spatiale est l'identifiant cle. Si certaines parties de l'image sont nettes tandis que d'autres sont floues, vous avez affaire a un mouvement du sujet. La direction du flou suit le chemin de deplacement du sujet, et differentes parties du sujet peuvent montrer differentes quantites de flou selon leur vitesse. Le pied qui frappe bouge plus vite que le genou, donc il est plus flou.
Un troisieme motif, moins courant, est le flou rotationnel, qui se produit lorsque l'appareil photo tourne autour de son axe optique pendant l'exposition. Cela cree un flou en spirale qui est plus net au centre du cadre et de plus en plus flou vers les bords. Le flou rotationnel se produit le plus souvent lorsque les photographes tordent leur prise sur l'appareil en appuyant sur le bouton d'obturation. Le flou de filage — ou vous suivez intentionnellement un sujet en mouvement — cree un motif hybride : le sujet est assez net car l'appareil a suivi son mouvement, tandis que l'arriere-plan montre un flou de mouvement horizontal du au deplacement lateral de l'appareil. Chaque motif repond differemment aux algorithmes de debuilage.
- Le bouge de l'appareil cree un flou directionnel uniforme sur tout le cadre — chaque element, du premier plan a l'arriere-plan, montre la meme trainee.
- Le flou de mouvement du sujet est localise sur l'objet en mouvement tandis que les elements statiques restent nets — le diagnostic cle est de savoir si une partie de l'image est nette.
- Le flou rotationnel se propage en spirale depuis le centre du cadre, generalement cause par une torsion de votre prise en appuyant sur le bouton d'obturation.
- Le flou de filage est un hybride intentionnel — un sujet relativement net sur un arriere-plan flou de mouvement qui evoque la vitesse et le mouvement.
Le debuilage AI : comment la technologie recupere les details perdus
Les mathematiques derriere le debuilage sont conceptuellement elegantes. Une image floue de mouvement est, en termes simplifies, l'image nette convoluee avec un noyau de flou — une description mathematique de la facon dont la lumiere de chaque pixel a ete etalee sur le capteur pendant l'exposition. Si vous connaissez precisement le noyau de flou, vous pouvez appliquer l'operation inverse — la deconvolution — pour reconstruire l'image nette originale. Les outils de debuilage traditionnels exigeaient que les photographes estiment manuellement ce noyau en specifiant la direction et la distance du flou, un processus fastidieux qui produisait rarement des resultats optimaux car l'estimation humaine des parametres de flou est intrinsequement imprecise.
Les modeles de debuilage AI, y compris celui qui alimente AI Enhance, sont entrainees sur des millions de paires d'images — des originaux nets et leurs versions floues artificiellement avec des noyaux de flou connus. Grace a cet entrainement, l'AI apprend a estimer le noyau de flou directement a partir de l'image floue elle-meme, eliminant le besoin de saisie manuelle des parametres. Plus important encore, l'AI apprend les proprietes statistiques des images naturelles nettes — les bords, les textures et les motifs — qui lui permettent de reconstruire des details que la deconvolution mathematique pure seule ne peut pas recuperer. Lorsque l'AI nettoie un œil flou dans un portrait, elle utilise sa comprehension apprise de l'apparence des yeux lorsqu'ils sont nets, et non pas simplement l'inversion du flou.
Le resultat pratique est que le debuilage AI gere une gamme beaucoup plus large de severites et de motifs de flou que les outils traditionnels. Le leger bouge de l'appareil — le genre qui rend une image legèrement molle plutôt qu'evidemment floue — repond presque parfaitement, AI Enhance recuperant des details virtuellement indiscernables d'un original net. Le flou modere — ou les bords sont clairement etales mais le sujet reste distinct — produit de bons resultats avec une amelioration visible, bien que les textures fines comme les cheveux et le tissage des tissus puissent ne pas etre entierement recuperees. Le flou severe — ou le sujet n'est qu'une trainee de couleur — atteint les limites de ce que toute technologie peut recuperer, bien que l'AI puisse souvent produire une image utilisable a partir de ce qui aurait ete une perte totale avec les outils traditionnels.
- Le debuilage AI elimine l'estimation manuelle du noyau de flou en apprenant a detecter la direction et l'amplitude du flou directement a partir de l'image.
- L'entrainement sur des millions de paires d'images nettes-floues apprend a l'AI l'apparence des objets du monde reel lorsqu'ils sont nets, permettant une reconstruction des details au-dela de la deconvolution mathematique pure.
- Le leger bouge de l'appareil est corrige presque parfaitement — le resultat est souvent indiscernable d'une capture native nette.
- Le flou severe atteint les limites de toute technologie de debuilage, mais l'AI produit typiquement une image utilisable a partir de ce qui serait autrement une perte totale.
Gerer les artefacts de debuilage pour des resultats d'aspect naturel
Le debuilage n'est pas une operation gratuite. Il amplifie certains types de degradation d'image comme effet secondaire de la recuperation de la netteté. L'artefact le plus courant est la sonnerie, aussi appelee phenomene de Gibbs, qui apparaît comme des halos lumineux ou sombres le long des bords a fort contraste. Dans une photo debuilee, vous pourriez voir un halo lumineux autour de la silhouette d'une personne sur un fond sombre, ou des franges sombres autour de lumieres vives. Cela se produit parce que le processus de deconvolution depasse la reconstruction du bord. Plus le debuilage est agressif, plus la sonnerie est prononcee.
L'amplification du bruit est le deuxieme artefact majeur. Le flou de mouvement agit comme un filtre passe-bas qui lisse le bruit a grain fin dans l'image. Lorsque vous inversez le flou, vous inversez egalement le lissage, ramenant et amplifiant le bruit sous-jacent du capteur, principalement dans les zones d'ombre ou le bruit est le plus concentre. Une photo debuilee peut montrer des details nets et propres dans les tons moyens et les hautes lumieres bien exposes tandis que les ombres deviennent granuleuses et bruitees. Le mode de reduction de bruit d'AI Filter gere bien cela — appliquez une reduction de bruit ciblee sur les tons d'ombre apres le debuilage pour calmer le grain amplifie sans affecter les details recuperes dans les zones plus lumineuses.
Pour les images debuilees fortement traitees qui ont une qualite artificiellement evidente — des bords trop nets entoures de zones trop lissees, des halos de netteté visibles et des transitions tonales non naturelles — une approche contre-intuitive fonctionne bien. Appliquez une legère superposition de grain argentique via AI Filter apres que toute la netteté et la reduction de bruit sont terminees. Le grain ajoute une texture organique et analogique qui masque les artefacts mineurs du traitement numerique et donne a l'image l'impression d'avoir ete capturee sur un film legerement granuleux plutot que reconstruite numeriquement a partir d'un original flou. Cette technique est largement utilisee dans les effets visuels cinematographiques pour integrer des elements generes numeriquement avec des sequences photographiees.
- Les artefacts de sonnerie — halos lumineux ou sombres le long des bords a fort contraste — sont l'effet secondaire le plus visible du debuilage et s'aggravent avec une correction agressive.
- L'amplification du bruit dans les ombres resulte de l'inversion de l'effet de lissage du flou — la reduction de bruit d'AI Filter calme le grain des ombres sans affecter les details recuperes.
- Une legère superposition de grain argentique apres le debuilage masque les artefacts mineurs de traitement et donne a l'image une qualite organique qui semble naturelle.
- Appliquez les corrections dans l'ordre : debuilez d'abord, puis reduction de bruit, puis superposition de grain — inverser cette sequence degrade le resultat du debuilage.
Quand supprimer les elements flous plutot que de les debuiler
Tous les elements flous d'une photo ne meritent pas d'etre debuiles. Parfois, la solution la plus propre est de supprimer entierement l'objet flou avec Magic Eraser plutot que de tenter une correction de debuilage qui produira des resultats imparfaits. Cela est surtout vrai pour les elements d'arriere-plan qui sont accidentellement flous et ne sont pas le centre d'interet de l'image. Un portrait de rue ou le sujet est net mais ou un taxi qui passe est flou de mouvement en arriere-plan sera meilleur avec le taxi entierement supprime qu'avec un taxi partiellement debuile montrant des artefacts de traitement.
Le cadre decisionnel est simple : si l'element flou est le sujet de la photo, debuilez-le. Si l'element flou est une distraction d'arriere-plan, supprimez-le. Si l'element flou est un sujet secondaire qui ajoute du contexte mais n'est pas le centre d'interet principal, essayez d'abord le debuilage et utilisez Magic Eraser comme solution de repli si le resultat n'est pas satisfaisant. Pour les photos de groupe ou une personne a bouge et est floue tandis que les autres sont nets, aucune des deux approches n'est ideale. C'est un cas ou la prevention par une vitesse d'obturation plus rapide est la seule vraie solution, car vous ne pouvez pas debuiler de maniere convaincante un visage pour recuperer des details d'identite, et supprimer la personne modifie la composition du groupe.
La photographie d'action et de sport presente frequemment des scenarios de flou mixte ou certains elements beneficient d'une suppression. Une photo de basket avec un joueur net filant vers le panier pourrait avoir des spectateurs flous en arriere-plan, un arbitre avec des traînées de mouvement, et un ballon flou que le joueur vient de lancer. Dans ce cas, debuilez le joueur pour une netteté maximale, laissez le ballon flou car il transmet la vitesse et l'energie du tir, supprimez l'arbitre flou de mouvement qui est une distraction, et laissez les spectateurs flous car le contexte de la foule est important. Chaque element recoit le traitement qui sert le mieux l'image globale.
- Supprimez les distractions d'arriere-plan floues avec Magic Eraser lorsque leur debuilage produirait des resultats imparfaits — la suppression est souvent la solution la plus propre.
- Debuilez le sujet principal mais envisagez de laisser un certain flou de mouvement sur les elements secondaires comme un ballon lance qui transmet vitesse et energie.
- Les visages flous dans les photos de groupe ne peuvent pas etre debuiles de maniere convaincante pour recuperer des details d'identite — la prevention par une vitesse d'obturation plus rapide est la seule vraie solution.
- Evaluez chaque element flou individuellement : certains beneficient d'un renforcement de netteté, certains d'une suppression, et certains d'une retention intentionnelle en tant que flou de mouvement creatif.
Techniques d'appareil photo pour prevenir le flou de mouvement avant qu'il ne se produise
Le debuilage le plus efficace est celui que vous n'avez jamais besoin de faire. Comprendre et controler la vitesse d'obturation est la competence fondamentale pour prevenir le flou de mouvement. La regle du reciproque fournit une base de depart : votre vitesse d'obturation minimale pour la prise de vue a main levee devrait etre un divise par la focale effective de votre objectif. Un objectif de 50 mm necessite au moins 1/50 seconde, un objectif de 100 mm necessite 1/100 seconde, et un teleobjectif de 200 mm necessite 1/200 seconde. Ce sont des minimums — pour des resultats nets avec des sujets en mouvement, vous avez besoin de vitesses d'obturation beaucoup plus rapides, souvent 1/500 ou 1/1000 seconde pour une action moderee et 1/2000 ou plus pour le sport et la faune.
Lorsque les conditions de lumiere vous forcent a faire un compromis, choisissez le bruit plutôt que le flou a chaque fois. Augmenter votre ISO de 400 a 3200 vous permet de shooter a 1/500 seconde au lieu de 1/60 seconde — c'est la difference entre une photo sportive nette et un désastre flou de mouvement. Oui, l'ISO 3200 introduit du bruit visible. Mais AI Enhance gere tres bien la reduction de bruit, recuperant des details propres a partir d'images bruitees bien mieux qu'il ne recupere des details nets a partir d'images floues. Une photo nette et bruitee a toutes les informations de detail preservees sous une couche de bruit qui peut etre filtrée. Une photo propre mais floue a perdu de maniere permanente des informations de detail qu'aucun algorithme ne peut completement reconstruire.
La stabilisation optique de l'image — disponible dans la plupart des objectifs d'appareil photo modernes et des appareils photo de smartphones — offre deux a quatre stops supplementaires de capacite de prise de vue a main levee, ce qui signifie que vous pouvez utiliser des vitesses d'obturation deux a quatre fois plus longues que ne le suggere la regle du reciproque sans introduire de bouge de l'appareil. Activez-la chaque fois que vous shootez a main levee. Pour les photos critiques, utilisez le mode rafale et prenez dix a vingt images. Meme avec le bouge de la main, une ou deux images dans une rafale capturent souvent un moment entre les battements de cœur ou votre corps etait momentanement immobile, produisant un resultat nettement plus net qu'une seule image soigneusement cadree. Examinez votre rafale en zoom avant et selectionnez l'image la plus nette avant de l'editer.
- Suivez la regle du reciproque comme minimum — la vitesse d'obturation doit etre au moins un divise par votre focale pour la prise de vue a main levee sans flou.
- Choisissez le bruit plutôt que le flou a chaque fois — augmenter l'ISO pour obtenir une vitesse d'obturation plus rapide produit un bruit corrigible, tandis que le flou perd defintivement les details.
- Activez la stabilisation optique de l'image pour deux a quatre stops supplementaires de capacite a main levee, et utilisez le mode rafale pour capturer l'image la plus nette entre les battements de cœur.
- Pour les sujets en action, des vitesses d'obturation de 1/500 seconde ou plus sont essentielles — 1/2000 ou plus pour le sport et la faune.
How to do it
- 1
Identify the type of motion blur in your photo
Before attempting to fix motion blur, determine whether it is caused by camera shake or subject movement — the correction approach differs. Camera shake produces uniform directional blur across the entire image, often at a consistent angle matching the direction your hand moved during the exposure. Subject motion blur affects only the moving object while the background remains sharp. A running dog is blurred but the park behind it is crisp. Some photos have both types at once if you were panning to track a moving subject but did not match its speed perfectly.
- 2
Apply AI Enhance deblurring to recover lost sharpness
Upload the blurred photo to AI Enhance and select the deblurring or sharpening mode. The AI analyzes the blur pattern. Its direction, magnitude, and consistency — and applies a mathematically inverse change called deconvolution to reconstruct the sharp detail that existed before the blur occurred. For mild to moderate camera shake, AI Enhance can recover remarkable detail. For subject motion blur, the AI focuses on the blurred region and reconstructs edges and textures based on the sharp areas of the image as context.
- 3
Use AI Filter to manage artifacts from heavy deblurring
Aggressive deblurring on severely blurred images can introduce artifacts. Ringing around high-contrast edges, amplified noise in shadow areas, and unnatural sharpness halos. Apply AI Filter after deblurring to smooth these artifacts while retaining the recovered detail. A subtle noise reduction filter calms the shadow noise that deblurring amplifies. If the deblurred image has an overly processed look, a gentle film grain filter from AI Filter can add organic texture that masks minor artifacts and makes the result look more natural.
- 4
Remove distracting blurred elements with Magic Eraser
In photos where the main subject is sharp but background elements have motion blur. Passing cars, walking pedestrians, swinging signs — you can use Magic Eraser to remove the blurred objects fully rather than trying to deblur them. This is often a cleaner solution than deblurring when the blurred element is not the focus of the image. A street portrait with a motion-blurred bus in the background looks better with the bus removed fully than with a partially recovered, still-imperfect bus image.
- 5
Prevent future motion blur with camera technique adjustments
For camera shake prevention, follow the reciprocal rule. Your shutter speed should be at least one divided by your focal length. A 50mm lens needs at least one-fiftieth of a second, a 200mm lens needs one-two-hundredth. Enable optical image stabilization if your camera or lens has it. For subject motion, increase your shutter speed by raising ISO or opening your aperture. In low light where fast shutter speeds require very high ISO, accept the noise and clean it up later. A noisy sharp photo can be fixed, but a clean blurred photo is much harder to recover.