
Replacing Overcast Skies with Blue Skies
Transform dull exterior photos by replacing gray skies with realistic blue sky and cloud compositions.
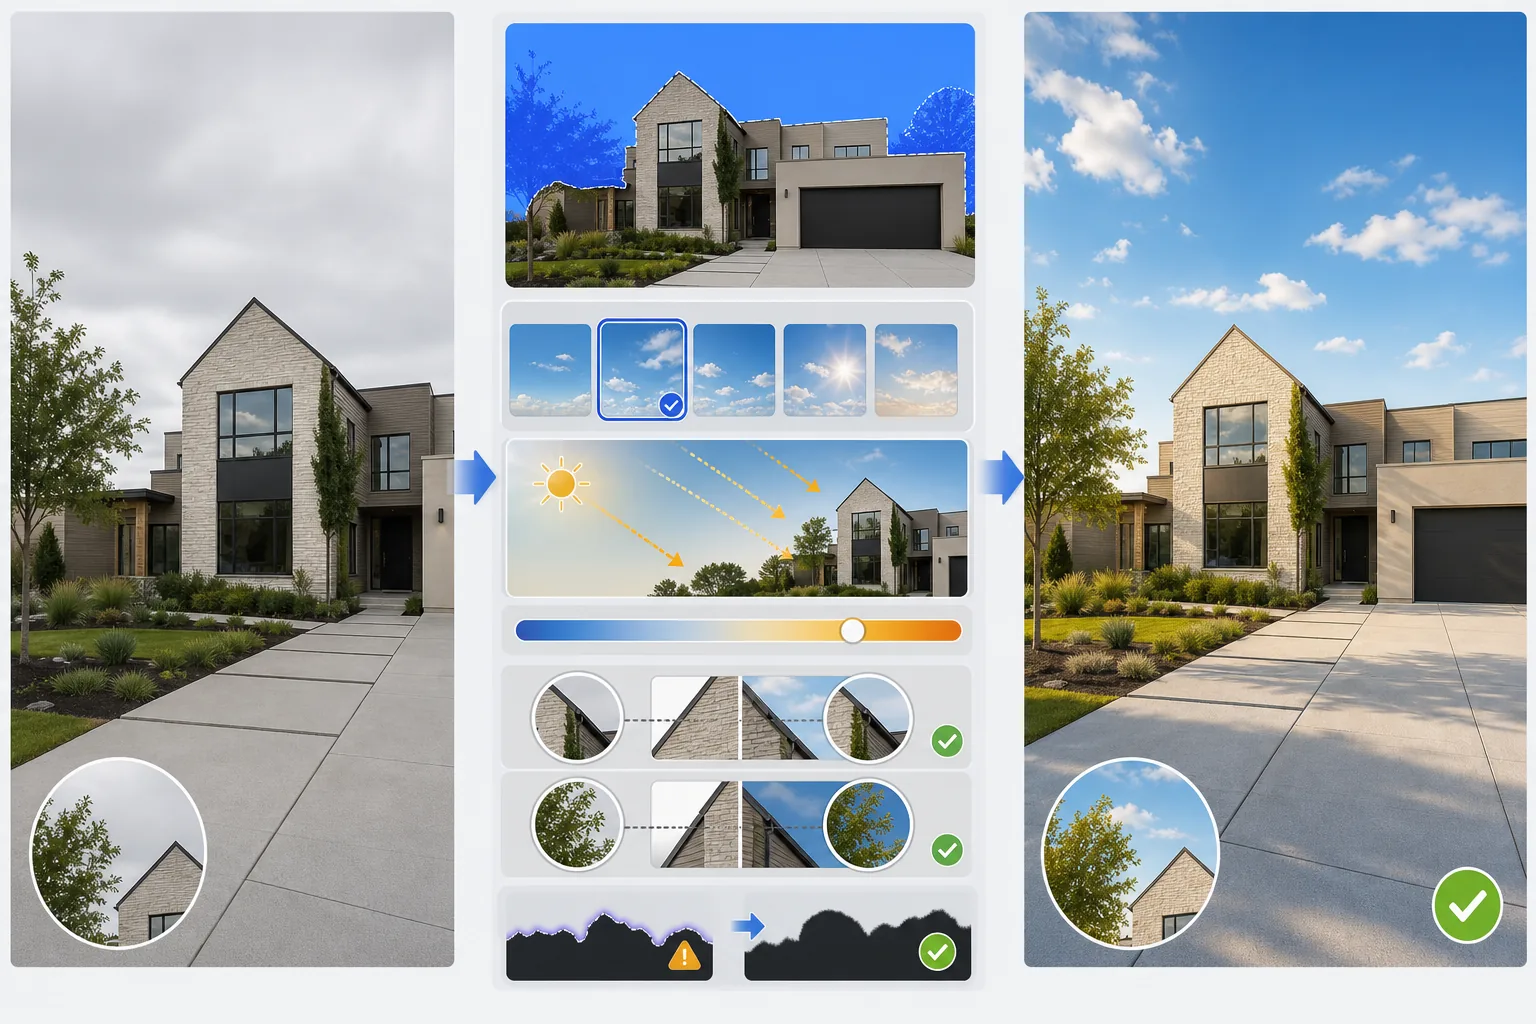
Lesson context before the long read
Review the result preview above, then scan the learning objectives below before reading the full lesson. Updated 2026-05-17.
Example visual uses an existing public asset: /content-images/real-estate-sky-replacement-academy.webp.
Learning Objectives
- 1Use AI sky detection to mask and replace an overcast sky in one step
- 2Match the replacement sky's lighting direction and color temperature to the ground scene
- 3Blend the horizon line so the transition between new sky and existing elements is invisible
When sky replacement improves a listing photo
An overcast sky makes even a beautiful property look dull and uninviting. Sky replacement is one of the highest-impact single edits you can make to an exterior listing photo. Magic Eraser's sky replacement tool uses AI to detect the sky boundary, including areas visible between tree branches and above irregular rooflines, and masks it automatically. Choose a replacement sky from the built-in library that matches the general time of day and sun position in the original photo. A morning scene calls for a soft blue sky with light clouds on the horizon, while a midday shot supports a deeper blue with scattered cumulus clouds.
Choosing believable replacement skies
Matching the lighting direction is critical for a convincing result. If shadows in the ground scene fall to the right, the sun in the replacement sky must come from the left. A mismatch between shadow direction and sky highlights is the easiest way to spot a fake sky swap. Also compare the color temperature: a warm golden-hour ground scene paired with a cool midday sky creates a visual conflict that feels wrong even if the viewer cannot articulate why. Use the temperature slider to warm or cool the replacement sky until it harmonizes with the building and landscape tones.
Matching sky lighting with the scene
The horizon line is where the swap is most likely to show artifacts, especially where the building's roofline, trees, or fences meet the sky. After replacement, zoom into the horizon at 200% and check for haloing, fringing, or hard edges. If the original sky was overcast, there may be a bright gray band just above the roofline where the old sky bleeds through. Use the refine-edge brush along the roofline to tighten the mask, then apply a gentle feather of two to three pixels to soften the join. The result should look as natural as if the photo were taken on the replacement sky day.
Key Takeaways
- ✓Choose a replacement sky that matches the time of day and sun position of the original
- ✓Align the replacement sky's lighting direction with the ground scene's shadow pattern
- ✓Refine and feather the horizon mask to eliminate haloing and hard edges at the roofline