How to fix an underexposed photo
Indoor shots without flash that came out too dark, backlit portraits where the subject is a silhouette, or evening snapshots where the camera underexposed to preserve highlights — underexposed photos hide detail in muddy shadows. Magic Eraser's AI Enhance lifts exposure intelligently, recovering hidden detail without blowing out highlights.
Last updated
Fix dark photos now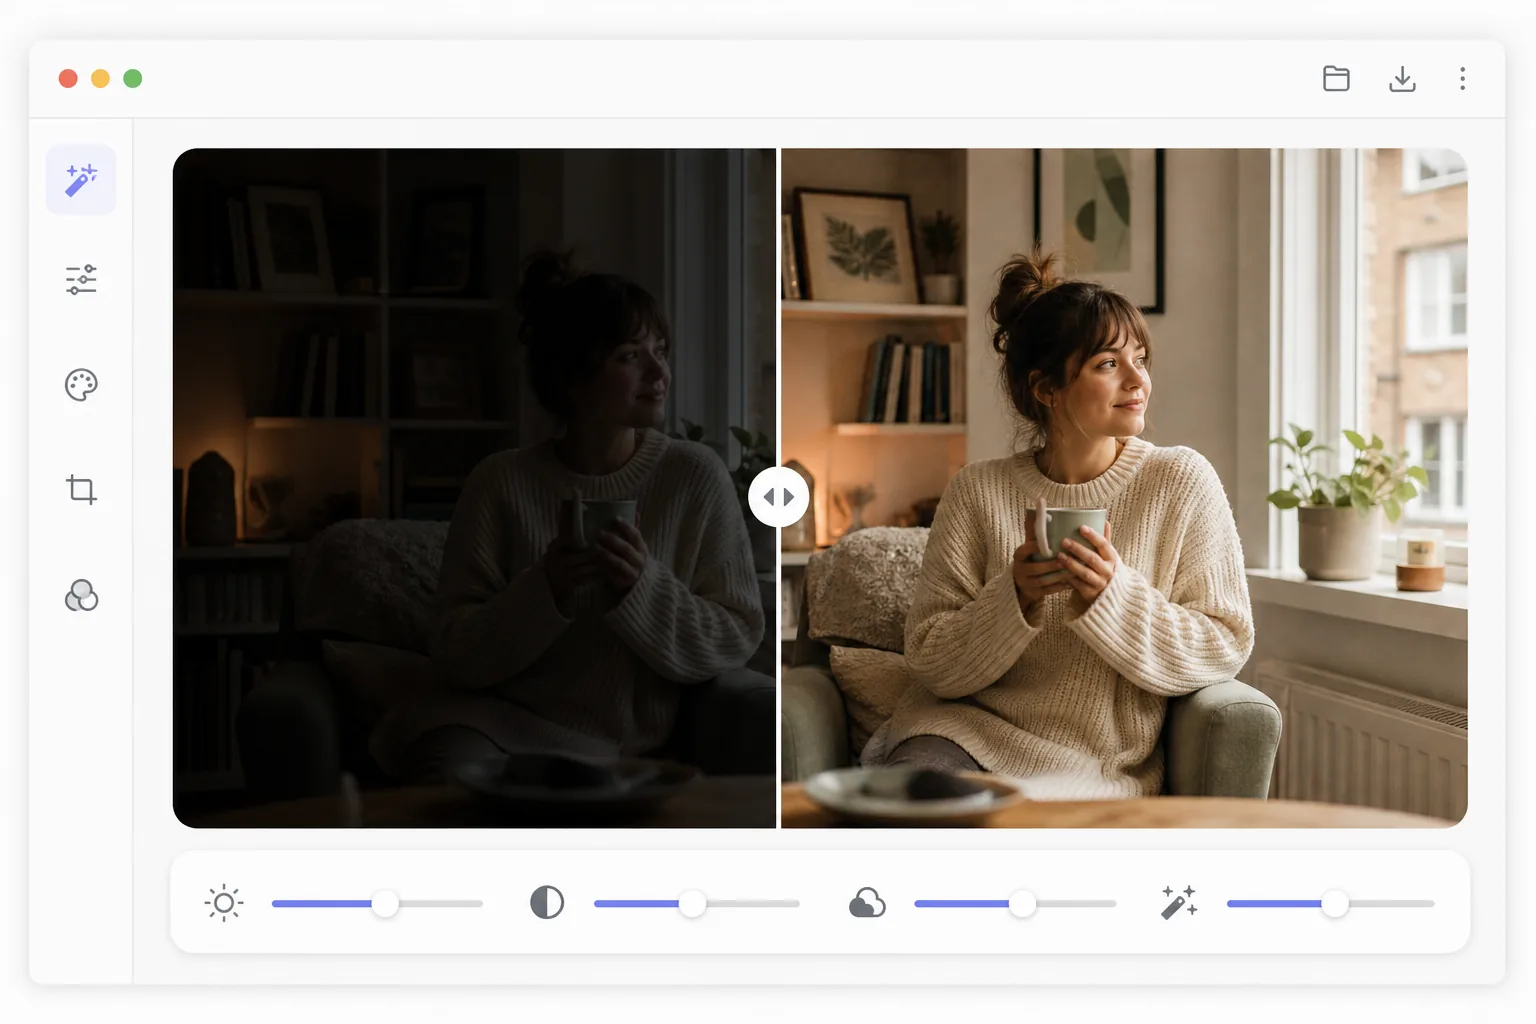
How to fix an underexposed photo
To fix an underexposed photo, open Magic Eraser on the web, iOS, or Android, select AI Enhance, upload the dark image, and let the AI correct the exposure — it lifts the shadows to recover hidden detail while holding the highlights, cleaning up the noise that brightening reveals and keeping the scene's natural mood. It includes limited free edits after sign-in. That's the difference from just dragging a brightness slider, which blows out highlights and amplifies grain. It works best on photos underexposed by 1–2 stops; very dark shots recover too, but with more noise. The naive fix for an underexposed photo is to drag the brightness slider up. This uniformly lifts all tones, which blows out any highlights that were correctly exposed, amplifies sensor noise that was hidden in the shadows (creating visible grain and color speckling), shifts the overall color balance toward the sensor's noise floor color, and produces flat, washed-out midtones. Professional exposure correction requires lifting shadows selectively while holding highlights, applying noise reduction to the newly revealed shadow detail, correcting the color shift that occurs when dark sensor data is amplified, and restoring contrast in the midtones. This process involves multiple Lightroom or Photoshop adjustments carefully balanced against each other. Magic Eraser's AI Enhance performs all these corrections simultaneously, understanding which areas need lifting and by how much based on the scene content.
Fix underexposure in three steps
- 1
Upload the photo
Open Magic Eraser on web, iOS, or Android and select AI Enhance. Upload the underexposed photo — an indoor shot that is too dark, a backlit portrait, or an evening scene where detail is lost in shadows. JPEG, PNG, HEIC, and RAW formats are supported. RAW files preserve the most shadow data for recovery.
- 2
Apply AI exposure correction
The AI analyzes the image histogram and scene content to determine optimal exposure. It lifts shadows to reveal hidden detail, holds highlights to prevent blowout, reduces the noise that becomes visible when shadows are brightened, and corrects the color shift from amplifying dark sensor data. The correction adapts to the scene — portraits get face-priority exposure, landscapes balance sky and foreground.
- 3
Fine-tune and export
Review the enhanced photo using the before/after toggle. If the auto-correction needs adjustment, use the manual exposure slider to dial in your preferred brightness level while keeping the AI's intelligent shadow recovery and noise reduction. The AI preserves the photo's mood — evening shots stay warm, not daylight-bright. Export at full resolution.
Best for
- Indoor photography taken without flash where available light was insufficient
- Backlit portraits where the subject's face is too dark against a bright background
- Evening and night photography where the camera underexposed the scene
- Concert and event photos taken in low light with fast shutter speeds
- Real estate interiors where windows cause the camera to underexpose the room
Tips for best results
Photos shot in RAW format preserve more shadow data than JPEG, so RAW files recover more detail when brightened. Severely underexposed JPEGs (3+ stops under) may show banding or posterization in the recovered shadows because the 8-bit format lacks the tonal depth to smooth the gradients. For best results with JPEG, capture no more than 1-2 stops underexposed. The AI prioritizes faces when present, ensuring portrait subjects are well-exposed even if the overall scene stays darker for mood. For real estate photography, the AI balances interior brightness with window views — a common challenge where rooms are dark and windows are blown out. If the corrected image shows warm or cool color cast in the formerly dark areas, use the color temperature slider to fine-tune the white balance after exposure correction.
Frequently asked questions
- How dark of a photo can be recovered?
- Photos underexposed by 1-2 stops recover with excellent quality and minimal noise. Photos 3 stops under are recoverable with some noise, especially in JPEGs. Beyond 4 stops, the image data degrades significantly. RAW files handle extreme recovery better than JPEG because they store more tonal information per pixel.
- Will fixing exposure add noise to the photo?
- Brightening shadows always reveals some sensor noise, but the AI applies targeted noise reduction simultaneously with the exposure lift. The result is significantly cleaner than manually raising the brightness slider, which amplifies noise without reducing it. Most corrected photos show minimal visible noise.
- Is underexposure correction free?
- Yes. AI Enhance exposure correction is included in Magic Eraser's free tier with daily usage limits. Upload, auto-correct, and export your brightened photo. Premium removes limits and unlocks batch processing for large photo sets.
- How do I fix a dark photo on Android or iPhone?
- Open Magic Eraser in any mobile browser or the iOS or Android app, load the dark photo from your camera roll, and select AI Enhance. The AI brightens it on your phone — lifting the shadows and reducing noise together — then saves the corrected version back to your camera roll. It works the same as the desktop version, with no app install required if you use the browser, which is handy for rescuing an indoor or backlit shot right after you take it. Use the manual slider if you want it a touch brighter or darker.
- Can it brighten a backlit photo where the face is a silhouette?
- Yes — this is one of the most common cases. When a subject is lit from behind (a window, a bright sky), the camera exposes for the background and the face goes dark. The AI lifts the shadowed face while holding the bright background so it doesn't blow out, and it prioritizes faces so the person comes out well-exposed even if the overall scene stays moody. A near-total silhouette has little detail left to recover, so a face with at least some visible tone gives the most natural result.