How to denoise a photo
Photos taken in low light, at high ISO, or with older cameras often have visible noise — colored speckles, grain, and a sandpaper-like texture that degrades image quality. AI denoising removes the noise while preserving the genuine detail underneath.
Last updated
Denoise now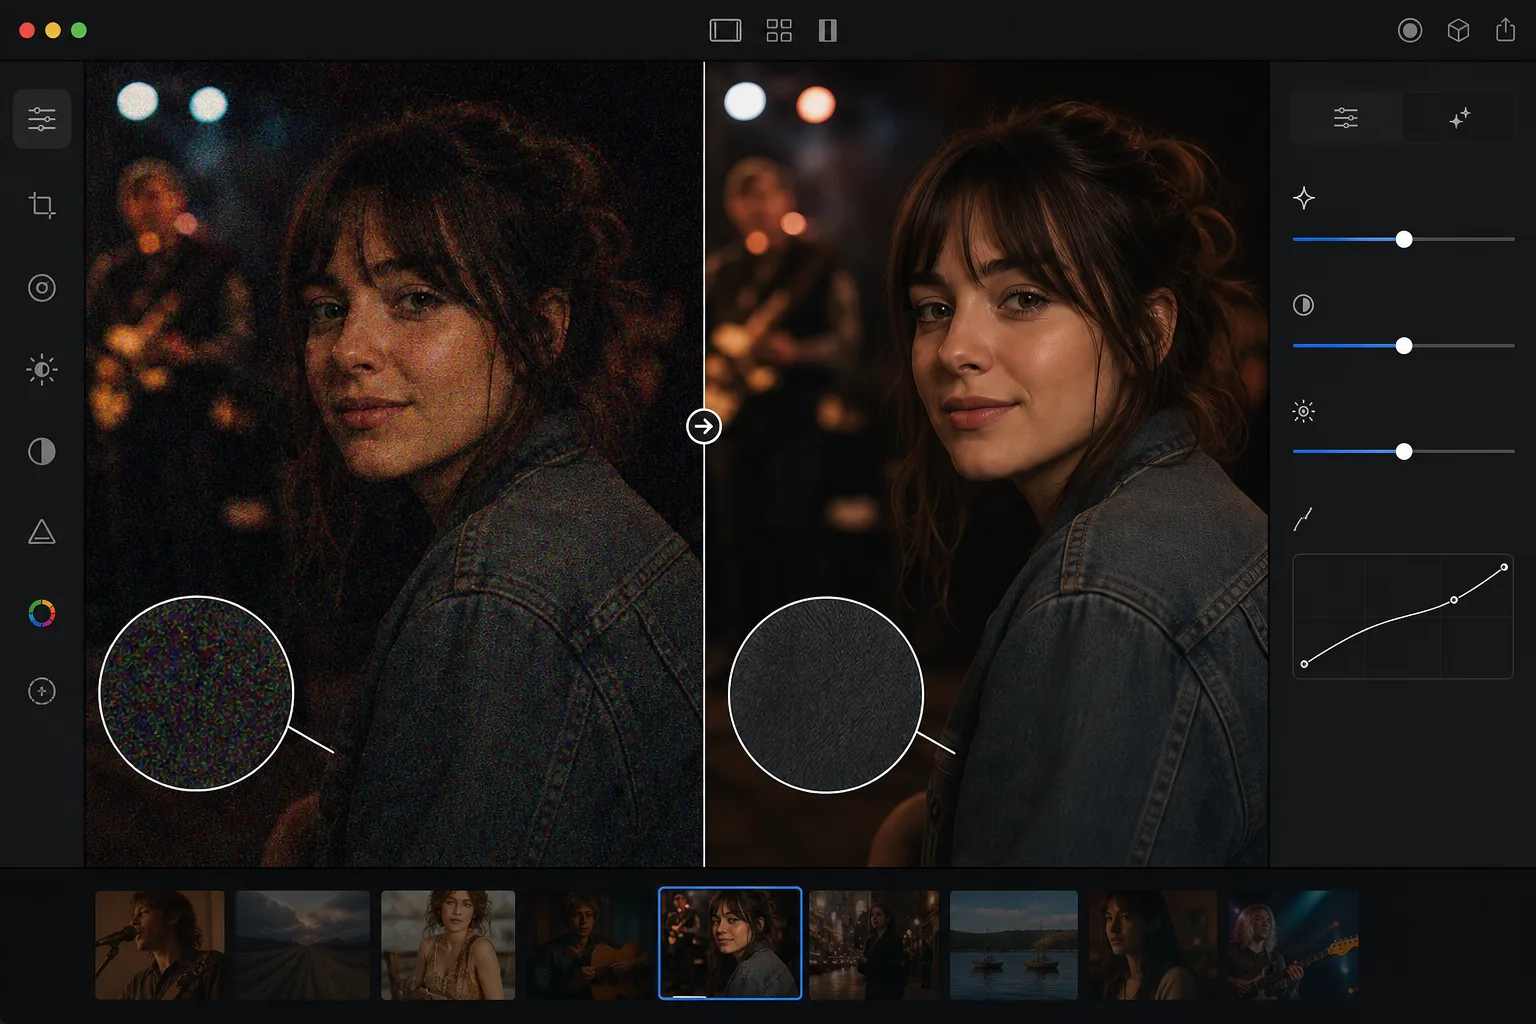
How to denoise a photo
To denoise a photo, open Magic Eraser on the web, iOS, or Android, select AI Enhance, upload the noisy shot, and let the AI clean it — it tells the random speckle apart from real detail, so it clears the colored chroma noise and grainy luminance noise while keeping edges, hair, and texture intact. It includes limited free edits after sign-in. It works best on moderate noise (around ISO 1600–6400); extremely noisy frames improve but may stay a little soft. Denoise before any sharpening or contrast edits, since those amplify noise and make it harder to separate from detail. Digital photo noise comes from the camera sensor amplifying weak light signals. In low light, the sensor needs higher amplification (higher ISO) to produce a visible image, and that amplification also boosts random electronic noise. The result is colored speckles (chroma noise) and grainy texture (luminance noise) overlaid on the actual image content. Older cameras and smaller sensors (phone cameras, compact cameras) produce more noise at equivalent ISO settings. Night photography, indoor events, concerts, and any low-light situation commonly produce noisy images. Traditional denoising (Gaussian blur, median filter) reduces noise but also destroys fine detail — hair, fabric texture, eyelashes, text all become soft. AI denoising distinguishes between noise and detail, removing the random speckles while preserving the genuine image content.
Denoise in three steps
- 1
Upload the noisy photo
Open Magic Eraser on web, iOS, or Android. Upload the noisy image — a low-light shot, a high-ISO photo, an older camera image, or any photo with visible grain or speckles. JPEG, PNG, HEIC, and WebP supported.
- 2
Apply AI denoising
Select the denoise or enhancement tool. The AI analyzes the noise pattern across the image — identifying which variations are noise (random speckles) and which are genuine detail (texture, edges, fine features). It removes the noise while preserving the real content.
- 3
Review and export
Check the result at full zoom — smooth areas (sky, walls, skin) should be clean without speckles, while detailed areas (hair, fabric, foliage) should retain their texture and sharpness. The overall image should look cleaner and more professional. Export at full resolution.
Best for
- Low-light event photography (concerts, weddings, indoor events) shot at high ISO
- Night photography and astrophotography where long exposures or high ISO create grain
- Phone camera photos taken in dim conditions where sensor size limits low-light performance
- Older digital camera photos where sensor technology produced more noise than modern cameras
- Video frame captures that are inherently noisier than dedicated still photographs
Tips for best results
AI denoising is most effective on moderate noise. Heavily noisy images (very high ISO, extreme underexposure) may lose some fine detail even with AI denoising because the noise overwhelms the underlying content. For best results, apply denoising before any other processing — noise reduction works best on the original noisy image, not after sharpening or contrast enhancement (which amplify noise). For photos with both noise and blur, denoise first, then apply sharpening or enhancement. The AI handles both chroma noise (colored speckles) and luminance noise (grain texture). Chroma noise is easier to remove because its colored pattern is distinctly different from image content. Luminance noise is harder because it resembles real texture — the AI excels at distinguishing the two.
Frequently asked questions
- Does denoising reduce image sharpness?
- Minimal impact. Traditional denoising blurs the image to reduce noise. AI denoising is more precise — it targets the random noise pattern while preserving edges, texture, and fine detail. Some very fine detail may be slightly softened in extremely noisy images.
- Can it fix extremely noisy images?
- It significantly improves them, but very heavily noisy images (ISO 12800+, severe underexposure) may retain some softness because the noise overwhelmed much of the original detail. Moderate noise (ISO 1600-6400) produces excellent results.
- Should I denoise before or after other edits?
- Before. Denoising works best on the original noisy image. Applying sharpening, contrast, or other edits before denoising amplifies the noise and makes it harder to separate from real detail.
- Is denoising free?
- Yes. AI denoising is available through the enhancement tool on the free tier with daily usage limits. Premium removes limits for batch processing noisy photo sets.
- How do I denoise a photo on Android or iPhone?
- Open Magic Eraser in any mobile browser or the iOS or Android app, load the noisy photo from your camera roll, and select AI Enhance. The AI detects the noise and cleans it right on your phone — no desktop needed — then saves the clearer version back to your camera roll. It works the same as the desktop version, with no app install required if you use the browser, which is handy for tidying up low-light or concert shots straight from your phone.