How to convert HEIC to JPG
iPhone photos in HEIC format are not compatible with every platform. Magic Eraser converts HEIC to JPG instantly while preserving image quality, EXIF data, and color accuracy — no downloads or installations required.
Last updated
Convert HEIC to JPG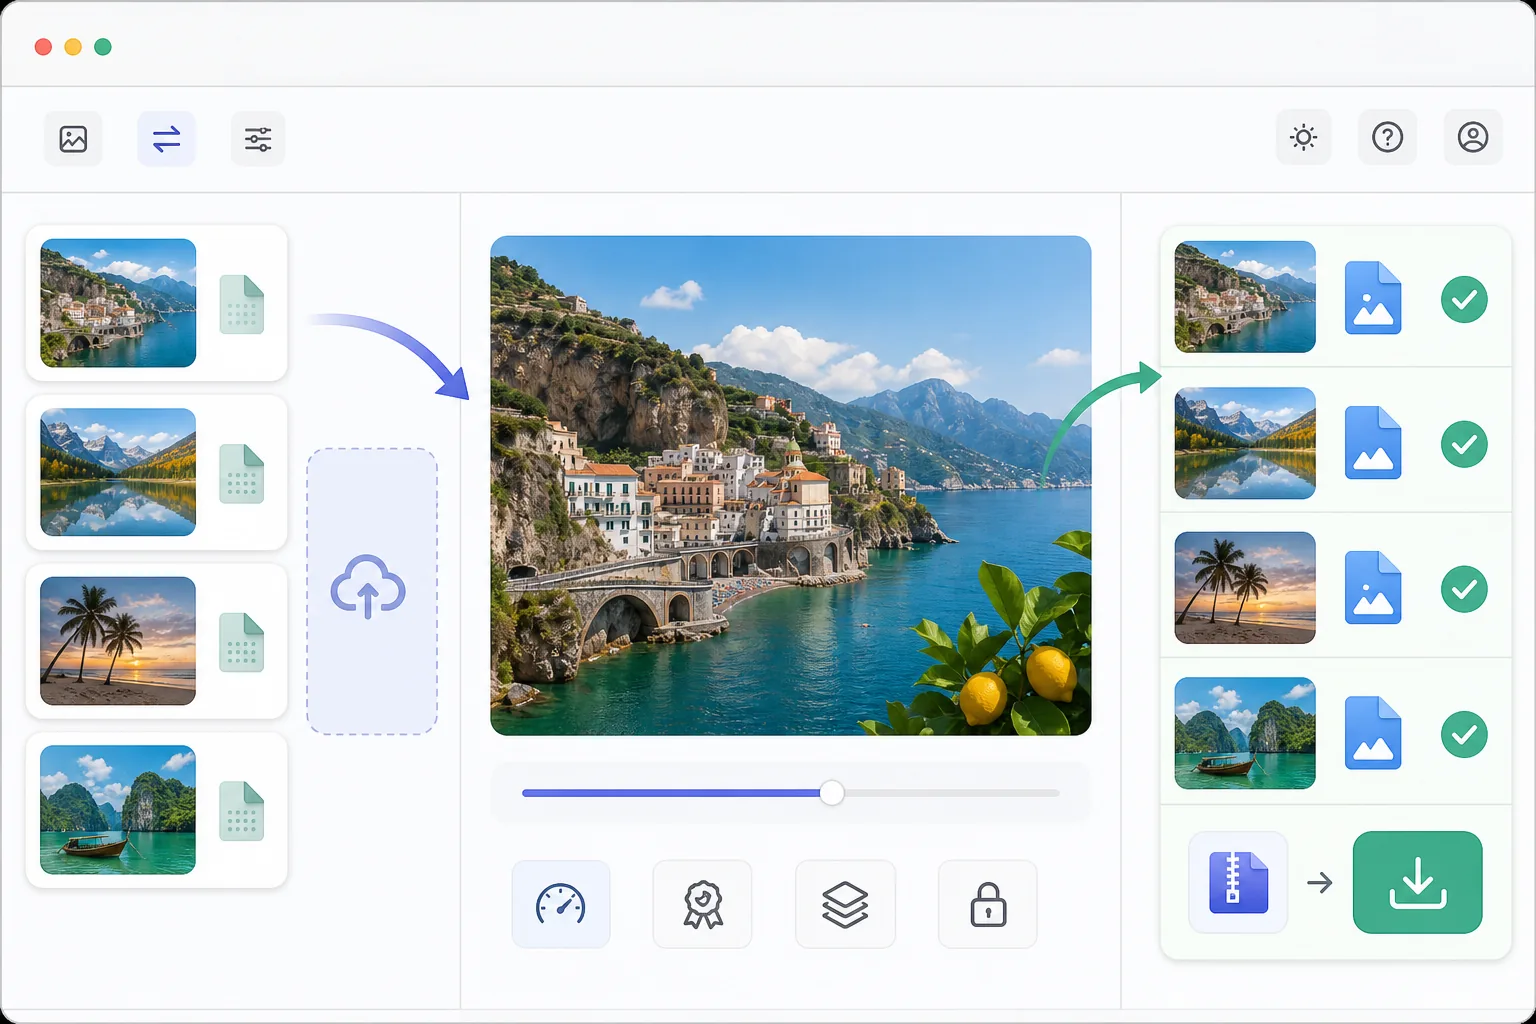
How to convert HEIC to JPG
To convert HEIC to JPG, open Magic Eraser on the web, iOS, or Android, upload the HEIC (or HEIF) file from your iPhone or any device, and export as JPG — the photo is decoded and re-saved in the universally compatible JPEG format, keeping its resolution, colors, and EXIF data. It includes limited free edits after sign-in. The conversion runs in your browser, so the photos never leave your device, and you can drop in several files at once for batch conversion. The result opens anywhere — Windows, Android, email, print services, and upload forms that reject HEIC. Apple adopted HEIC (High Efficiency Image Container) as the default photo format on iPhones because it produces files 40-50% smaller than JPEG at the same quality. But HEIC is not universally supported — older Windows versions, many web platforms, email clients, printing services, and social media upload forms reject HEIC files. This creates friction when sharing iPhone photos. Converting to JPEG/JPG ensures compatibility with virtually every device, platform, and service. The conversion involves decoding the HEVC-compressed image data and re-encoding it as JPEG with minimal quality loss when done at high quality settings (90+). Magic Eraser handles this conversion in-browser, so your photos never leave your device.
Convert HEIC to JPG in three steps
- 1
Upload your HEIC file
Open Magic Eraser on web, iOS, or Android. Upload the HEIC or HEIF file from your iPhone, iPad, or any device. You can upload multiple files for batch conversion. The tool accepts files of any size.
- 2
Preview and adjust settings
The image is decoded and displayed at full quality. Optionally adjust JPG quality (recommended: 92 for the best balance of quality and file size). EXIF data (date, location, camera settings) is preserved by default. You can also enhance the photo with AI tools before converting.
- 3
Export as JPG
Download the converted JPG file. The output maintains the original resolution and color profile. For batch conversions, all files download as a single zip archive. The converted files are compatible with every platform that accepts images.
Best for
- iPhone users sharing photos with Windows or Android users who cannot open HEIC
- Uploading photos to websites and forms that only accept JPG/JPEG
- Preparing photos for printing services that do not support HEIC format
- Email attachments where recipients may not have HEIC-compatible software
- Archiving photos in a universally compatible format for long-term storage
Tips for best results
Use JPG quality 92 for the best balance — at this level, the quality difference from the original HEIC is imperceptible to the human eye while keeping file sizes reasonable. Going above 95 significantly increases file size with negligible visual benefit. If you are converting photos for web use, consider WebP instead of JPG for even better quality-to-size ratios with modern browser support. To avoid the conversion hassle entirely, you can change your iPhone camera settings to capture in JPEG instead of HEIC: Settings → Camera → Formats → Most Compatible.
Frequently asked questions
- Is there quality loss when converting HEIC to JPG?
- Minimal. At quality 90+, the difference is imperceptible. HEIC uses more efficient compression, so the JPG file will be slightly larger at equivalent visual quality. For practical purposes — sharing, printing, uploading — the quality is identical.
- Is EXIF data preserved during conversion?
- Yes. Date taken, GPS location, camera settings, and other metadata are preserved in the JPG output by default. You can optionally strip EXIF data for privacy when sharing photos publicly.
- Is HEIC to JPG conversion free?
- Yes. Format conversion is available in the free tier with no daily limits for basic conversion. Premium adds batch processing and simultaneous multi-format export.
- How do I convert HEIC to JPG on my iPhone or Android?
- Open Magic Eraser in any mobile browser or the iOS or Android app, load the HEIC photo from your camera roll, and export as JPG — the converted file saves straight back to your photos, ready to share or upload anywhere. No app install is required if you use the browser. On iPhone you can also avoid converting altogether by capturing in JPEG from the start: Settings → Camera → Formats → Most Compatible.
- Can I convert many HEIC files to JPG at once?
- Yes. Upload multiple HEIC or HEIF files in one go and they're converted together, then downloaded as a single zip archive — useful for clearing a whole camera roll or a shoot's worth of iPhone photos before sending them to someone on Windows or Android. Each file keeps its original resolution and color profile. Batch conversion is part of the Premium tier; single-file conversion is free with no daily limit.