
زيادة حدة الصور الضبابية ومنخفضة الدقة
استعد التفاصيل والوضوح من الصور الضبابية أو الناعمة أو منخفضة الدقة باستخدام تقنيات زيادة الحدة المدعومة بالذكاء الاصطناعي.
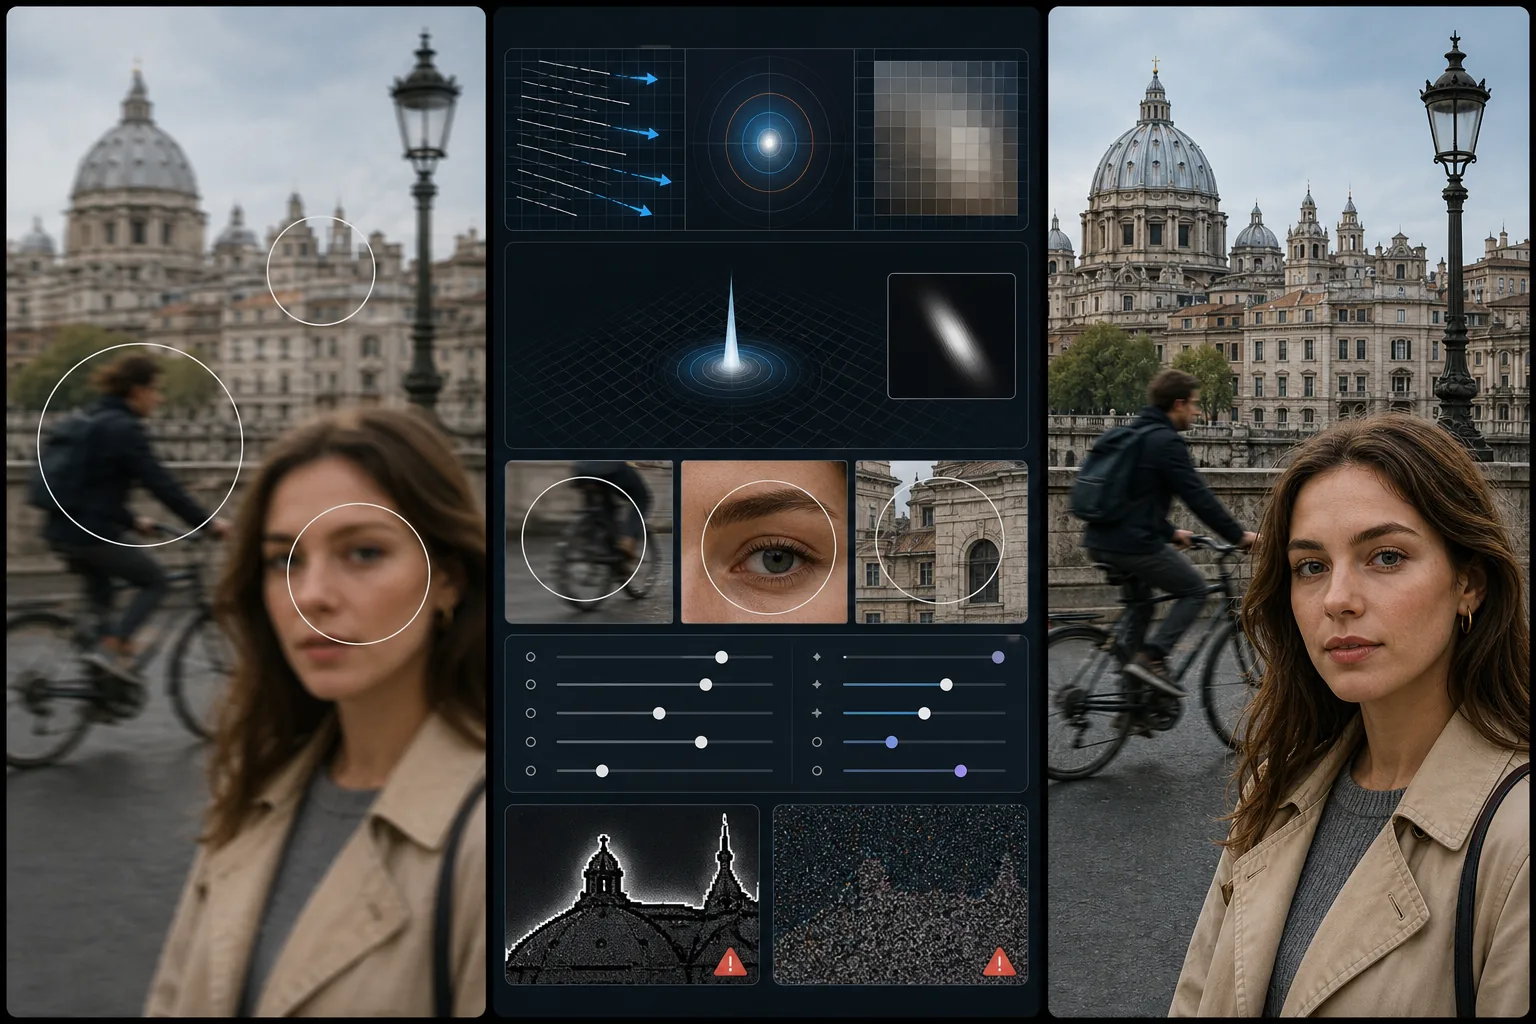
Lesson context before the long read
Review the result preview above, then scan the learning objectives below before reading the full lesson. Updated 2026-05-17.
Example visual uses an existing public asset: /content-images/ai-sharpening-blurry-academy.webp.
Learning Objectives
- 1ميّز بين ضبابية الحركة، وضبابية التركيز، ونعومة الضغط لاختيار الإصلاح المناسب
- 2طبّق إزالة الضبابية بالذكاء الاصطناعي التي تعكس أنماط ضبابية محددة بدلًا من مجرد إضافة تباين الحواف
- 3تجنّب عيوب زيادة الحدة الشائعة مثل الهالات، وتضخيم التشويش، والقوام غير الطبيعي
كيف تختلف زيادة الحدة بالذكاء الاصطناعي عن الطرق التقليدية
ليست كل أنواع الضبابية متماثلة، وتحديد نوع الضبابية في صورتك يحدد طريقة التصحيح الأكثر فعالية. تخلق ضبابية الحركة خطوطًا اتجاهية ناتجة عن حركة الكاميرا أو حركة الهدف أثناء سرعة غالق بطيئة. تنتج ضبابية التركيز مناطق ناعمة بشكل موحد حيث ركّزت العدسة على المسافة الخطأ. وتنتج نعومة الضغط عن ضغط JPEG أو ضغط وسائل التواصل الاجتماعي العدواني الذي يتخلص من التفاصيل الدقيقة. يتطلب كل نوع نموذج ذكاء اصطناعي مختلفًا لتصحيحه، وتطبيق النموذج الخطأ ينتج نتائج رديئة.
تحسين التفاصيل الدقيقة دون إدخال تشويش
تعمل إزالة الضبابية بالذكاء الاصطناعي عن طريق تقدير نواة الضبابية، أي الوصف الرياضي لكيفية تشويش الصورة، ثم عكس تلك العملية. بالنسبة لضبابية الحركة، يكتشف النموذج اتجاه ومسافة الحركة ويعكس حسابيًا تأثير التخطيط. وبالنسبة لضبابية التركيز، يقدّر مسافة عدم التركيز ويعيد بناء تفاصيل الحواف التي فُقدت عندما أخطأت العدسة التركيز. يختلف هذا اختلافًا جوهريًا عن زيادة الحدة التقليدية التي تزيد ببساطة التباين عند الحواف دون استعادة المعلومات المفقودة فعليًا.
متى تساعد زيادة الحدة جودة الصورة ومتى تضر بها
أكبر خطر عند زيادة الحدة هو إنشاء عيوب تبدو أسوأ من الضبابية الأصلية. الهالات هي حدود ساطعة تظهر حول الحواف عالية التباين عندما تكون زيادة الحدة عدوانية جدًا. يحدث تضخيم التشويش عندما تتعامل خوارزمية زيادة الحدة مع تشويش الصورة كتفاصيل وتجعله أكثر بروزًا. لتجنب هذه المشكلات، استخدم أداة زيادة الحدة بالذكاء الاصطناعي بقوتها الافتراضية أولًا، ثم زدها تدريجيًا أثناء التكبير إلى 100%. ركّز على المناطق ذات التفاصيل المهمة مثل النص، أو العيون، أو الخطوط المعمارية وتحقق من أن المناطق الناعمة مثل السماء والجدران تبقى نظيفة.
Key Takeaways
- ✓حدد نوع الضبابية (حركة، أو تركيز، أو ضغط) قبل اختيار طريقة زيادة الحدة
- ✓تعكس إزالة الضبابية بالذكاء الاصطناعي نمط الضبابية المحدد بدلًا من مجرد إضافة تباين الحواف
- ✓زِد الحدة تدريجيًا عند تكبير 100% وراقب الهالات، وتضخيم التشويش، وعيوب القوام