
How to remove dark circles from a photo
เรียนรู้วิธีHow to remove dark circles from a photoด้วย Magic Eraser คำแนะนำทีละขั้นตอนง่ายๆ ด้วยเครื่องมือ AI ฟรี ใช้ได้บนเว็บ, iOS และ Android
Last updated
ลองใช้เลย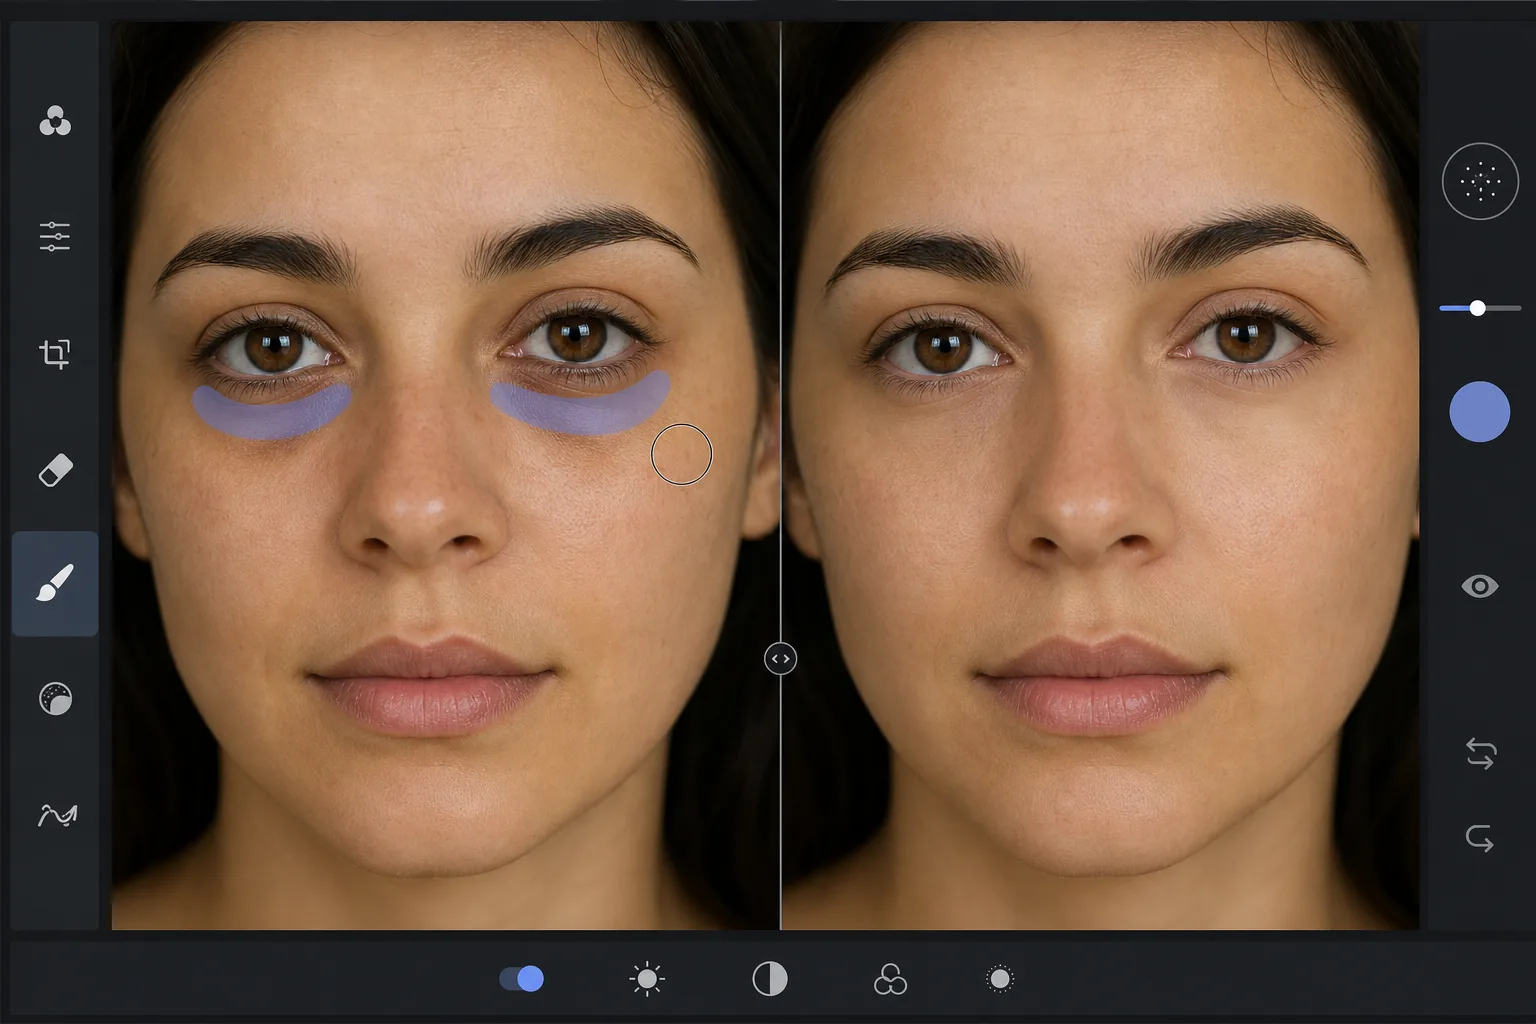
Why dark circles are tricky to retouch — Magic Eraser
Under-eye dark circles are not a single object you can cut out — they are a gradient of shadow and discoloration that blends into the surrounding skin. Heavy-handed editing (a brightness brush, a clone stamp) erases the natural shading that gives the face dimension, leaving a flat, obviously-retouched patch under the eye. The goal is to reduce the darkness while preserving skin texture, pores, and the subtle highlight-to-shadow transition that reads as real. Magic Eraser's AI treats the under-eye region as skin to reconstruct rather than a color to paint over: it lightens the area and rebuilds matching texture from the surrounding cheek and lower-lid skin, so the result looks like a well-rested version of the same face, not an airbrushed mask. This makes it useful for headshots, dating-profile photos, family portraits, and any shot where the subject looks more tired than they felt.
Before you start
ขั้นตอนการใช้งาน
Start with อัปโหลดรูป. The result preview above and tips below use this guide's existing content; no separate before-and-after proof is assumed.
- 1
อัปโหลดรูป
เปิด Magic Eraser บนเว็บ, iOS หรือ Android ลากและวางรูป JPEG, PNG, HEIC หรือ WebP ไม่ต้องสร้างบัญชี
- 2
เลือกเครื่องมือและพื้นที่
เลือกเครื่องมือที่เหมาะสมและทำเครื่องหมายพื้นที่ที่ต้องการ AI จะวิเคราะห์และใช้การเปลี่ยนแปลงโดยอัตโนมัติภายในไม่กี่วินาที
- 3
ดาวน์โหลดผลลัพธ์
ดูตัวอย่างผลลัพธ์และดาวน์โหลดรูปที่แก้ไขแล้ว ส่งออกเป็น PNG หรือ JPEG คุณภาพสูง
เหมาะสำหรับ
- Professional headshots where the subject looks tired despite good lighting
- Dating-profile and social photos that need a fresher, well-rested look
- Family and event portraits taken late in the day
- Quick retouching without learning frequency separation or dodge-and-burn
- Batch-cleaning a set of portraits to a consistent look
เคล็ดลับเพื่อผลลัพธ์ที่ดีที่สุด
Reduce, don't erase. Real faces have some shadow under the eye — removing it completely reads as fake. Aim to lighten dark circles to the point they no longer draw attention, not to a uniform flat tone. Brush each eye separately so the AI references the skin closest to each one. If the subject has both dark circles and under-eye bags, the discoloration and the puffiness-shadow are two issues: lighten the discoloration first, then assess whether the remaining shadow still needs a light pass. For a related cleanup, pair this with removing blemishes or skin shine in the same edit. And as always, the most natural result keeps pores and skin texture intact — Magic Eraser preserves them automatically, so avoid over-brushing into clear skin.
คำถามที่พบบ่อย
- ฟีเจอร์How to remove dark circles from a photoใช้ฟรีไหม?
- ใช่ Magic Eraser ให้คุณHow to remove dark circles from a photoฟรีภายในโควตาประจำวัน อัปเกรดเป็น Pro สำหรับการประมวลผลไม่จำกัดและส่งออกความละเอียดสูง
- How to remove dark circles from a photoใช้เวลานานเท่าไหร่?
- แค่ไม่กี่วินาที AI ของ Magic Eraser ประมวลผลรูปอย่างรวดเร็ว ผลลัพธ์ส่วนใหญ่พร้อมใช้งานทันทีหลังอัปโหลด
- ใช้บนมือถือได้ไหม?
- ใช่ Magic Eraser ใช้ได้บน iOS, Android และเบราว์เซอร์ทุกชนิด สลับระหว่างอุปกรณ์ได้อย่างอิสระ
- คุณภาพภาพจะลดลงไหม?
- ไม่ Magic Eraser รักษาคุณภาพรูปต้นฉบับ AI ประมวลผลอย่างชาญฉลาดเพื่อรักษารายละเอียดและความคมชัด