
Corriger l'éclairage et l'exposition
Corrigez les photos sous-exposées, surexposées et en contre-jour grâce à des ajustements d'éclairage par IA qui récupèrent les détails perdus.
Lesson context before the long read
Review the result preview above, then scan the learning objectives below before reading the full lesson. Updated 2026-05-17.
Example visual uses an existing public asset: /content-images/ai-fixing-lighting-academy.webp.
Learning Objectives
- 1Diagnostiquer les problèmes d'éclairage courants en lisant un histogramme et en identifiant les hautes lumières ou les ombres écrêtées
- 2Utiliser la correction d'exposition par IA pour récupérer les détails dans les ombres et les hautes lumières simultanément
- 3Appliquer des ajustements d'éclairage locaux pour corriger un éclairage inégal sur différentes zones de l'image
Corriger les images sous-exposées et surexposées
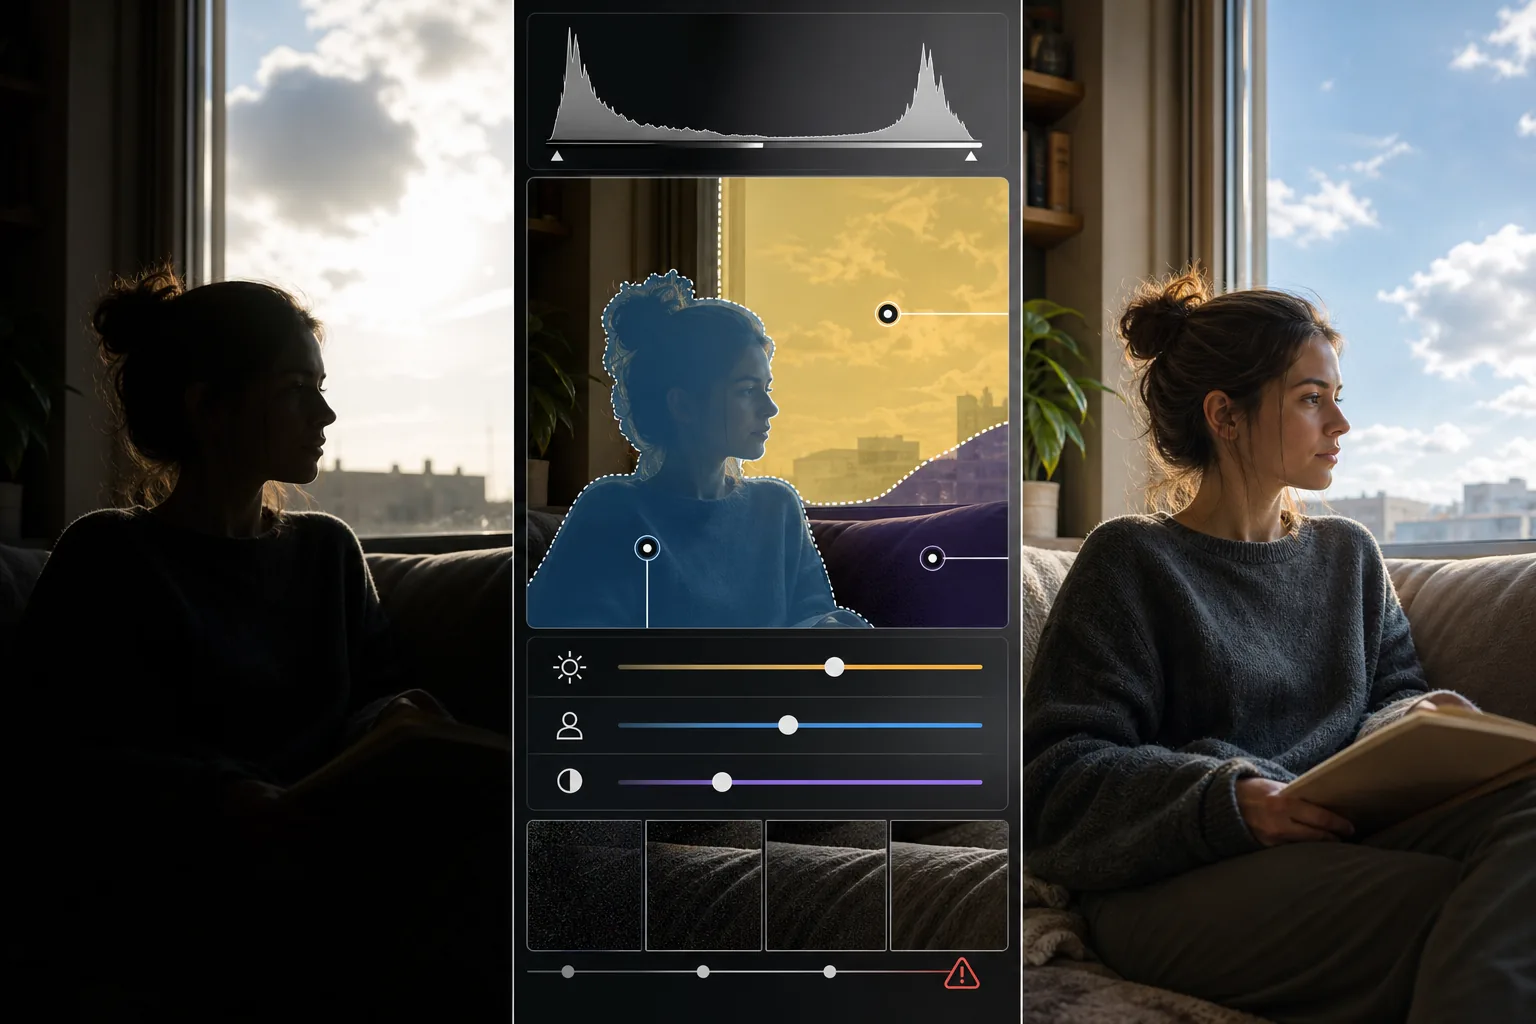
Les problèmes d'éclairage sont les plus courants en photographie amateur. Les sujets en contre-jour apparaissent comme des silhouettes sombres, les prises de vue en intérieur sans flash sortent ternes et sous-exposées, et l'éclairage mixte crée des images dont certaines zones sont trop claires et d'autres trop sombres. L'histogramme est votre outil de diagnostic : un graphique entièrement décalé vers la gauche indique une sous-exposition, décalé vers la droite signifie une surexposition, et des creux au milieu suggèrent un faible contraste. Comprendre l'histogramme vous aide à identifier le problème avant de choisir une correction.
Techniques de récupération de la plage dynamique
La correction d'exposition par IA va au-delà du simple ajustement de la luminosité en analysant indépendamment différentes régions de l'image. Lorsque vous augmentez l'exposition sur un portrait sous-exposé, les outils traditionnels éclaircissent tout de manière égale, brûlant le ciel derrière le sujet. La correction par IA reconnaît le sujet séparément de l'arrière-plan et applique des ajustements d'exposition différents à chaque zone. Elle peut extraire les détails des ombres d'un premier plan sombre tout en gardant un arrière-plan de fenêtre lumineux correctement exposé, simulant ainsi la technique HDR utilisée par les photographes professionnels.
Ajustements du contraste pour différents sujets
Pour les photos éclairées de manière inégale, comme une pièce avec des fenêtres lumineuses d'un côté et des coins sombres de l'autre, utilisez les ajustements d'éclairage locaux. L'IA identifie des zones d'éclairage distinctes et vous permet de les équilibrer afin que toute la scène paraisse éclairée naturellement. Augmentez progressivement la récupération des ombres plutôt que d'appliquer une correction maximale, car forcer trop introduit du bruit dans les zones les plus sombres. Une bonne règle générale consiste à récupérer les détails jusqu'à ce que vous puissiez voir la texture dans les ombres, puis à vous arrêter avant que l'image ne commence à paraître plate ou bruitée.
Key Takeaways
- ✓Lisez l'histogramme pour diagnostiquer si une photo est sous-exposée, surexposée ou à faible contraste
- ✓La correction d'exposition par IA ajuste indépendamment différentes régions de l'image, à la manière du traitement HDR
- ✓Récupérez les détails des ombres progressivement et arrêtez-vous lorsque la texture est visible pour éviter d'introduire du bruit