
Como Nitidar Fotos Borradas com IA: Um Guia Passo a Passo
Aprenda a corrigir fotos borradas usando IA. Entenda os tipos de borrão, o que o AI sharpening pode e não pode recuperar. Obtenha instruções passo a passo para restaurar detalhes em imagens suaves ou desfocadas.

Technical Writer
Revisado por Magic Eraser Editorial ·
Índice
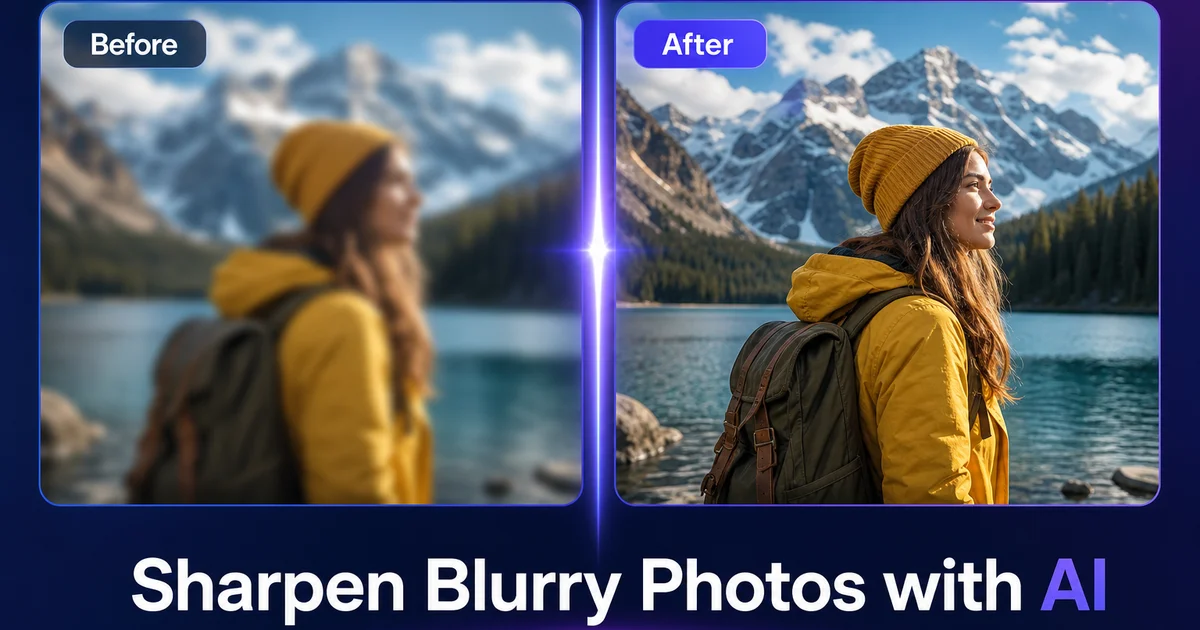
Fotos borradas são uma das frustrações mais comuns na fotografia. Você capturou o que deveria ter sido um momento perfeito. O sopro das velas de aniversário de uma criança, um pôr do sol sobre a água, um protótipo de produto para seu site — e só depois percebe que a imagem está suave, ligeiramente desfocada ou manchada por vibração da câmera. No passado, havia muito pouco que você podia fazer. Ferramentas de nitidez tradicionais como Unsharp Mask adicionam contraste às bordas existentes, mas não conseguem reconstruir detalhes que nunca foram gravados claramente em primeiro lugar.
O AI-powered sharpening funciona de forma diferente em sua essência. Em vez de realçar bordas com truques de contraste, redes neurais modernas analisam os padrões de borrão em sua foto, preveem como a versão nítida da imagem deve se parecer com base em treinamento em milhões de fotografias. Reconstroem detalhes perdidos no nível do pixel. Os resultados não são mágicos — uma foto com severo motion blur nunca parecerá ter sido tirada em um tripé — mas para a grande maioria das imagens ligeiramente suaves, moderadamente desfocadas ou degradadas por compressão, o AI sharpening produz melhorias drásticas.
Este guia explica os diferentes tipos de borrão, o que a IA pode recuperar realisticamente em cada um, e percorre o processo passo a passo de nitidar uma foto usando AI Enhance.
- O AI sharpening reconstrói detalhes perdidos em vez de apenas adicionar contraste de borda como o tradicional Unsharp Mask.
- Funciona em motion blur, focus blur, suavidade de lente e artefatos de compressão JPEG.
- Processamento com um clique, sem necessidade de ajustar manualmente raio, limite ou parâmetros de máscara.
- Melhores resultados em fotos ligeira a moderadamente borradas — borrão severo é parcialmente recuperável, mas não totalmente reversível.
- Duas passadas de realce podem ajudar imagens muito suaves; passadas adicionais correm o risco de introduzir artefatos.
Entendendo os tipos de borrão
Nem todo borrão é igual, e cada tipo tem um prognóstico diferente para recuperação por IA. O motion blur ocorre quando a câmera ou o assunto se move durante a exposição. A imagem mostra arrasto direcional — bordas borradas na direção do movimento. Vibração leve da câmera (1-3 pixels de deslocamento) é altamente recuperável. Motion blur severo (10+ pixels, arrasto visível) é parcialmente recuperável. A IA pode reduzir o arrasto e recuperar alguma estrutura de borda, mas a imagem não ficará tão nítida quanto uma foto devidamente congelada.
O out-of-focus blur acontece quando a lente focou na distância errada. O assunto aparece uniformemente suave com bokeh circular ou em formato de disco em áreas de destaque. Desfoque leve — onde o assunto está ligeiramente à frente ou atrás do plano focal — responde muito bem ao AI sharpening. Desfoque severo, onde o assunto está muito fora da profundidade de campo, é mais difícil de recuperar porque a informação espacial está espalhada por uma área muito ampla.
A suavidade de lente e os artefatos de compressão representam a categoria mais recuperável. Lentes de baixo custo, principalmente em aberturas amplas, produzem imagens que estão tecnicamente em foco, mas carecem de nitidez. Da mesma forma, fotos que foram fortemente comprimidas, enviadas por texto, publicadas em redes sociais ou salvas como JPEGs de baixa qualidade — perdem detalhes finos devido à compressão. O AI sharpening é excelente para restaurar essas imagens porque a estrutura subjacente está presente, mas degradada, dando à rede neural padrões claros para reconstruir.
- Motion blur: arrasto direcional do movimento da câmera ou do assunto. Vibração leve é altamente recuperável; arrasto severo é apenas parcialmente corrigível.
- Focus blur: suavidade uniforme devido ao foco incorreto da lente. Desfoque leve recupera bem; desfoque severo tem potencial de recuperação limitado.
- Lens softness: falta geral de nitidez devido a limitações ópticas. Altamente recuperável porque a estrutura subjacente existe.
- Compression artifacts: perda de detalhes devido à compressão JPEG agressiva ou reprocessamento em redes sociais. Excelente potencial de recuperação por IA.
Como o AI sharpening funciona nos bastidores
A nitidez tradicional aplica um Unsharp Mask. Ele encontra bordas na imagem e aumenta o contraste através dessas bordas, fazendo-as parecer mais definidas. Isso funciona em imagens que já estão quase nítidas, mas não faz nada para imagens onde o detalhe da borda nunca foi gravado adequadamente. Forçar o Unsharp Mask demais cria halos, amplificação de granulado e um aspecto artificial e crocante que faz as fotos parecerem piores, não melhores.
O AI sharpening usa redes neurais profundas, muitas vezes baseadas em arquiteturas convolucionais treinadas em milhões de pares de imagens nítidas e borradas. Durante o treinamento, a rede aprende a relação estatística entre versões borradas e nítidas do mesmo conteúdo. Como uma borda borrada deve parecer quando resolvida, que detalhe de textura deve existir em um campo de grama suave, como as características faciais devem se nitidar quando o desfoque é revertido. No momento da inferência, a rede analisa sua foto borrada e prevê como a versão nítida deve se parecer, gerando novos detalhes de pixel que não estavam presentes na entrada.
É por isso que o AI sharpening pode produzir resultados que as ferramentas tradicionais não conseguem: não está realçando o que está lá. Está inferindo o que deveria estar lá com base em prioridades visuais aprendidas. A precisão dessa inferência depende de quanta informação estrutural permanece na imagem borrada e de quão semelhante o conteúdo é com o que a rede foi treinada. Assuntos comuns como rostos, texto, edifícios e cenas naturais produzem os melhores resultados porque os dados de treinamento são mais ricos nessas categorias.
Quando o AI sharpening funciona melhor
O AI sharpening produz seus resultados mais impressionantes em imagens que estão quase nítidas, mas não totalmente. O ponto ideal inclui fotos com leve vibração da câmera ao fotografar em modo handheld com pouca luz, imagens tiradas através de uma janela ou tela que introduziram difusão suave, fotos de produtos de uma câmera de smartphone que não têm a nitidez de uma lente dedicada, fotos antigas digitalizadas que perderam nitidez no processo de digitalização, e capturas de tela ou imagens da web que foram salvas em baixa qualidade.
Em todos esses casos, o assunto subjacente está bem composto e devidamente exposto. O único problema é uma suavidade que faz a imagem parecer pouco profissional ou inadequada para o uso pretendido. O AI Enhance frequentemente resolve esses problemas em uma única passada, produzindo uma imagem visivelmente mais nítida com detalhes de borda e textura recuperados.
Fotógrafos experientes também usam AI sharpening como etapa final. Mesmo imagens tiradas com câmeras de ponta se beneficiam de uma passada final de reforço que adiciona nitidez sem os artefatos da nitidez tradicional. Isso é verdade principalmente para imagens que serão visualizadas em tamanhos grandes — impressões, imagens hero de sites ou telas cheias — onde qualquer suavidade é amplificada.
- Fotos em modo handheld com pouca luz e leve vibração da câmera apresentam melhoria drástica.
- Fotos de smartphone ganham nitidez que rivaliza com lentes de câmera dedicadas.
- Fotos digitalizadas e imagens da web comprimidas recuperam detalhes e textura perdidos.
- Imagens profissionais se beneficiam de uma passada final que adiciona nitidez sem artefatos.
Limitações e expectativas realistas
O AI sharpening é poderoso, mas não ilimitado. Definir expectativas realistas evita frustrações e ajuda a decidir se uma determinada foto vale o esforço de edição. Motion blur severo — onde o assunto se moveu muito durante uma longa exposição — não pode ser totalmente revertido. A IA pode reduzir o arrasto e recuperar alguma estrutura de borda, mas a imagem parecerá melhorada em vez de nítida. Pense nisso como mover uma foto de inutilizável para aceitável, não de borrada para perfeita.
O desfoque extremo segue o mesmo padrão. Se o assunto está muito fora da profundidade de campo — um retrato onde o foco travou na parede de fundo em vez do rosto — o kernel de desfoque é muito amplo para a IA inferir o detalhe original. Você obterá uma imagem marginalmente melhor, mas o rosto não parecerá genuinamente em foco.
Imagens de origem muito pequenas também limitam a recuperação. Uma imagem com 200 pixels de largura não contém informação suficiente para a IA reconstruir detalhes significativos, independentemente de quão sofisticado seja o algoritmo. Para melhores resultados, comece com a versão de maior resolução da foto disponível — o arquivo original da câmera ou celular, não uma miniatura ou download de rede social.
Finalmente, esteja ciente dos artefatos de IA. Em raras ocasiões, a rede neural erra ao adivinhar que detalhe deve existir, produzindo padrões de textura sutis que não correspondem ao assunto original. Estes são mais perceptíveis em pele e tecido. Sempre amplie para 100% e inspecione a saída antes de publicar.
- Motion blur severo melhora, mas não resolve completamente — espere algo utilizável, não perfeito.
- Desfoque extremo tem potencial de recuperação limitado quando o assunto está muito fora da profundidade de campo.
- Imagens de origem muito pequenas não têm dados suficientes para reconstrução significativa por IA.
- Inspecione imagens realçadas com zoom de 100% em busca de possíveis artefatos de IA em texturas de pele e tecido.
Antes e depois: cenários comuns
Para fundamentar expectativas, aqui estão os níveis típicos de melhoria para cenários comuns. Um retrato ligeiramente suave de uma câmera de smartphone — o assunto está em foco, mas a imagem carece de nitidez — frequentemente se transforma em uma foto nítida e rica em detalhes que parece ter sido tirada com uma lente muito melhor. Detalhes de cílios, textura de tecido e fios de cabelo se tornam visíveis. Este é o melhor cenário e o caso de uso mais comum.
Uma foto em modo handheld com pouca luz e vibração visível da câmera — a imagem mostra 2-3 pixels de desfoque direcional — recupera a maior parte de sua nitidez de borda. O texto no fundo se torna legível, as linhas arquitetônicas se endireitam e a impressão geral muda de amador para competente. Este é um resultado muito bom e cobre a maioria das fotos afetadas por vibração.
Uma imagem de rede social fortemente comprimida que foi capturada de tela e re-salva várias vezes recupera detalhes importantes de textura. Os artefatos JPEG quadriculados e a bandagem de cor são reduzidos, e padrões finos (tecido trançado, grama, cascalho) reaparecem. A imagem não igualará a qualidade do arquivo original não comprimido, mas será muito mais utilizável para impressão ou exibição profissional.
Uma foto de ação com motion blur severo — uma criança correndo, um cachorro se sacudindo — onde o assunto se moveu 10+ pixels durante a exposição melhora na clareza geral. O arrasto direcional é reduzido e alguma estrutura de borda retorna. A foto passa de inutilizável para aceitável para uso pessoal. Não igualará uma foto tirada em uma velocidade de obturador rápida.
Dicas para prevenir borrão em primeiro lugar
Embora o AI sharpening seja uma ferramenta de resgate poderosa, a prevenção é sempre melhor que a reparação. A medida mais eficaz é a estabilização: use um tripé para assuntos parados, apoie os cotovelos contra o corpo para fotos em modo handheld, e encoste-se em uma parede ou mesa ao fotografar com pouca luz. Smartphones modernos têm estabilização óptica de imagem, mas ela tem limites — qualquer coisa abaixo de 1/30 segundo em modo handheld é um risco.
Para assuntos em movimento, aumente a velocidade do obturador mesmo que isso signifique aumentar o ISO. Uma foto ligeiramente ruidosa mas nítida é muito mais recuperável do que uma foto limpa mas borrada. Ferramentas de AI denoising lidam com ruído muito melhor do que qualquer ferramenta lida com motion blur severo. Se sua câmera permitir configurações manuais, foque na velocidade do obturador para ação e na abertura para cenas estáticas.
A precisão do foco é tão importante quanto a prevenção de borrão. Toque para focar no assunto em vez de confiar no foco automático para escolher corretamente. Para fotos em grupo e fotos de produto, use uma abertura menor (número f mais alto) para aumentar a profundidade de campo, de modo que pequenos erros de foco não coloquem assuntos-chave fora da zona nítida. E tire sempre múltiplos quadros — o custo do armazenamento extra é trivial comparado ao custo de perder a única versão nítida de um momento importante.
- Use um tripé ou apoie-se para estabilidade em situações de pouca luz.
- Priorize a velocidade do obturador para assuntos em movimento — uma foto nítida com ruído é melhor que uma foto borrada e limpa.
- Toque para focar no assunto em vez de confiar na seleção automática de foco.
- Tire múltiplos quadros para garantir que pelo menos um esteja nítido — armazenamento é barato, momentos não são.
How to do it
- 1
Identify the type of blur in your photo
Before editing, determine whether your photo suffers from motion blur (camera or subject moved during exposure), out-of-focus blur (the lens focused on the wrong point), or general softness from a low-quality lens or heavy compression. Each type responds differently to AI boost, and knowing which one you have helps set realistic expectations.
- 2
Open the photo in AI Enhance
Upload the blurry photo to AI Enhance. The tool analyzes the entire image to detect blur patterns, noise levels, and areas where detail has been lost. There is no need to select specific regions — the AI evaluates every pixel.
- 3
Apply the first enhancement pass
Run AI Enhance to sharpen the image. The algorithm reconstructs edge detail, reduces blur spread, and restores texture information that standard sharpening filters cannot recover. For most photos with mild to moderate blur, one pass produces a noticeably clearer result.
- 4
Evaluate the result and apply a second pass if needed
Zoom into key areas — faces, text, fine textures — and compare with the original. If the photo is still softer than you need, run a second boost pass. Severely blurry photos benefit from the second pass, but stop at two — extra passes risk introducing artifacts.
- 5
Save the sharpened image at full resolution
Export the enhanced photo at full resolution. Avoid re-compressing with aggressive JPEG settings, which would undo some of the sharpness you just recovered. Save as a high-quality JPEG (90+) or PNG if file size is not a concern.
Fontes
- Deep Learning for Image Super-Resolution: A Survey — IEEE Transactions on Pattern Analysis and Machine Intelligence
- Understanding Image Quality and Sharpness — Cambridge in Colour