
Como Remover Timestamps de Fotos de Segurança — Magic Eraser
Aprenda a remover sobreposições de carimbo de data/hora, texto de modelo de câmera. Elementos de HUD de fotos de câmeras de segurança e fotos de dashcam usando AI. Guia passo a passo para resultados limpos e profissionais em imagens de vigilância.
SEO & Growth
Revisado por Magic Eraser Editorial ·
Índice
- Tipos de sobreposições encontradas em imagens de segurança e dashcam
- Removendo sobreposições de fundos uniformes com o Magic Eraser
- Lidando com sobreposições em fundos complexos com o AI Fill
- Melhorando a qualidade da imagem de câmeras de segurança após a remoção de sobreposições
- Quando preservar sobreposições e considerações éticas
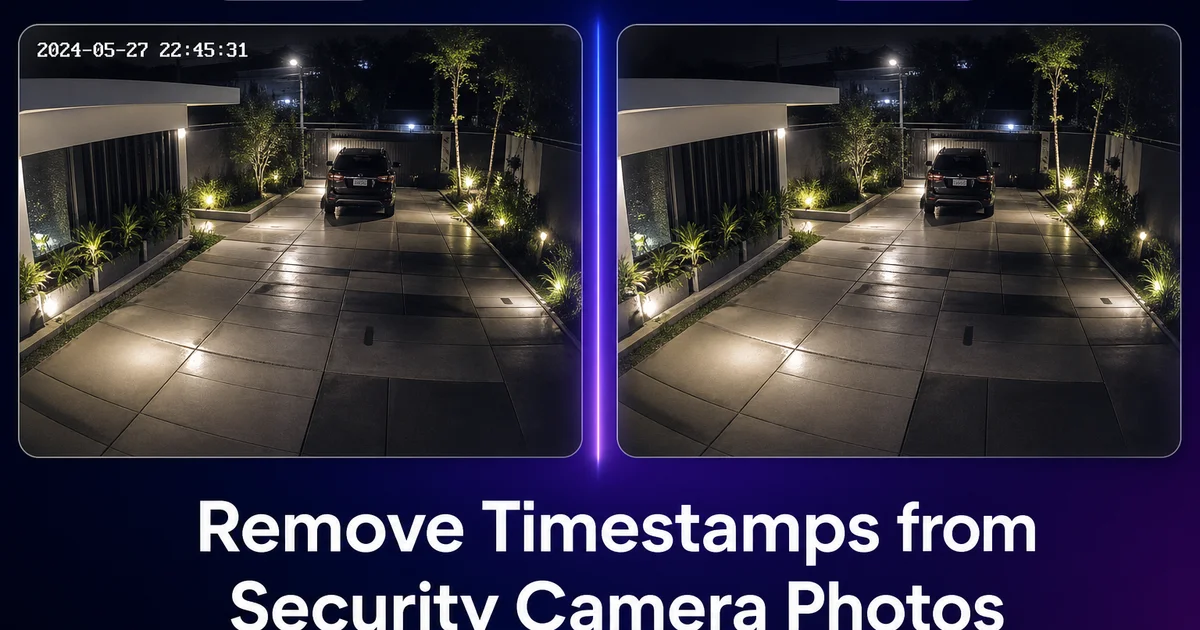
Câmeras de segurança, dashcams, câmeras corporais e campainhas com câmera incorporam sobreposições de texto diretamente na imagem. Carimbos de data/hora mostrando data e hora, números de identificação da câmera, resolução de gravação, marcas do fabricante e vários elementos de HUD como temperatura, nível de bateria ou status de detecção de movimento. Essas sobreposições têm um propósito importante para registros de segurança e evidências. Elas se tornam distrações indesejadas quando você precisa usar a imagem para outros propósitos: reclamações de seguro onde você quer que a foto pareça limpa, fotos de anúncios de imóveis capturadas de ângulos de câmera de segurança, postagens em redes sociais, exibições ou qualquer contexto onde a estética de câmera de segurança funciona contra você.
Remover essas sobreposições é mais desafiador do que remover um objeto típico de uma foto porque o texto está gravado diretamente nos dados dos pixels, sobre o conteúdo da cena subjacente. Diferente de um objeto físico que oculta o que está atrás dele, uma sobreposição de texto obscurece parcialmente o detalhe do fundo enquanto se mescla a ele através de transparência ou contraste. A ferramenta de remoção deve reconstruir como a cena se pareceria sob o texto. Continuando uma textura de parede, completando um galho de árvore ou estendendo um gradiente de sombra através da área onde o texto foi renderizado.
Ferramentas de edição AI-powered lidam com essa reconstrução com precisão notável. O Magic Eraser remove sobreposições de fundos uniformes em uma única passada. O AI Fill resolve fundos complexos gerando conteúdo de substituição contextualmente preciso que preserva o detalhe da cena subjacente. Combinado com o AI Enhance para melhorar a qualidade frequentemente de baixa resolução e alta compressão das imagens de segurança, essas ferramentas transformam fotos de câmeras de segurança de capturas de vigilância utilitárias em fotografias limpas e utilizáveis.
- O Magic Eraser remove texto de carimbo de data/hora, IDs de câmera e logotipos de fabricantes de fundos uniformes como céu, paredes e pavimento em uma única passada.
- O AI Fill reconstrói fundos complexos atrás de sobreposições — preservando texturas, bordas e padrões que a remoção simples desfocaria.
- Funciona em câmeras de segurança, dashcams, câmeras corporais, campainhas com câmera e qualquer dispositivo que grave sobreposições de texto na imagem.
- O AI Enhance melhora a qualidade de baixa resolução e comprimida das imagens de segurança após a remoção de sobreposições para resultados finais mais limpos.
- O fluxo de trabalho lida com todos os tipos comuns de sobreposição: carimbos de data/hora, datas, nomes de câmera, texto de resolução, logotipos de fabricantes e elementos de HUD.
Tipos de sobreposições encontradas em imagens de segurança e dashcam
Câmeras de segurança incorporam uma grande variedade de sobreposições de texto e gráficos dependendo do fabricante, modelo e configuração. A mais comum é o carimbo de data/hora. Uma string de data e hora frequentemente exibida em um dos cantos superiores ou inferiores, sempre atualizada conforme a gravação avança. Texto de identificação da câmera, como um nome atribuído durante a configuração ou um número de série, geralmente aparece no canto oposto. Muitas câmeras também exibem a resolução de gravação, taxa de quadros ou um logotipo do fabricante em algum lugar do quadro. Modelos avançados adicionam zonas de detecção de movimento, leituras de temperatura, indicadores de bateria ou intensidade de sinal e ícones de status de rede.
Dashcams adicionam seu próprio conjunto de sobreposições. Além de carimbos de data/hora e leituras de velocidade, muitos modelos de dashcam exibem coordenadas GPS, velocidade do veículo, dados de força G durante impactos e direção da bússola. Alguns modelos incorporam uma marca d'água do fabricante ou nome do modelo que aparece em todos os quadros. Essas sobreposições são frequentemente renderizadas em texto branco ou amarelo com um contorno escuro ou barra de fundo semitransparente para legibilidade. Isso significa que elas obscurecem parcialmente a cena atrás delas enquanto permanecem legíveis mesmo sobre fundos claros ou complexos.
Campainhas com câmera e câmeras domésticas inteligentes geralmente incluem mais sobreposições do que qualquer outro tipo de câmera de consumo. Ring, Nest, Arlo e plataformas similares podem incorporar um carimbo de data/hora, nome da câmera, indicador de zona de movimento, rótulo de detecção de pessoa, temperatura e um logotipo da marca — às vezes tudo ao mesmo tempo. Quando você captura uma foto desses sistemas, pode precisar remover cinco ou mais elementos de sobreposição separados de diferentes posições no quadro, cada um sobre um tipo diferente de conteúdo de fundo que requer sua própria abordagem de remoção.
- Câmeras de segurança: carimbos de data/hora, IDs de câmera, texto de resolução, logotipos de fabricantes, indicadores de detecção de movimento e leituras de temperatura.
- Dashcams: carimbos de data/hora, coordenadas GPS, leituras de velocidade, dados de força G, direção da bússola e marcas d'água do fabricante.
- Campainhas com câmera e câmeras domésticas inteligentes: carimbos de data/hora, nomes de câmera, rótulos de movimento, tags de detecção de pessoa, temperatura e logotipos de marca.
- Cada tipo de sobreposição pode exigir uma técnica de remoção diferente dependendo de sua posição e da complexidade do fundo abaixo dela.
Removendo sobreposições de fundos uniformes com o Magic Eraser
As remoções de sobreposição mais simples são aquelas em que o texto está sobre um fundo relativamente uniforme. Um céu limpo, uma parede pintada, pavimento de concreto, uma superfície de estrada asfáltica, um gramado ou qualquer área com cor e textura consistentes. Nesses casos, o Magic Eraser pode reconstruir a área uniforme atrás do texto com precisão quase perfeita porque os pixels ao redor fornecem informações inequívocas sobre como a área obscurecida deve se parecer. Céu é céu. Concreto é concreto. A ferramenta estende o padrão existente através da área do texto e o resultado é contínuo.
Para usar o Magic Eraser em uma sobreposição de fundo uniforme, selecione a área do texto com uma margem de alguns pixels de cada lado. Uma seleção apertada que mal cobre os caracteres do texto pode deixar vestígios visíveis do contorno ou sombra do texto. Uma seleção ligeiramente generosa dá ao AI mais espaço para mesclar a reconstrução na área ao redor. Para carimbos de data/hora em cantos, estenda sua seleção para incluir qualquer barra de fundo semitransparente ou sombra que a câmera renderiza atrás do texto para legibilidade. Esse elemento de fundo é tanto uma sobreposição quanto o próprio texto.
Processe cada elemento de sobreposição um por um em vez de tentar selecionar todas as sobreposições de uma vez. Se sua imagem tem um carimbo de data/hora no canto superior direito e um ID de câmera no canto inferior esquerdo, remova-os em duas operações separadas. Isso permite que o Magic Eraser foque sua reconstrução em uma área de cada vez, usando os pixels desobstruídos ao redor para máximo contexto. Tentar remover múltiplas sobreposições distantes em uma única passada força o AI a trabalhar com menos informação contextual por área. Pode reduzir a qualidade de cada reconstrução individual.
- Fundos uniformes — céu, paredes, pavimento, grama — produzem as remoções de sobreposição mais limpas porque os pixels ao redor definem claramente a área obscurecida.
- Selecione com alguns pixels de margem ao redor do texto para capturar qualquer contorno, sombra ou barra de fundo semitransparente atrás da sobreposição.
- Processe cada sobreposição individualmente em vez de selecionar múltiplas sobreposições distantes de uma vez para melhor qualidade de reconstrução.
- Sobreposições em cantos são tipicamente as mais fáceis porque cantos geralmente têm conteúdo uniforme como céu ou superfícies de parede.
Lidando com sobreposições em fundos complexos com o AI Fill
As remoções de sobreposição mais desafiadoras são aquelas em que o texto está sobre uma área complexa ou detalhada da cena. Um carimbo de data/hora sobre uma copa de árvore, um ID de câmera sobre um padrão de parede de tijolos, texto cruzando o limite entre duas superfícies diferentes ou uma sobreposição posicionada diretamente sobre uma pessoa, veículo ou outro assunto importante. Nesses casos, a remoção simples e o preenchimento de textura não conseguem reconstruir o detalhe subjacente porque o fundo atrás do texto contém informação visual significativa. Bordas, padrões, transições de cor e limites de objetos que precisam ser preservados ou recriados de forma plausível.
O AI Fill lida com esses fundos complexos analisando o contexto da cena muito além da área imediata da sobreposição. Ele identifica quais objetos e superfícies se estendem através da região do texto observando as porções não obscurecidas ao redor desses mesmos objetos. Um padrão de parede de tijolos continua com o espaçamento e alinhamento corretos das linhas de argamassa. Um galho de árvore se estende pela área do texto no ângulo e espessura corretos. Um painel de carroceria de veículo continua com a cor, reflexo e curvatura certos. A reconstrução é guiada pelo contexto completo da cena, não apenas pelos pixels imediatamente adjacentes.
Para sobreposições que cruzam limites entre diferentes superfícies. Um carimbo de data/hora que está metade sobre o céu e metade sobre uma linha de telhado, ou texto que abrange uma transição de parede para pavimento — o AI Fill lida com a transição naturalmente porque entende o limite geométrico entre as superfícies. Ele continua cada superfície através de sua porção da área de sobreposição e mantém a linha de limite. Isso é muito mais sofisticado do que as abordagens tradicionais de clone stamp ou content-aware fill, que frequentemente borram o limite ou estendem uma superfície para o território da outra.
- O AI Fill reconstrói detalhes complexos de fundo — padrões de tijolos, texturas de folhagem, bordas de objetos — que a remoção simples desfocaria ou destruiria.
- O algoritmo analisa o contexto completo da cena, não apenas pixels adjacentes, para determinar o que deve existir atrás da sobreposição.
- Lida com sobreposições que cruzam limites de superfície mantendo a borda geométrica entre diferentes materiais e superfícies.
- Produz resultados mais limpos do que o clone stamp tradicional ou content-aware fill em fundos detalhados com múltiplas superfícies.
Melhorando a qualidade da imagem de câmeras de segurança após a remoção de sobreposições
As imagens de câmeras de segurança têm limitações de qualidade inerentes que a remoção de sobreposições por si só não resolve. A maioria das câmeras de segurança grava em resolução relativamente baixa. 720p ou 1080p para modelos de consumo, com compressão intensa aplicada para reduzir as necessidades de armazenamento. O resultado é uma imagem com artefatos de compressão visíveis (áreas quadriculadas, bandeamento de cor, perda de detalhes finos), faixa dinâmica limitada (áreas claras estouradas enquanto sombras são completamente pretas) e frequentemente um cast de cor do filtro infravermelho da câmera ou processamento de wide-dynamic-range. Após remover as sobreposições, esses problemas de qualidade se tornam mais perceptíveis porque as sobreposições antes desviavam a atenção do visualizador da qualidade da imagem em si.
O AI Enhance resolve cada um desses problemas de qualidade. Ele reduz artefatos de compressão suavizando as áreas quadriculadas enquanto mantém bordas e detalhes legítimos. Ele recupera detalhes de sombra para que você possa ver o que está acontecendo em áreas subexpostas da cena. Ele corrige o cast de cor que muitas câmeras de segurança introduzem. O tom esverdeado de certos sensores CMOS, o cast azul-acinzentado do modo de visão noturna capturado durante o dia ou a aparência desbotada do processamento excessivamente agressivo de wide-dynamic-range. O resultado é uma imagem que parece muito mais próxima do que a cena pareceria ao olho humano no mesmo local.
Para filmagens de visão noturna, que geralmente são capturadas em infravermelho e exibidas em escala de cinza, o AI Enhance pode melhorar o contraste e o detalhe, mas não pode adicionar cor que nunca foi capturada. No entanto, ele pode reduzir o ruído intenso que caracteriza imagens infravermelhas, nitidez de bordas que o modo noturno de baixa sensibilidade suaviza. Melhora a faixa tonal para que a imagem em escala de cinza tenha detalhes visíveis tanto no primeiro plano claro iluminado por infravermelho quanto no fundo mais escuro. A melhoria torna a imagem substancialmente mais útil para fins de observação e registros, mesmo que permaneça monocromática.
- O AI Enhance reduz artefatos de compressão, recupera detalhes de sombra e corrige casts de cor comuns em imagens de câmeras de segurança.
- Resolve as limitações de qualidade inerentes de imagens de vigilância comprimidas em 720p e 1080p após a remoção de sobreposições.
- Filmagens de visão noturna se beneficiam de redução de ruído e melhoria de contraste, embora a cor não possa ser adicionada a capturas infravermelhas.
- Imagens pós-melhoria parecem mais próximas da percepção do olho humano da cena, em vez da estética típica desbotada de câmera de segurança.
Quando preservar sobreposições e considerações éticas
Embora este guia se concentre na remoção de sobreposições, é importante entender quando a remoção de sobreposições é inadequada ou possivelmente problemática. Carimbos de data/hora de câmeras de segurança têm um propósito probatório — eles estabelecem quando um evento ocorreu. Se uma imagem pode ser usada como evidência em um processo judicial, reclamação de seguro ou investigação policial, remover o carimbo de data/hora destrói metadados críticos que estabelecem a linha do tempo dos eventos. Nesses contextos, mantenha a imagem original não editada com todas as sobreposições intactas e crie versões editadas apenas para propósitos secundários, não probatórios.
Para reclamações de seguro especificamente, muitos avaliadores e investigadores esperam ver o carimbo de data/hora e a identificação da câmera na imagem como autenticação de que a foto vem de um sistema de vigilância legítimo, em vez de uma câmera pessoal. Uma foto de seguro sem essas marcas pode na verdade levantar mais perguntas do que uma com elas. Se você precisar enviar imagens de vigilância para uma reclamação de seguro, envie os originais com sobreposições e forneça versões editadas separadamente apenas se solicitado especificamente para fins de exibição ou relatório.
O uso ético da remoção de sobreposições significa ser transparente sobre a origem das imagens. Remover um carimbo de data/hora de uma câmera de segurança para fazer a imagem parecer uma fotografia convencional. Por exemplo, usar uma captura de campainha com câmera como imagem principal de um anúncio de imóvel sem divulgar a fonte — é enganoso. A edição é o mesmo processo técnico independentemente da intenção. O uso correto é melhorar a qualidade da imagem para fins secundários legítimos, mantendo os originais para qualquer contexto onde proveniência e momento importam. Sempre mantenha os originais não editados com sobreposições como seu registro principal.
- Nunca remova sobreposições de imagens que possam servir como evidência legal — carimbos de data/hora estabelecem informações críticas de linha do tempo.
- Avaliadores de seguro frequentemente esperam ver sobreposições de câmera como autenticação de que a imagem vem de um sistema de vigilância legítimo.
- Sempre preserve os originais não editados com sobreposições intactas como seu registro principal, independentemente das versões editadas que você criar.
- A remoção de sobreposições é para melhorar a qualidade da imagem para usos secundários — não para deturpar a fonte ou proveniência da imagem.
How to do it
- 1
Identify all overlay elements in the security camera image
Before editing, examine the full image to locate every overlay element. Timestamp, date, camera name or number, recording resolution text, manufacturer logo, motion detection indicators, and any HUD elements like temperature or battery status. Security cameras and dashcams often embed multiple overlays in different corners and edges of the frame. List each overlay and its position so you can address them systematically rather than discovering extra ones after you think the edit is complete.
- 2
Use Magic Eraser to remove simple text overlays from uniform backgrounds
When a timestamp sits over a fairly uniform area. A patch of sky, a wall, pavement, or grass — Magic Eraser removes it cleanly in a single pass. Select the text overlay and Magic Eraser replaces it with content that matches the surrounding area. This works best when the background behind the text has a consistent color and texture. For timestamps over sky, concrete, asphalt, or painted walls, the removal is often seamless and undetectable.
- 3
Use AI Fill for overlays on complex or detailed backgrounds
When a timestamp or camera text sits over a complex area. A person's face, a vehicle license plate area, textured foliage, a patterned floor, or a transition between two different surfaces — AI Fill produces better results than simple erasure. AI Fill analyzes the surrounding context and generates replacement content that preserves the underlying detail, texture, and pattern continuity. Select the overlay area and AI Fill reconstructs what the scene would look like without the text, maintaining edges, gradients. Object boundaries that simple inpainting might blur.
- 4
Enhance the overall image quality after overlay removal
Security camera and dashcam images are often low resolution with heavy compression artifacts, noise, and limited dynamic range. After removing the overlays, run the entire image through AI Enhance to improve sharpness, reduce compression artifacts, correct the color cast from infrared-filtered night vision or wide-dynamic-range processing. Lift detail from underexposed shadow areas. This step transforms the image from an obvious security camera still into a cleaner, more usable photograph.
- 5
Inspect the edited areas at full zoom for artifacts
After all edits, zoom to one hundred percent on every area where an overlay was removed. Look for telltale signs of editing. Texture discontinuities where the fill does not perfectly match the surrounding area, color shifts at the boundary between original and generated content, or subtle repeated patterns from texture synthesis. If you find artifacts, apply a second targeted pass with Magic Eraser or AI Fill on the specific artifact area. For critical uses, compare the edited region to similar adjacent areas to confirm the visual consistency is convincing.
Fontes
- Understanding Video Surveillance Image Quality Standards — IPVM
- Digital Image Forensics and Metadata Preservation — Forensic Magazine